Polyfilla is the one must-have product that painters carry around or invest in whenever they have a paint job. Polyfilla is a multipurpose product used to deal with small to medium imperfections. It can be applied to drywalls, brick, wood, and masonry. Polyfilla seals nail holes and hammer dints imperfections. If you have rough wood grain, chipped concrete block, or cracked paint, Polyfilla is the remedy you need.
Even though Polyfilla is touted as the remedy for all the small imperfections you might have while building or painting, it is not a solve-it-all solution. Polyfilla, when properly applied, is guaranteed to give exceptional results, but you can regret using it if you don’t adhere to the basic procedures and norms of using it.
Today, we take a look at the problems that one is likely to encounter when applying paint over Polyfilla. As stated above, Polyfilla is applied on surfaces to hide or seal some imperfections. Painting over Polyfilla means the imperfections are sealed off and will no longer be visible. We will look at what exactly causes these problems. We will take a step further and explain how to solve and avoid the said problems.
What is Polyfilla, and how does it work?
Polyfilla is used interchangeably with spackling paste. The spackling paste is a putty used to fill holes and cracks found in wood, plaster, or drywall. It is made using glue and gypsum plaster which is derived from hydrated calcium sulfate. On the other hand, Polyfilla, which is a term used in the UK, South Africa, Australia, and other places, is cellulose-based, unlike the spackling paste. According to the manufacturers of Polyfilla, it does not crack or shrink.
Using Polyfilla is quite easy. Everyone can apply it with ease. When you carefully follow instructions, even a novice will achieve excellent results. Here are the simple steps you should follow;
- Start by brushing the hole or the crack. You don’t want any dirt or debris while applying the Polyfilla.
- Mix two parts of Polyfilla with one part of water. You can buy a premixed Polyfilla, which is good for small cracks and nail holes. Powder Polyfilla, on the other hand, is ideal when dealing with large cracks. Mix the powder and the water until you get a smooth paste.
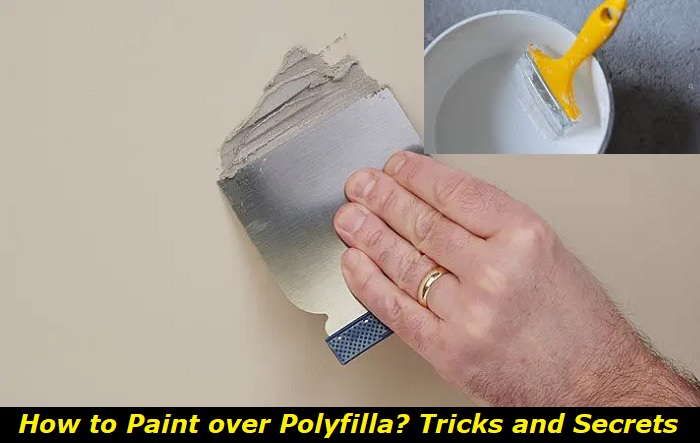
- Using a putty knife, fill in the hole or the crack. Smoothing out the Polyfilla is best done with a wet knife. You should start from the center of where you applied the filler and slide it toward the outside. Starting from the edges towards the center of the patch will pull the Polyfilla from the hole’s edge.
- Leave the Polyfilla to dry for about 12 hours.
- Sand the surface to remove any excess Polyfilla and also to give the patch a smooth feel, the same as that of the rest of the surface. You can then move on to the next phase of painting.
What are the main problems painting over Polyfilla, and what causes them?
There are so many things that can go wrong when you are painting. Of course, skip the obvious issues like scratching your nose with a drenched colored finger or dropping a gallon of paint from the scaffold. Let us assume you have taken the necessary precautions.
When you paint over Polyfilla, you can encounter problems either while applying the paint or after the job is done. Though frustrating, some of these problems can easily be resolved, while others will cost you time and money. Here are some of the problems you may encounter and how to solve them;
1) Filler lines showing through paint coat
Some painters have had a tough time making the Polyfilla lines go away. These lines are similar to cutting lines, and after a coat of paint, the lines show and won’t go away even with a subsequent layer of paint.
Solution
Different brands of Polyfilla have slightly different ingredients; hence the final results tend to vary from one Polyfilla to the next. Another thing to note is that walls have varying absorption capabilities depending on the mortar or wood underneath. This means the paint can change depending on the Polyfilla underneath.
If you have already painted the first coat, you may get some relief by painting a second coat. You can end up painting a third or even a fourth coat before the Polyfilla lines disappear completely. Where the problem is on one wall and not all, you should try feathering out the paint with every coat of paint.
2) Polyfilla showing through paint and having patches
This is a common problem where the surface you are painting has varying absorption rates. In other instances, the Polyfilla brush lines may show through the paint. The Polyfilla might remain stubborn even after painting several coats of paint.
Solution
Patchy walls after using Polyfilla can easily be handled by thinning down the first coat of your paint. This is applicable if you are using emulsion paint. Failure to thin down the first coat leads to moisture in the paint getting absorbed by the surface. Remember, the filler is likely to be more porous than the surface. This issue leads to the paint drying out quickly and leaving a halo effect. The edges of the filler can be seen.
The application of primer before and after Polyfilla is something that many experts agree to disagree on. Primer is basically categorized into three; shellac, latex, or oil-based. For those who strongly believe in primer’s effectiveness, it provides a smooth surface where the paint can be applied. Primer is also touted as the layer that helps the paint cover the wall better and even improves the longevity and durability of the paint.
Before applying the primer or sealer, it is advisable that you sand the wall or surface with 120-grit glass paper. Make sure you rub the whole wall to avoid any issues when painting. Once you have applied the filler, let the wall dry completely before applying the paint.
3) Flaking or blistering
This is a rather common problem for painters, especially new DIYers. The problem can arise if the surface is moist, applying paint on unclean surfaces or on powdery surfaces. Some painters have reported experiencing flaking of the paint.
Solution
For a smooth surface after applying the Polyfilla, many painters will sand the wall to remove any imperfections. Sanding causes the surface to be powdery and chalky such that when you pass your hand over the surface, it will turn whitish. You should remove all the dust arising from sanding. Use a clean, dry cloth for this.
4) Shriveling surface
Shriveling or wrinkling of the paint is a problem most seen on horizontal surfaces. This is when wrinkles are seen on a painted surface.
Solution
This problem arises when you apply paint over Polyfilla that has yet to fully dry. The problem is even more pronounced when you apply a thin coat of paint. The answer to this problem lies in good painting practice. You should adhere to the laid-out instructions found on the Polyfilla container. Let the filler dry for at least 12 hours.
5) Mold
Many people have experienced mold problems on their home or office walls. This problem is caused by something other than one painting over Polyfilla. However, if you suspect you have a mold problem, wash the surface with a fungicidal wash and rinse it. Once the surface is well dried, follow the appropriate procedure of applying Polyfilla and paint to get the best long-lasting results.
6) Cissing
This is when paint fails to adhere to the underlying surface. When you paint over a contaminated surface, the paint will, over time, peel, or you might end up seeing patches beneath the top coat. Contaminants include oil, dirt, wax, or polish. Oily smudges block the paint from merging properly with the underlying Polyfilla. Where the surface is contaminated, you will be able to see Polyfilla.
Solution
The solution to the above problem is to remove all the impurities that might cause the paint to agree with the surface. The trick is to allow the Polyfilla to dry. You should then rub the surface using wet and dry abrasive paper. Use warm water and detergent, which removes any oily patches on the surface. Rinse the surface and let it dry before applying the paint of your choice. It is advisable to follow this step if there is traffic along the surface. Even someone gliding their palm on the surface can leave an oily patch that might not be visible to the painter.
Conclusion
Using Polyfilla correctly guarantees excellent results once you apply a coat of paint on top. At times, the paint you use may fail to merge well with the coat of Polyfilla. Rarely does this happen, but in the instances that it does happen, it is good to know the possible causes. In this article, we have explored why your paint over Polyfilla may encounter problems. In your next painting project, you will have an easy time when you take note of the above possible Polyfilla problems.
- Can You Unmix Paint: Techniques, Consequences, Alternatives - February 23, 2024
- Does Primer Need to be Mixed? Effective Primer Application - February 22, 2024
- How to Make Old Paint Usable Again: Retrieving and Preserving Paint - February 21, 2024


