If you haven’t used DAP Plastic Wood filler before or worked with wood fillers in general, then you may be interested in understanding its drying time, and factors affecting it. Importantly, you would also be interested to know the best ways to apply filler properly and avoid the issues that may arise due to poor workmanship.
Therefore, in this post, we’ll discuss in detail everything about DAP Plastic Wood, its features and benefits of using it, drying patterns, and ways to apply it properly.
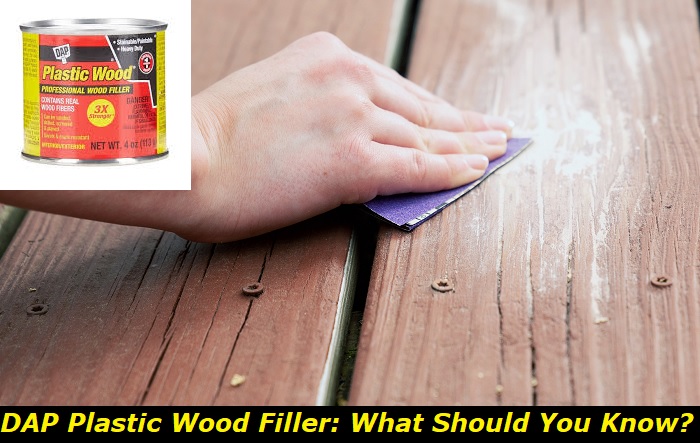
What is DAP Plastic Wood?
DAP Plastic Wood filler is a fast-drying product designed for wood repair works. It tries fully within 2 to 6 hours from the time of application.
The product is made with sawdust or wood fibers and blends well with wood surfaces when it dries, especially on unfinished wood.
Mainly, the plastic filler is formulated to repair cracks, holes, and other wood surface defects to create a surface that looks similar to real wood. It is ideal for small wood repair projects such as covering scratches, cracks, or nail holes.
The DAP wood filler can be used on all kinds of wood and furniture including cabinets, doors, windows, and moldings among others.
Notably, in case the filler color does not match the color finish of the wood, you can always go ahead and stain it to your preferred shade.
DAP Plastic Wood Filler Drying Time
For many DIY enthusiasts and beginners, dry time is a crucial aspect for them to consider when choosing wood filler. A fast-drying wood filler is preferable for small-scale and urgent repair works. The fillers enable you to begin using the item almost immediately after application without any issues.
Therefore, knowing how soon the filler will be dry and ready to use, will help you determine whether it is the suitable filler for that particular repair project or whether you should choose an alternative one.
So, what is the drying time for DAP Plastic Wood filler? DAP Plastic wood filler is a fast-drying repair product that takes 2 to 6 hours to dry. Notably, the filler has a stiff putty consistency and is a little bit tacky, but it’s ready to receive a subsequent layer after 15 minutes of repairing deep holes. While most fillers take approximately one hour to dry, DAP plastic wood dries faster, and within minutes the surface is ready for recoating.
Although the fast drying characteristic makes the filler difficult to work with especially when it’s your first time doing a DIY repair work, by following the manufacturer’s instructions, and application guides, you can still enjoy the application process and get the desired results.
Notably, the drying time may vary depending on temperature and humidity levels.
Therefore, if after application you are unsure if the surface has dried, you can touch or try sanding the surface to confirm. Usually, if the filler clogs the sandpaper it means it’s not fully dry and you should wait to allow it to fully dry.
Factors Affecting DAP Plastic Wood Drying Time
Under ideal circumstances, the drying time for DAP Plastic Wood filler is between 2 to 6 hours. However, this is not always the case. Sometimes the wood filler may take more time to dry fully. This is because there are many factors that affect the filler’s drying time. Some of the common factors affecting the wood filler’s drying time include;
- The depth of the holes being repaired. If you are applying the filler in holes deeper than ¼”, then the drying time will be higher than the recommended 6 hours. You may be required to wait for up to 36 hours before you proceed with other steps in the filler application process including sanding.
- Low temperature or high humidity. Usually, the level of temperature and humidity affect the drying of the filler. If you are using the filler in a low-temperature or high-humidity area, then it may take a longer time for the filler to dry fully and become ready for sanding. Therefore, you can ensure the filler dries faster by applying it in a warm, dry, and well-ventilated area.
Benefits of using DAP Plastic Wood
When applied properly following the right procedures, the following are the benefits you will get.
- Fast drying. The filler’s fast drying characteristic is one of the reasons it’s the most preferred product for fast repair projects.
- Easy to use. The filler is easy to use. You don’t need specialized tools to apply it and you can apply it even when you are a beginner.
- High performance. DAP wood filler is a heavy-duty filler that dries to 3x stronger material than natural wood.
- You can sand, cut, screw, or paint as you would natural wood. Unlike wood putty, DAP plastic wood filler is sandable. The wood filler hardens fully to create a sandable surface that is similar to natural wood.
- Stainable. DAP plastic wood filler is stainable. Therefore, you shouldn’t worry when the color of the filler doesn’t match that of your wood. You can stain it.
- It’s crack resistant. After application and hardening, the filler won’t crack or split.
- Easy to mold and sculpt. The filler is a thick knife-grade product that is easy to mold and sculpt to your desired shape. It is suitable for use in corners and vertical repair surfaces.
- It’s water-resistant. The wood filler is water-resistant. However, it’s not waterproof hence it’s more susceptible to moisture.
- Can be used on both finished and unfinished wood surfaces. The DAP wood filler is suitable for use on wood.
- The wood filler is durable. DAP plastic wood dries to 3x stronger and it’s durable.
Ways to Use and Apply DAP Plastic Properly
Prior to applying the DAP plastic wood, you need to ensure you have all the materials you need for the exercise. The following are the essential materials you need.
- DAP Plastic Wood
- Putty Knife
- Medium grit sandpaper
- A container with water and a rag
- Gloves
- Stain
After getting the materials you need, the following are the proper steps you should follow.
1) Prepare the surface
For best adhesion, you must ensure the surface is clean and dry. Therefore, prepare the surface by removing all the dirt, dust, and grease. If necessary sand the surface, then use a damp piece of cloth to clean the dust.
2) Apply in a Warm Dry Environment
For the filler to dry within the specified time after application you must ensure the temperature of the wood surface, the wood filler, and the air is not below 40F. Also, use the filler in a well-ventilated less humid area.
3) Test the Wood Filler Before Applying
If you want to stain the surface after repair, then you should test the wood filler with the stain you would like to use.
4) Stit the Filler or Knead the Tube
Before application, stir the filler properly using a putty knife. Alternatively, if the filler is in a tube, knead the tube.
5) Apply the Filler
Apply the filler generously and spread it to fill the cracks or the hole. Depending on the depth of the hole, ensure to press the filler in. Importantly, ensure you apply slightly more filler to allow for sanding.
Also, if you are applying over a large area, then you may need to stir the filler from time to time to ensure the filler retains a uniform consistency.
6) Allow it to Dry
Since the filler is fast drying you don’t have to worry much about the drying time. You only need to be a little bit patient after application to let it dry. Usually, the filler will harden within 15 minutes and you can apply a subsequent layer if you are repairing a deep hole after. Then, after 2 to 6 hours the repaired surface is ready for sanding, and staining if necessary.
7) Sand
Wait for 2 to 6 hours before sanding for shallow fills. For deeper fills of ¼” and above, wait for 36 hours, then sand to smoothen out the surface.
8) Stain (optional)
If the filler does not match the wood’s color, you can stain it after sanding. To stain it, follow the manufacturer’s instructions. Paint immediately after sanding using latex-based paint. If you are using oil-based paint, then you should wait for 12 hours after sanding.
9) Apply wood finish
If you have applied the filler on unfinished wood, then you can apply a high-quality finish for a seal and protect the wood for durability.
10) Clean up
Clean the tools you have used and the surrounding area. Remove the filler residue using mineral spirits.
11) Reseal the Container
After application, reseal the container tightly, and store it in a cool and dry place upside down.
Conclusion
DAD Plastic Wood filler, when you use it properly, based on the manufacturer’s instructions and the above guidelines, you will definitely get the best results.
Therefore, if you are a woodworker or a DIY enthusiast, then DAP Plastic Wood Filler should be your preferred choice of filler for all your quick wood repair works. The filler has a fast drying property hence suitable for minor repair projects. So you can try it out.
- Can You Unmix Paint: Techniques, Consequences, Alternatives - February 23, 2024
- Does Primer Need to be Mixed? Effective Primer Application - February 22, 2024
- How to Make Old Paint Usable Again: Retrieving and Preserving Paint - February 21, 2024


