A textured finish offers a simple way of creating a unique look for your space. That is because it adds dimension and depth to otherwise flat surfaces, and it is perfect for creating various faux finishes or covering up imperfections. There are multiple ways to create textured finishes, including the one discussed below that involves mixing primer with texture.
The texture coat applied to ceilings and walls creates small shadows because of the various depressions and bumps on the surface. These shadows can camouflage the wall and help to hide surface imperfections. If your wall or ceiling has visible bulges, seams, and other marks, adding wall texture can fix it. That is why ceilings are commonly texturized to ensure they can cover most imperfections.
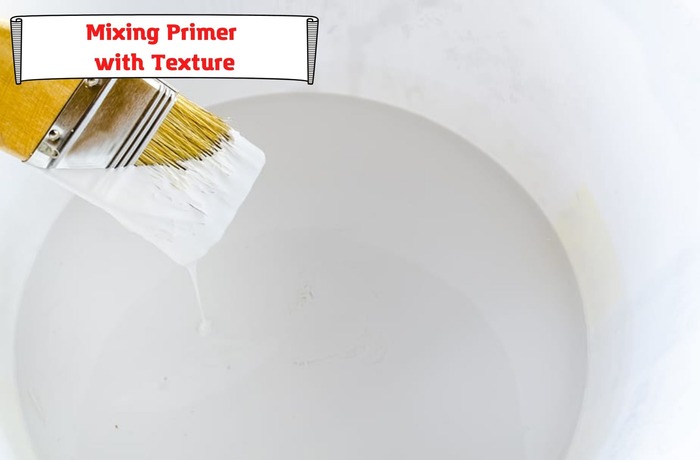
Why mix primer with texture?
Primer is primarily used as the preparatory coating on a surface to provide better paint adhesion, add extra protection, and improve paint durability. Traditionally, the best way to apply texture is to mix it with water and then brush or spray it onto the wall after applying primer. However, you can still get excellent results by starting with a primer and texture mixture.
The main reason for mixing primer with texture is to reduce the number of coats required for a particular surface, particularly demanding areas like ceilings. Nevertheless, the site must be primed once again before painting. The extra primer coat ensures that the textured finish is evenly applied and produces a better visual result.
Mistakes when mixing primer with texture
There are several mistakes that people make while mixing primer with texture.
Lumping of mixture
A common mistake when you mix primer with texture is that the resultant solution becomes lumpy and hard to use. It is essential to get the right consistency for your mixture as it will make the application process more straightforward, particularly for brush or roll applications.
To avoid lumping up the mixture, start preparing your primer by adding water. Once the primer is ready, you can gradually add the texture and ensure you mix thoroughly. Ensure you are using the right mixing equipment for the best results. You can add more water to get rid of the lumps and maintain the ideal consistency for application.
Mixing too light
The main benefit of textured finishes is that you have complete control over the final result since you get to choose what to add to your primer to establish the texture. Whether you add sand, joint compound, or other texture additives, you can decide how much and what texture to add. However, a common error here is that the primer and texture mixture is too light or thin.
The reason your mixture gets too thin generally is that you’re using cool or cold water. An easy solution for this is to place the desired texture in the water and soak it for around two hours prior to adding it into the primer. In addition, most texture materials will not work well when mixed under less than 60 degrees Fahrenheit.
Spraying issues
While spraying on texture can be convenient and quick, it can also get quite messy. So, take caution, especially when working in finished rooms. That means covering the floors, sockets, light fixtures and removing all the furniture before spraying. Also, ensure you verify the drywall thickness and joist spacing as the moisture and texture weight may sometimes cause the panels to start sagging.
One way to avoid mistakes during texturing is to adhere to the manufacturer’s appropriate air pressure and spray tips. Also, ensure you leave enough space between the sprayer and the surface. That way, you can avoid making your application bounce off and failing to adhere adequately.
Lack of sufficient coverage
The other mistake associated with spraying on primer with texture is insufficient coverage. The solution is to add more water to ensure the texture material and primer are at optimal viscosity limits. That will allow for even application across the drywall.
The movement of the sprayer also has a significant effect on your final result, and thus it is best to avoid the mistake of either moving it too slowly or too quickly. It would be best to determine the ideal speed for your specific spray-on textured finish. Afterward, maintain that consistent application speed throughout the project, avoiding overloading specific areas and covering the entire surface uniformly.
Joint or surface darkening
The issue of surface or joint darkening typically occurs when you apply the primer and texture solution over damp drywall compounds, particularly in humid or cold conditions. Hence, before you begin texturing, ensure the surface is prepared with a coat of flat latex or prime. Also, you can bring heaters into the room or wait until you get the ideal temperature for texturing.
Using the wrong primer
Various surfaces like wood, drywall, plaster, MDF, masonry, and concrete will require a unique primer and texture application. For example, the oil-derived primer mainly used for walls should never be used on textured surfaces or fresh drywall.
When choosing a primer for your textured finishes, the ideal option is to use water-based products since they offer both an even tone and balanced coverage. Using the wrong choice can result in that unattractive orange peel look that often means poor coverage.
Texture accumulation
There can be a buildup of texture over a joint if the surface is not dry or primed adequately before application. In addition, over diluting the texture material can also result in texture accumulation over the joints. The key to avoiding this error is to use the specified quantity of water every time you mix the texture material into the primer.
Drywall flashing
Drywall is notorious for soaking up lots of paint. Hence, if you mistake failing to prepare the surface before applying the primer and texture mix, you can encounter issues like where the background color flashes through. An easy solution is to use a tinted primer before adding the texture, as it will help to neutralize the underlying paint you are covering.
Avoiding the necessary preparation work
The other common mistake people make when mixing primer with texture is failing to do the necessary surface preparation tasks. Performing the essential repair tasks before texturing is critical as they help make the entire process much more manageable while guaranteeing a more even coat. The repairs are even more vital when working on damaged surfaces or walls that may have been affected by kids, animals, or water damage.
Fill holes and imperfections by appropriately applying spackle or putty depending on the specific defect and then allow enough time for drying. If the gap is too big, consider scrapping the area off to ensure proper primer and texture adhesion afterward. You can use sandpaper here if necessary.
Mixing primer and paint
Some people think that if it is okay to mix primer and texture, it might also be good to mix primer and paint. However, doing that will be a colossal mistake that will produce useless paint and ruined primer. Here are the results that you get:
- Old colors and stains will show through the paint
- There will be poor adhesiveness between the surface and the paint
- The texture may also be uneven, with numerous drywall patches
- The final product won’t be durable
- The painted surface will also get dirty easily
These are the reasons no primer or paint manufacturer recommends mixing primer and paint. Instead, use a system where you apply the primer and texture mix first, followed by another primer layer and then the topcoat. This process will ensure the most long-lasting and appealing texturing and paint job.
Precautions when mixing primer with texture

The general room temperature and drywall should be kept at 55°F or 13°C before applying the primer and texture mix. Continuous ventilation is essential to ensure proper drying. If using temporary heaters, take care to avoid high humidity and overheating.
All surfaces you plan to texture must first be primed before application to guarantee uniform texture and porosity. The first primer layer must be entirely dry before applying the following primer with texture mix. Additionally, confirm that the surfaces are thoroughly clean and dry and do not contain contaminants like oils and dirt.
Conclusion
Mixing primer with texture offers a fast and convenient way to prepare your walls for painting. However, remember that you will still need to add extra primer before applying the final coats of paint to guarantee excellent results. That is because the primary purpose of primers is to help in sealing the substrate for better paint adhesion.
The information above should help you avoid making mistakes when installing textured finishes, allowing you to experience the numerous benefits of this finish. In addition, avoiding the errors shown above will allow you to save money from future repairs. Ensuring proper preparation before mixing primer and texture will significantly reduce these mistakes.
- Shellac Over Mineral Oil – Possible? We’ve Conducted Experiments - January 29, 2022
- Mixing Primer with Texture. And Some Mistakes You Might Make - January 28, 2022
- Acrylic Enamel Reducer Substitute. Safe Testing And Proper Application - January 22, 2022


