You’ve got a new home or improvement project and want to get your wood treated and all protected. The problem is that you don’t know much about woodwork. What should you do?
You might consider hiring a professional to spruce up your house. But if you’re starting, you might wonder whether you’ll ever be able to match their skills. Woodwork isn’t always straightforward. Several things may go wrong, including selecting the right finish to apply. In addition, you are considering using wipe-on poly but have heard about problems that could arise.
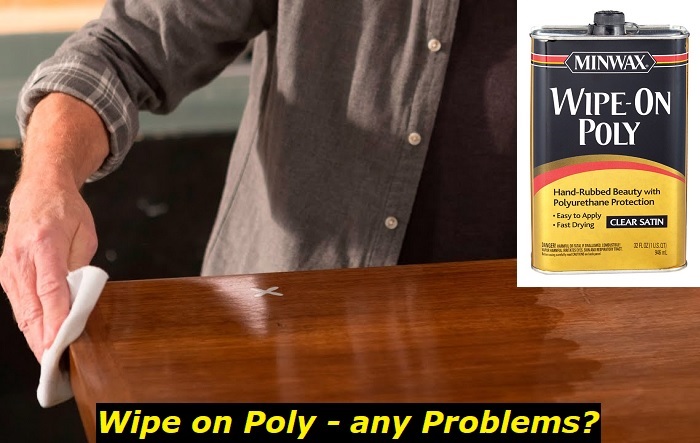
A lovely and polished-looking piece of furniture is produced with an excellent hand-rubbed finish. For a variety of reasons, brushing on poly isn’t always practical.
Or perhaps you haven’t mastered that skill yet. In any case, it might be advisable to discover how to use wipe-on poly. This guide will give you some pointers on how to apply wipe-on poly seamlessly and become a professional.
What is Wipe-on Poly?
The best of both worlds of finishing are combined in wipe-on (also known as oil-based) polyurethane, which combines the excellent durability and protection of polyurethane with the straightforward wipe-on application of an oil finish.
You don’t have to be concerned about drips or brush marks like water-based polyurethanes. A piece with this finish is great for your home because it can withstand heavy use. Here’s how I finish my woodworking projects by wiping on poly.
What could go wrong with Wipe-on Poly?
If you’re planning on using a wipe-on polyurethane, it’s important to be aware of the potential risks involved. The most serious risk is that the polyurethane may not cure properly if not applied evenly. This can lead to a sticky surface that attracts dirt and dust or an uneven finish that looks blotchy and unfinished.
In addition, a wipe-on polyurethane is more likely to produce bubbles than other types of finishes, so it’s important to apply it carefully to avoid ruining your project. However, as long as you’re aware of the risks and take care in your application, wipe-on polyurethane can produce a beautiful, durable finish.
Common Polyurethane Problems
Polyurethane is a versatile material used for various applications, from furniture to countertops. However, it’s not without its problems. Here are some of the most common polyurethane problems and how to solve them.
- Yellowing:Yellowing is caused by exposure to light and heat. To prevent yellowing, keep polyurethane finishes out of direct sunlight and away from heat sources. If your finish is already yellowed, you can try restoring it with a whitening agent designed for polyurethane.
- Bubbling:Bubbling occurs when air bubbles become trapped in the finish. To prevent bubbling, apply the finish in thin, even coats. If you get bubbles, you can try popping them with a needle and then smoothing the finish with fine-grit sandpaper.
- Cracking:Cracking occurs when the finish dries too quickly or is applied too thickly. Work in a well-ventilated area to prevent cracking and apply thin, even coats. If your finish cracks, you can try repairing it with a clear epoxy resin designed for use with polyurethane.
With proper care and maintenance, your polyurethane finishes should last for years. If you run into problems, don’t despair – solutions are usually available.
Best Way to Apply Wipe-on Poly
Applying a wipe-on poly finish is a great way to get a smooth, professional-looking finish on your woodworking projects. And although it could appear like a challenging endeavor, it’s quite simple – once you know a few tips and tricks. Here’s what you need to know to get the best results:
- Clear gloss wipe-on poly
- Satin finish wipe-on poly
- White, lint-free cotton rags
- Nitrile Gloves
- Plastic bowl
- Flat sanding block (scrap piece of hardwood)
- Wet/dry sandpaper
Wipe-on Poly — Preparation.
The workspace needs to be prepared first. Please ensure the furniture and the area around it are dust-free. As you apply your finish, avoid stirring up any dust. To accomplish this, blow off the dust from the furniture’s components using compressed air.
You should also clean off the workbench where you’ll be applying the finish to little pieces with air, and the poly should be prepared before each usage.
After an hour, wait for the dust to settle before blowing everything off again. After that, sweep the floor to lessen the possibility of kicking up dust as you’re moving throughout the store. The furniture should be assembled and prepared for finishing in the desired locations.
You should ensure there aren’t any tools laying around that could get in the way and that there is plenty of space to move anything around without obstruction.
Step by Step Guide on How to Apply Wipe-on Poly
- Step one:Put it in a plastic container. For wipe-on, a container of margarine or cottage cheese works perfectly. Swipe-on after dipping your cloth into the finish and squeezing off any excess. The poly will stay fresh for a few days with the lid on. Don’t use plastic for long-term storage since the solvent will start to break down the plastic after a few days.
- Step two:First brush, then wipe. Brush-on poly, wipe-on, or a combination of the two are best for protecting doors and other surfaces. Oil-based or water-based finishes should be used to ensure they bond. Sand the brushed-on finish smooth and apply at least two wipe-on coats for a consistent sheen.
- Step three: Swiftly cover a wide region with the coats. Compared to cloth, a paint pad holds more finish and applies more quickly. A paint pad can also be used again. Simply keep it in a sealed plastic container or plastic bag after each application. Applying an even finish to the entire piece should be your goal; doing so is quite simple. Avoid flooding the surface, and don’t leave any extra material there. This coat will need three to four hours to dry.
- Step four: Apply a second coat after sanding. Check to see if the piece is dry after 3–4 hours. Depending on the temperature and humidity, the drying time will change. Give the object a little sanding with high-grit sandpaper if it is dry. You could use 220-grit for this step, but if you prefer, you may use a higher grit, like 320. Another option is 0000 steel wool.
- Step five.Apply more coats. However, it would help if you used your 1200-grit wet/dry sandpaper to apply the coat using the sandpaper and a block of wood after the fourth or fifth coat. This produces a small slurry, which you can remove with the rag by rubbing it once more along the grain and in one direction.
- Step six:Apply the last layer. The following layer is applied with a cloth and feels like glass after the fifth coating, which is finished with 1200-grit wet sandpaper. You will then apply the wet-sanding layer again near the end when only one layer is left. Usually, this is sufficient to provide a final finish that is incredibly smooth and shiny.
- Step seven:Wipe off any dust left. When sanding is finished, use a microfiber tack cloth or a lint-free cloth to remove any remaining dust.
Note: When compared to poly that is brushed on, a single layer of wipe-on poly is very thin. You should use seven to ten coats. A finish that has received this many coatings of satin finish may appear exceedingly murky. Therefore, it is recommended to utilize clear gloss up to the final few layers before switching to satin (unless you want the glossy look, finish with that).
Tips to avoid problems when using Wipe-on Poly
Always use 220 grit sandpaper before finishing your furniture: You should only go beyond that when you make a piece with a true mirror finish. This requires 1500 and 2000-grit wet sanding – not necessary for standard wood furniture.
Always hang your finishing clothes flat so they can dry evenly. It has been amply stated online several times that a finished cloth wadded up can catch fire from the heat that emanates from the finish. That heat readily disappears by putting it out flat to dry by air, preventing any heat buildup in the cloth.
In a finish, dust nibs are quite obvious. Therefore, try your best to maintain the space completely dust-free. You will certainly encounter at least one or two significant dust nibs, which is practically impossible.
Applying a poly coat with sandpaper after that is the best course of action. You won’t even remember it when this knocks it down.
Final Notes
Applying wipe-on polyurethane to your wood projects can give them a beautiful finish, but there are a few things you need to know to get the best results. We’ve outlined the steps you need to take for a successful application and how to fix any problems.
Follow these tips, and you’ll be able to achieve a gorgeous finish on all of your wood projects! Have you tried applying wipe-on polyurethane before? What tips do you have to share?
- Can You Unmix Paint: Techniques, Consequences, Alternatives - February 23, 2024
- Does Primer Need to be Mixed? Effective Primer Application - February 22, 2024
- How to Make Old Paint Usable Again: Retrieving and Preserving Paint - February 21, 2024


