You have heard it all: “Lacquer stains do not need sanding between coats since each coat dissolves into the previous layer”. Some other people recommend sanding before spraying the first coat but no more.
It all gets confusing when you think about how sanding has helped you achieve a beautiful finish in past woodworking projects.
Should you go ahead and sand between coats of lacquer? The truth is you can. In fact, you should not skip this process.
Asides from fixing imperfections, sanding can help the finish penetrate better. It opens the wood pores which may have otherwise become closed when you scraped the wood paint.
Sanding is especially necessary for refinishing projects where paint leftovers on old wood can affect penetration. The benefits of sanding between coats are quite evident but following correct techniques while at it often requires guidance.
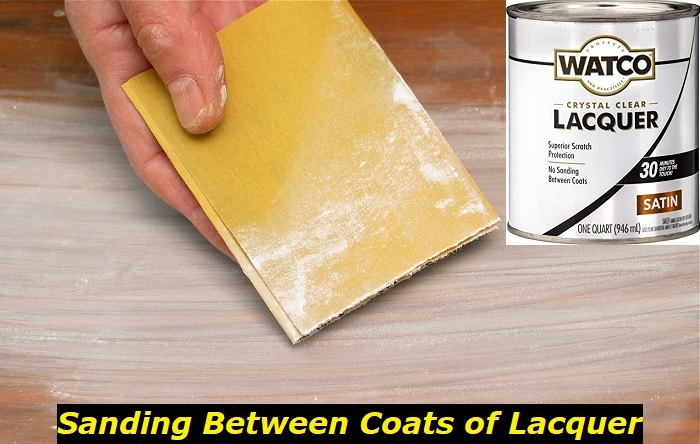
Rules to Remember When Sanding Between Coats of Lacquer
To enjoy the benefits of sanding between lacquer coats, you should adhere to certain rules. Here are some guidelines for best results:
- Apply Each Coat Lightly
It is best to keep each coat light to avoid build-up or runs which often happen with thicker coats. You can apply as many as four light coats rather than start with a thick one.
- Maintain Consistency
When using a lacquer spray, keep the spraying speed consistent with each coat. Switching the speed between coats can make the result uneven. So long as you maintain a consistent speed, the newer coats will correct the first coat if it looks patchy.
- Pay Attention to The Drying Time
Products differ and so do their drying time. Some manufacturers recommend you wait at least 20 minutes before sanding while some others take hours to dry. Check the directions and wait until the advised drying time before sanding.
- Cleaning
Make sure you clean the wood with a cloth to get rid of dust before applying the other 2 or 3 coats. Your work area should be well-ventilated so that the air particles can settle before you apply each coat.
You may have to clean your spray gun between each coat if you are working with water-based lacquer. Consider adjusting the thinner to lacquer ratio after applying the first coat.
- Use The Right Tool
A P320- to 400-grit sandpaper helps you achieve a smooth finish. Some people prefer steel wool to sandpaper. You can begin with 320-grit sandpaper, buff it with a 400-grit mode and then finish with the steel wool pad.
- Wear Protective Equipment
You should wear protective gear when sanding all kinds of wood, especially when working with lacquer. Too many negative effects can arise from inhaling lacquer and dust.
When Not to Sand Between Coats of Lacquer
Not all tasks may involve sanding in between coats. Refinishing projects mostly require sanding multiple times between layers of lacquer. If you do not want to sand each coat, consider using clear brushing lacquer.
You can use this kind of wood finish for interior surfaces, over stained wood or bare wood. They are great for times when you need to apply lacquer without removing the old finish. You can recoat in 2 hours and don’t need to sand between coats.
Ensure the following when using this non-sanding lacquer:
- Prepare the surface, making sure it is dry and does not contain foreign substances like wax or grease.
- Sand before applying the first coat to get an even surface. Get rid of the sanding dust with a damp cloth containing mineral spirits.
- Stir the lacquer properly without shaking it.
- Use a natural bristle brush and apply enough lacquer to seal the edges if the wood is unfinished.
- Give the first coat up to 2 hours to dry before applying the second coat.
- Apply as many coats as you want, maintaining the drying time.
- Leave the material for up to a day to dry after applying the final coat.
How Long Should You Wait to Sand Between Coats of Lacquer?
The drying time differs from product to product. Moreover, some other factors affect how long it will take for the lacquer to dry. One benefit of lacquer is that compared to certain other types of finishes, its solvent evaporates quickly.
Here are some factors that can affect the drying time of lacquer:
1) Surface Type
The type of surface you are applying the lacquer on affects its drying time. Untreated wood will absorb the substance quicker, speeding up the drying time.
If there is an existing finish on the wood, this will increase its drying time as the lacquer will take longer to penetrate. The same applies when using multiple coats of lacquer. The more layer you add, the longer it likely takes to dry.
2) Thickness
Like the number of coats you apply, the thickness of each coat affects drying time too. This is why it is advised to use light coats if you intend to sand between coats.
Your project should be ready for sanding in just a few minutes if you use thin layers of lacquer. On the other hand, you may have to wait for hours with some products if the layer is too thick. Pay attention to the amount of lacquer you are applying if you want to speed up drying time.
3) Type of Lacquer
The type of lacquer you use also affects drying time. Oil-based lacquer generally takes longer to dry than water-based lacquer. However, consider the additional benefits you can enjoy with an oil-based lacquer.
4) Application
The different ways you can apply lacquer influence drying time. Some people prefer to apply lacquer and then wipe off the excess. Doing this can make the coats dry faster.
Spraying the lacquer also helps it dry faster than applying it with a paintbrush. Of course, it all boils down to the thickness of the layers whether you spay or brush. Brushing usually demands a longer drying time.
5) Temperature
The temperature and humidity in the area are other important factors that greatly impact drying time. Lacquer dries by evaporating so the less humid the area is, the quicker it dries.
If the humidity levels in the area are high, you can expect each coat to take long hours before drying. It’s the same with airflow and temperature. The higher the temperature and airflow, the lower the humidity levels, resulting in a faster drying time.
Some people add acetone or lacquer to increase the time. You can try natural methods to preserve the lacquer’s quality. Increase the source of airflow in the areas or avoid working in humid conditions.
Other Easy Steps to Follow to Get a Smooth Lacquer Finish
Whether you are using a clear or shiny colored lacquer, sanding between coats can help you achieve a smooth finish. This is especially true when working with wood that has an old finish.
However, you can still get a smooth finish without sanding after each lacquer layer. Here are some tips to help you achieve that:
1) Fill The Grain
Do this using oil or water-based wood grain filler. You can achieve that mirror feel on all wood types if you carry out this step correctly. Use a paintbrush to apply the filler and scrape it out with a paint scraper. Also, sand it flat in the grain direction.
2) Apply the Stain
If you are staining the wood, the proper time to do so is right after filling the grain. Use a stain that matches the color of the grain filler. Also, make sure you use a filler that accommodates stains as some of them do not.
3) Dry Properly
If you would not be sanding each coat, focus on achieving smoothness by giving enough time for the lacquer to dry. In some cases, you may have to wait for up to 24 hours before removing any imperfections by sanding.
4) Use a Spray Lacquer
Spraying makes it easier to end up with a mirror finish. Use a spray lacquer, give it a few minutes to dry, following the product instruction, and sand with 320-grit sandpaper.
5) Pay More Attention to the Edges
Be careful when rubbing around the wood edges. The lacquer is thinner in that area and you want to avoid rubbing through it.
Conclusion
With lacquer, the goal is mirror-smoothness. Using thin layers of lacquer is how you avoid waste and get the desired result. Sand thinly to prevent thinning the applied coats and for better layering. Lacquers are generally brittle so you want flexible coverage while still getting a final layer that is hard enough. Increase the sandpaper grit as you progress to get a durable flat coat.
- Can You Unmix Paint: Techniques, Consequences, Alternatives - February 23, 2024
- Does Primer Need to be Mixed? Effective Primer Application - February 22, 2024
- How to Make Old Paint Usable Again: Retrieving and Preserving Paint - February 21, 2024


