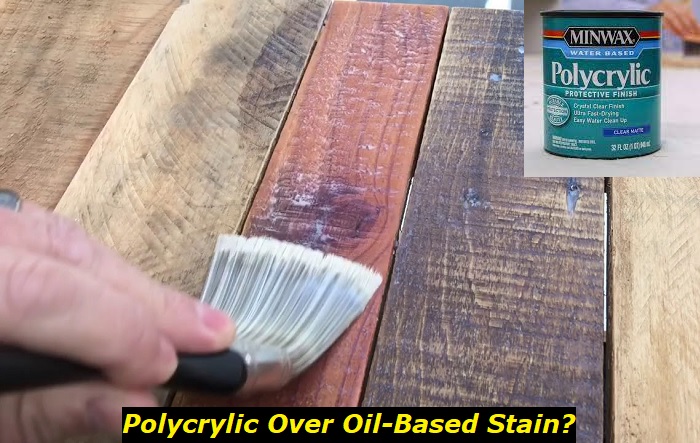
Anyone would hesitate using polycrilic over an oil-based stain. Given that this wood finish has a water base, it could result in many problems if anything goes wrong.
Imagine needing to strip and finish an oil-stained surface only to see its finished surface uneven, rough, or bumpy. You don’t have to experience that and waste your efforts.
Good thing you come across this article. We will help you make this project work and know what to consider when finishing with polycrylic over the oil-based stain.
What is Polycrylic?
Polycrylic is a water-based protective wood finish known for its versatility and durability. The primary purpose of this wood treatment is to protect the wood and preserve its beauty.
Polyacrylic is a solution formed from acrylic polymers and resins. The liquid dries into a crystal-clear and hard coat when applied to wood.
You can avail of this wood finish in high gloss, semi-gloss, satin, and matte finishes.
Polycrylic is available spray-on and roll-on. Depending on the application process you are more comfortable with, it should leave a clear transparent finish or enhance the paint color or stain.
What is an Oil-based Stain?
Oil-based stain is a protective coating made from natural oils and synthetic resin designed to penetrate the wood and enhance its color and grain. Oil-based stains are available in different shades of stains. One of the benefits of oil-based stains is that they can go deeper into the wood and provide better protection than water-based stains.
But even in other applications, the compatibility of water and oil-based liquids is always in question. Oil rejects water. We know the water-based finish may not adhere well to an oil-based stain. But because it enhances the beauty of the wood and provides long-lasting results, we want to seal this stain in wood with a clear finish that is polycrylic.
Polycrilic over Oil-based stain: Is it a Good Idea?
Polycrylic over oil-based stain can deliver good results with proper application techniques. And it depends on how much time you will provide for curing time. Ideally, you must provide 24 to 48 hours of drying time for the stain to cure. But to be sure, apply polyacrylic after three days of coating the wood with an oil-based stain.
Advantages of Polycrylic over Oil-based Stain:
- Do not have a strong smell
- Easy to clean
- Do not emit harmful fumes
- Dries quickly
- Environmentally friendly
Disadvantages of Polycrylic over Oil-based Stain:
- Adhesion problems
- Possible discoloration
- Limited resistance to heat
Is Polycrylic Better than Polyurethane?
While polyurethane is more durable than polycrylic, the latter leaves a more distinct finish because it sets a crystal-clear coat. It contains fewer Volatile Organic Compounds (VOCs). Also, polycrylic doesn’t have a strong smell.
However, the problem with polycrylic is it needs more focus during application. You need to apply thinner coats and fast. It dries quickly. Yet you will still need more of these thin coats.
What are the Consequences of Improper Application of Polycrylic over Oil-based Stain?
The success of using polycrylic on oil-based stain depends on your application. You need to give it a good time to cure before applying. Improper application of polycrylic on oil-based stain could lead to several problems:
1) Peeling or flaking
Peeling or flaking happens when small flakes of polycrylic chips of from the surface. It develops with poor surface preparation. When you do not give the stained wood surface enough time to dry, the polyacrylic finish will not hold properly.
Aside from poor surface preparation, peeling may occur when contaminants are present on the surface during application. Also, thick coatings could chip the paint off easily.
To avoid this, always read the manufacturer’s instructions and let the stain dry completely.
2) Discoloration
The discoloration is the changing of color of the wood surface over time. Polycrylic should pull off a clear coat over the wood surface. But some problems could change the color of the surface.
- When the surface has not dried completely
- Poor surface preparation
- Light exposure
- Incompatible oil-based product
Note that some oil-based stain products are incompatible with water-based ones.
3) Poor adhesion
Poor adhesion happens when the polycrylic fails to secure a long-lasting bond with an oil-based stain. This condition leads to peeling or flaking. You may need to strip the coat and recoat the surface when this happens. This issue is also a result of incomplete drying, incompatible oil-based stain, and poor surface preparation.
4) Bubbling
Bubbling happens when air forms inside the coating layer while or after applying. These small air pockets form when your area has too much humidity, you apply too much pressure when coating, or the oil-based stain is not compatible with polycrylic.
5) Uneven coat
An uneven coat happens when the application leaves inconsistent brush strokes, patches, brush marks, or streaks. These uneven coats are often a result of the uneven application in different areas of the surface. Also, poor surface preparation and low-quality tools leave uneven coats on the surface.
Things to Consider Before Using Polycrylic Over-Oil-based Stain
Now you know what can happen if you use improper techniques for applying polycrylic. It doesn’t mean you cannot make it work. There are some things you should consider when proceeding with this project.
1) Compatibility
Although you can top coat polycrylic on the oil-based stain, you still should consider their compatibility since not all oil-based stains have formulations that could accept a polycrylic finish. Having chemically different formulations may lead to reactions that may ruin the stain and cause discoloration, peeling or poor adhesion.
For this reason, you should practice reading the product labels and seeing the instructions. Most manufacturers would tell if the oil-based stain is suitable for polycrylic.
2) Application Method
The application method is crucial to the result of your project. There are three different ways to apply polycrylic: spraying, brushing, and rolling. However, you should not use them interchangeably.
The application method may not be suitable for your project. If you use a brush on a wide surface, it can leave uneven brush marks or streaks on the surface. Additionally, using rollers on a small surface is harder to control, may leave a textured finish, and may not be able to coat some parts.
Also, you should consider the thickness of the coat during application. Polycrilic dries easily and it will require multiple thin coats.
3) Adhesion & Surface Preparation
One of the most important factors to consider when using polycrilic over oil-based stain is adhesion. Adhesion and surface preparation work hand-in-hand. Your wood needs some rough surface to hold on to. The oil-based stay may inhibit water-based polycrilic adhesion. Aside from sanding lightly, ensure the surface is dry and free from dust, dirt, and stains.
Or, you can also use a primer or sealant to serve as a barrier between the oil-based stain and polycrylic for better adhesion.
4) Drying Time of Stain
The drying time of oil-based stain plays a very crucial role in the success of your project. You must be patient because oil-based stain takes a long time to dry and cure. You must give the wood fiber enough time to absorb it completely. Ensure that the surface is dry to the touch and would not leave marks on your finger when touched.
The oil-stained surface should dry within 24 to 48 hours. But to ensure that the stain has penetrated deep into the wood, apply polycrilic after three days.
5) Environment
The environment plays a key role in the success of using polycrilic over oil stains. These elements are crucial for the adhesion and drying of the stain. Polycrylic highly reacts to temperature fluctuation during application. Also, humidity is an essential factor in drying polycrylic. You need to work in a well-ventilated area. Aside from that, light exposure could also affect the appearance of polycrylic over time.
How to use Polycrylic over Oil-based Stain?
Once you set the oil-based stain into the wood after two or more days, clean the surface with a wire brush and sand the surface. This process should give the polycrylic small teeth to hold on to. When the surface is smooth and free from dirt you can start applying polycrilic over the stain.
If you are using a spray, provide at least a one-foot distance. Also, work only on areas with minimum airflow so it won’t drive the polycrylic mist away.
If you use a brush, you must avoid leaving brush streaks or marks. For this, use a high-quality fine-bristled synthetic brush. Apply only thin layers with less pressure, going towards the direction of the wood grain. You will need two to three thin layers instead of one thick coat.
If you will use rollers for large surfaces, ensure the surface is clean and free of dirt and debris. Use a roller with a high-density foam cover. Pour the polycrylic on the paint tray and dip the roller. Make sure to coat only with thin layers of polycrylic. Keep the edge wet. And make light and smooth strokes. You need multiple thin strokes. And ensure to let the polycrylic cure on the wood.
Should You Use Polycrilic Over Oil-based Stain?
Using polycrylic over an oil-based stain is possible. You only need extra consideration and focus on surface preparation. You must ensure the surface is clean, sanded thoroughly, and dried for at least 24 hours.
When applied correctly, you can enjoy the outstanding durability & crystal-clear finish of polycrylic. Your furniture, cabinet, or flooring gets to boast the natural beauty of wood.
- Can You Unmix Paint: Techniques, Consequences, Alternatives - February 23, 2024
- Does Primer Need to be Mixed? Effective Primer Application - February 22, 2024
- How to Make Old Paint Usable Again: Retrieving and Preserving Paint - February 21, 2024


