Spotting a few bumps on hardened or fresh polyurethane-finished wooden furniture is unsettling. It is distracting and disrupts the entire aesthetics of your furniture, flooring, or interior. Aside from that, bumps can leave the surface feeling rough when touched. And these bumps often indicate low-quality workmanship.
So, when you see them on your wood surface, you’d find them unsightly. If the polyurethane finish is still fresh, removing the bumps can be trickier because the texture is still soft and tacky. And if the polyurethane finish hardens, these bumps risk possible damage and reapplication of the polyurethane finish.
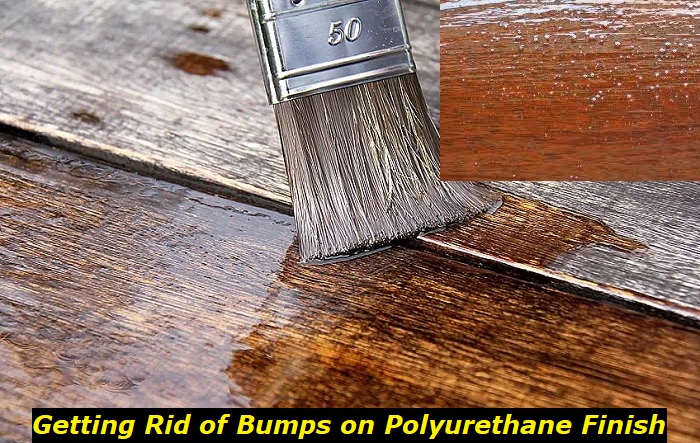
For this reason, you need to get them out as soon as possible.
How do Bumps Form on a Polyurethane Finish?
Bubbles
Bubbles are pockets of air trapped inside the finish while being applied. Aside from that, they also form when there is uneven surface tension while applying the finish. Also, brush marks leave bubbles on the applied finish when not loaded evenly on the application tool like a brush.
Craters
Craters are small pits or depressions formed on a finished surface. These craters form when there are contaminants on the surface. Also, these craters are common, if you haven’t spotted them on a fresh finish. Craters form when applying the coats firmly. Also, moisture and improper mixing may leave craters on the wooden finish.
Alligator Skin
Alligator skin is a bump formed with a scaly appearance like alligator skin. This event usually happens when the top coat layer hardens faster than the under layer. When the under layer is drying and the top layer has long hardened, the top layer leaves cracked spots that look like alligator skins.
Dust nibs
Dust nibs are particles of dust trapped on the polyurethane finish while applying. It leaves a bumpy texture when the finish dries.
Orange Peel
If you imagine the texture of an orange peel, you can see a dimpled or pored surface on a polyurethane finish. This texture forms when using an inappropriate roller brush or applying thick coats.
Brush Marks
Brush marks are a result of inappropriate coating techniques, using an incorrect brush, or applying heavier pressure while coating.
Why Should You Fix Bumps on a Polyurethane Finish?
There are many reasons why you should address bumps on polyurethane finish:
- To maintain or achieve aesthetic appeal
- To increase protection
- To increase the durability of the finish
- To avoid future damage
What are the Risks and Challenges of Removing Bumps on a Polyurethane?
There are risks and challenges to removing bumps on polyurethane on the surface. Although, they depend on the method you’ll use.
- The wood surface may change color.
- It may create uneven surfaces.
- It can leave brush streaks.
- The entire or portions of the polyurethane finish may peel.
- It may leave an inconsistent sheen.
- The process may require the reapplication of the entire finish.
- Some chemicals from cleaners or strippers may cause adverse reactions on the surface and carry health risks.
How to Get Bumps Out of Polyurethane Finish?
The method you will use depends on when the bump is on a fresh or hardened polyurethane. While it is possible, removing imperfections on a fresh polyurethane finish is trickier than on a hardened one.
Method 1– Remove Bumps On a Fresh Polyurethane Finish
The most common bumps forming on a fresh polyurethane are bubbles, dust nibs, brush marks, or orange peels.
Removing bumps on a fresh polyurethane finish is tricky for several reasons. One, the finish is still soft and sticky. Trying to remove it may risk the efficiency of the entire finish.
You cannot sand it in the meantime until the finish has dried completely. Also, using cleaners can have adverse reactions on the finish leading to discoloration or peeling.
For this reason, you need to use a careful method if you’ll remove the bumps on a wet polyurethane.
- Use a needle or pin (for bubbles)
You can lightly pop the bubbles with the tip of a needle or pin while the finish is still wet. Then run a light stroke of the brush to even out the finish. This method will gently care for the wet finish without risking its efficacy in the future.
- Use a clean cloth
This method only applies if dust nibs are settling on the wet polyurethane. Cover your fingertip, the pointer one, with a clean cloth and lightly dab the tip of your fingers on the dust nib. The dust nib should hold onto the cloth.
- Use the brush tip
The brush tip can help you smoothen the affected area. Gently dab the brush tip on the bump until you have removed it.
- Run little brush strokes
After removing bubbles, dust nibs, or any bump on the wet polyurethane, apply a light brush stroke so it will not touch unaffected areas.
- Wait for the finish to dry
This method is your last resort. You need to wait for the wet polyurethane finish to dry so you can finally sand and clean the bumps away.
Once the finish has dried, you can sand and remove bumps as you would on a hardened polyurethane finish, which we will discuss below.
Method 2 Remove Bumps on a Hardened Polyurethane Finish
Removing bumps on a hardened polyurethane is much easier than removing them on a wet finish. However, this method will require you to reapply polyurethane.
Stage 1 Bump Removal
- Scraping
Using a scraper is one of the simplest ways to remove bumps. Sand the affected area, so it will not gouge or scratch the surrounding surface. Scrape the bumps off gently with a scraping tool or a putty knife. It would do for smaller ones. Apply thin light pressure to avoid damaging the surrounding surface. Resand and wipe it gently with a dry and clean cloth.
- Sanding
This method is one of the most effective methods for most types of bumps. You will need sandpapers in various grit levels starting at 120 grit (120, 220, and 400).
Sand the surface progressively. Start with a coarse 120-grit sandpaper, then follow it with 220-grit sandpaper. And finish it with 400-grit sandpaper.
- Using heat gun
If the bumps cover a larger area, you may need to strip the whole finish. A heat gun is an effective coat stripper. It softens the surface so you can peel off the finish entirely and reapply a new finish.
Protect yourself with safety gloves, goggles, and a mask. Start with a low temperature and test the heat gun a few inches from the surface. Maintain a back-and-forth motion. Avoid heating one spot for long periods, as it may scorch the wood.
- Chemical stripper
Another way to remove bumps is using a chemical stripper. Chemical strippers are chemical solutions that remove paint, varnish, and other coatings on wood. It works by breaking the bond between the surface and the coat.
Before you apply stripper, you need to cover other painted or coated areas that required no bump removal or coat stripping. Next, wear a respirator, safety gloves, and glasses.
Apply the stripper according to the method recommended by the manufacturer. The applicators could be a sprayer or a paintbrush that you can dispose of after use. Wait for a few minutes until it takes effect. Note that water-based chemical strippers may need an additional coat. You can start scrubbing and scraping the wood if you see the polyurethane bubbling and wrinkling.
Stage 2 Cleaning
After removing the bumps, clean the surface before recoating the wood with a fresh finish.
- Vacuum
Use a shop vac or a vacuum to collect the sanded bumps of polyurethane. Attach an appropriate nozzle or attachment to your vacuum. Turn it on and with few inches away from the surface. Do not apply too much pressure as it can scratch or damage the surface.
- Buffing
You can use a buffing wheel or pads to remove bumps on a hardened finish. If you do not have a buffing tool, a soft, clean cloth will do. Apply a generous amount of buffing compound on the surface. Start buffing the surface using a circular motion and minimal pressure. Buff one portion at a time. Apply polishing compound as needed. After polishing the entire surface, wipe it with a clean, dry soft cloth.
Stage 3 Finish reapplication
You may need to reapply polyurethane if the affected surface is wide. (Note that you may not need this stage on small bumps.) Also, it will help achieve a more even finish after removing the bumps.
Apply a thin coat of polyurethane. You can use a foam brush for uniform strokes and even finish.
Follow the wood grain direction and wait for the polyurethane to dry. You’ll need at least 12 to 24 hours to cure the finish thoroughly. After the finish has cured, sand the surface again with fine 220-grit sandpaper. Wipe the surface clean or use a vacuum to remove the sanded finish.
Once the surface is clean, apply the second coat and let it dry with the same methods above. After the second coat fully dries, sand the surface with extra-fine 400 grit sandpaper to ensure a smooth and even finish.
Tips to Prevent Bumps on a Polyurethane Finish
- Use the appropriate removal method for different types of bumps.
- Use the right tool for removing bumps and cleaning the surface.
- Practice on a small area if needed.
- Work carefully, especially for a fresh finish.
To Wrap it Up
Removing bumps out of polyurethane finish can be tricky and challenging. But with the appropriate techniques and tools, you can pull this off. Remember to work slowly and carefully because one wrong move can affect the entire surface. With greater focus, you can remove bumps from polyurethane finish and restore the beauty of your furniture or flooring.
- Can You Unmix Paint: Techniques, Consequences, Alternatives - February 23, 2024
- Does Primer Need to be Mixed? Effective Primer Application - February 22, 2024
- How to Make Old Paint Usable Again: Retrieving and Preserving Paint - February 21, 2024
