Do you have any battered wooden furniture and fixings gnawing away at you? You may be wondering whether to repair them or pick the more straightforward option and do away with them. Resist the temptation to discard your precious hardwood furniture or fixings over a few scratches. Mohawk wood filler could be all you need to breathe life back into your wooden surfaces.
Fixing up your weather-beaten wood furnishing is simpler and cheaper than you imagine. It is also much better for the environment than tossing them out. Fewer trees will be felled if people fix up instead of discarding their worn-out wooden furniture. Sales of wood filler have significantly increased as a consequence.
Read on to learn how mohawk wood filler can help restore your wooden surfaces to their former glory. In this article, we will discuss the following:
- What is Mohawk wood filler?
- Does mohawk wood filler work Well?
- What finishes are compatible with Mohawk Wood Filler?
- What are the advantages of using Mohawk Wood Filler?
- When should I use mohawk wood filler?
- How should I use mohawk wood filler?
What Is Wood Filler?
Most homeowners know that their property is bound to face wear and tear over the years, and wood is no exception. You probably know how to repair a lightly scratched wooden surface. What should you do when your wood has deep scratches, dents, or gouges? You do not need a time machine to go back and stop the damage from occurring. The suitable wood filler will make it look like nothing ever happened to your precious wooden surface.
Wood fillers are materials used to cover flaws in the wood, like nail gaps. Before finishing, wood-filling products are suitable for projects like beloved furniture, pricey wooden floors, or outdoor wood that require additional care when restored to look their best.
One such incredibly well-liked wood-filling product is Mohawk wood filling. It is a high-grade, water-based filler that does not contain solvents and adheres securely to all wood surfaces.
In this guide, we describe how it works and its appropriate applications.
When to Use Mohawk Wood Filler
Mohawk wood filler has proven indispensable for professionals facing various types of wood damage. You can use mohawk wood filler for any of the following purposes.
- To repair woodwork after a job is complete before staining, painting, and finishing the wood
- To mold rotten parts of wood like furniture that has chipped out.
- To fill nicks, gaps, cracks, gouges, nail holes, and other flaws on timber surfaces.
- To mold and shape damaged borders of furniture such as shelves and countertops.
- To fill wood projects destroyed by termite damage.
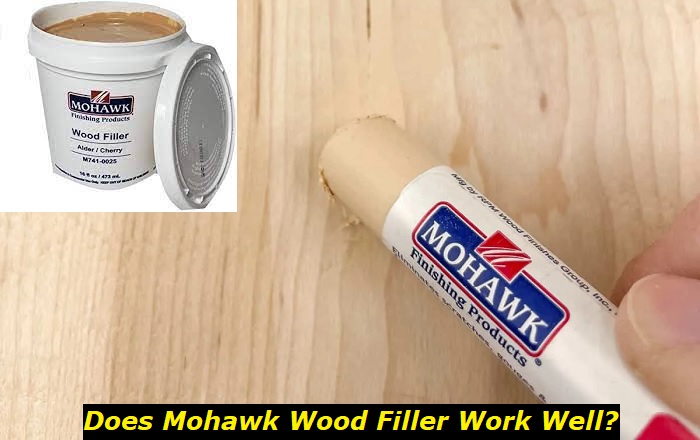
Does Mohawk Wood Filler work well?
Mohawk wood filler is great for filling voids. It hides all damage to wood as though a magic wand has been waved over it. This wood filler enables professionals and handy DIYers to produce a smooth, closed-grain surface on open-grain wood. Once you are done repairing your wooden surface, Mohawk Wood Filler won’t crack or slide out because it is non-shrinking.
What finishes are compatible with Mohawk Wood Filler?
If you are concerned that using mohawk wood filler to repair your damaged surfaces will limit your finishing options, we assure you that that is not the case. All finishing processes, including lacquers, drilling, sawing, painting, and sanding, can be applied to this wood filler. It also accepts the majority of stains, tints, and finishes. Edge veneering and completing woodgrains are perfect applications for it. Furthermore, it is excellent for making repairs like filling any timber flaws like cracks and knot holes, among others.
Advantages of Using Mohawk Wood Filler
If you still aren’t convinced that mohawk wood filler is the best choice for you, check out these advantages:
- This water-based wood filler has less volatile organic compounds (VOCs), produces less or no odor, and is safer to use.
- Because it applies readily, levels smoothly, sands like wood, and dries rapidly (within two to four hours), it is simple to use.
- It is freeze-thaw stable and water resistant, making it suitable for interior and exterior work. You can also easily clean this wood filler with water.
- It is non-flammable and works well with water-based stains and topcoats.
- This product is versatile because repairs done with it can be finished and stained rapidly.
How to use mohawk wood filler
This section will prove helpful if you are onboard and ready to use mohawk wood filler on your damaged surfaces. Getting into a repair job without homework and proper preparation could do more harm than good.
1. Prepare the surface of the wood.
Your first step will be to prepare your wooden surface by removing any loose bits of rotten or decayed timber. To get rid of peeling paint, primer, or rust, sand down the surface of the wood. Remove any sanding residue or debris and ensure that the region you’re working with is smooth and easy to fill.
A dry brush or cloth will remove any loose wood grains from the surface. For the filler to adhere firmly to the wood, its surface, and surrounding environment must be above 40° F, and the timber must be clear and dry.
2. Mix the mohawk wood filler.
The next step is ensuring that your mohawk wood filler is well-mixed. If you use wood filler that does not have a uniform consistency, it may not hold as long as it should. Use a putty knife to mix the wood filler in the receptacle before applying it (wood filler can disintegrate after it sits for a while). Blending the mixture into a uniform hue and texture with a smooth, peanut butter-like consistency is recommended.
3. Apply the filler
After ensuring your mohawk wood filler is mixed correctly, it is ready to apply onto the wooden surface you have prepared and cleaned. Press the wood filler into the wider gouges with a clean putty knife, then gently scrape the blade across the top to smooth it out. Ensure you do not scratch the undamaged wooden surface when filling out the damaged area.
Spread the filler in layers if the damage exceeds 1/8″ to 1/4″. You may push the filler into tiny nail holes using your finger. It would help if you let each coat dry completely before applying the next. If your wooden surface is adequately ventilated, a thin layer should dry within fifteen minutes. You can test the layer by checking whether it is so dry and firm to the touch.
If the initial layer of mohawk wood filler has not dried, allow more time before applying the next. Mound the filler up generously above the surface of the wood to account for shrinkage as it cures, but be careful not to use too much as this will significantly lengthen the time you need to spend on sanding. Allow the filler to dry as per the manufacturer’s directions.
4. Sand the wood filler.
Allow the filler to solidify for at least 30 minutes; an entire hour is preferable. The amount of time the filler needs to dry will depend on how well it was applied and whether the area is well-ventilated.
Finish by hand-sanding the filled area with 220-grit sandpaper while rubbing in the wood grain. It will facilitate the filler to take in the stain more authentically and leave minor scratches that mirror the pattern of the encircling wood. Do not allow the filler to dry for too long. Mohawk wood filler that has overdried becomes so hard that sanding by hand becomes tedious.
5. Clean with an adhesive Cloth
After sanding the excess filler, ensure you clean the debris away immediately. Challenges during staining can occur as a result of sanding grit that is left on the surface. The mixture of the liquid and the dust will result in a lumpy, grainy texture, which is the opposite of what you expect from a smoothly sanded surface. Your safest bet for removing debris without making a bigger mess is typically using a tack cloth dampened with water.
6. Finish the wood
Once you have thoroughly cleaned the surface and the wood filler has dried, the filled void or patch is ready for stain and finish, as required. Expect the filler to be somewhat visible, don’t expect it to be completely undetectable. Staining the final product will help to balance the contrast between the filler and the bordering wood.
It is uncommon to find a perfect match in terms of color since wood filler absorbs stains differently than unfinished wood. So, to ensure you can get the best finish possible, read the product label carefully for any specific directions.
Conclusion
Wood is frequently subjected to wear and strain, accidents, rot, decay, divots, cracks, and holes. If you want your wood to last a long time, a wood filler will need to be used at some point.
Investing in Mohawk wood filler is a sure bet. It is an affordable and high-quality product guaranteed to enhance the appearance of your woodwork. Be sure to visit our page for more tips and product offers.
- How to Fix Rough Concrete Floor? Best DIY Methods - July 10, 2023
- Rotted Door Frame: Repair Kit and Ways to Solve the Problem - June 5, 2023
- Granite Grip vs. SpreadRock: Comparison and Best Applications - April 28, 2023


