You do not stain wood for the sake of it. The undertone must match your style and interior design. The staining project should give the wooden surfaces a new feel and transform your space.
The process starts with quality stains that provide an even, durable, and elegant finish. You are safe with Minwax stains. In this guide, you will learn how to choose the best stains with a green undertone. We also outline an easy DIY staining process to help you out after purchasing the stain.
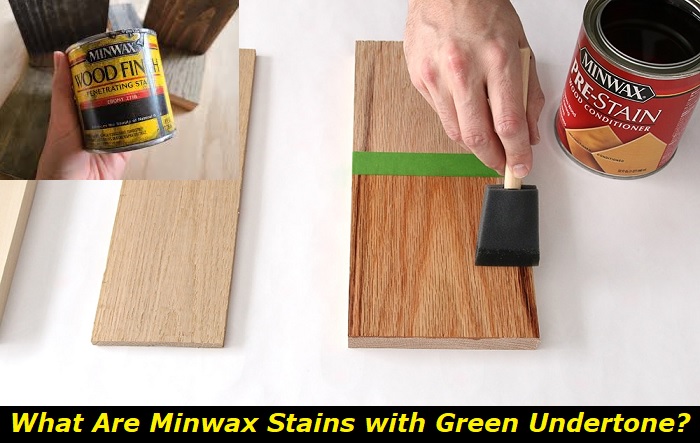
Minwax Stains with Green Undertone
Minwax supplies more than 200 wood stains in different shades. About 30 of these shades are green. Minwax categorizes the stains further into solid and semi-transparent stains.
If you prefer dark shades of green, Minwax offers Green Tea, Austin Field, and Nightwatch Green stains. You can also try medium green undertones, which are not too dark or too light.
The medium green brands include Botanical, Verdigris, Hunter Green, Royal Pine, Early Spring, and Viridian Green. The light shades include Spearmint Green, Juniper Mist, and Modest Mist.
Additional light green shades include Antique Jade, Gentle Olive, and Winter Moss. All colors in the dark, medium, and light categories have a solid and semi-transparent option.
Solid stains offer an even tone but cover the wood grains. The stains are perfect for old and stained wood. The semi-transparent stains display the wood grain beautifully.
The stains are thick enough for easy application. Previous customers and professional wood painters report that one coat of Minwax stains dries within an hour. Hence, you can finish your staining project within hours.
Minwax stains with green shades are water-based. Each color is distinct. However, you can tint each shade to over 200 colors by combining different shades.
Experts recommend them for interior use and small staining projects such as touch-ups and repairs. You can apply one coat on kitchen cabinets, doors, rails, and unfinished furniture.
How to Choose the Right Stain
Looking at the multiple options of wood stains with a green undertone triggers a new question. How do you choose the right shade for your space? Let us talk about it.
1. Consider the Type of Wood
Stains react differently to different types of wood. Hardwoods absorb stains better and faster than softwoods. The same stain color gives one finish on hardwood and another on softwood.
Remember that some woods have natural undertones that change the appearance of stains. For instance, pines have yellow undertones, while birch has pink undertones.
Poplar and White Oak have green and neutral undertones, respectively. The final look will depend on the wood’s undertone. It is advisable to choose a stain color close to the natural undertone.
You also need to differentiate between oil-based and water-based stains. Water-based stains are perfect when you want to keep the natural beauty of wood grains visible.
Oil-based stains give an even tone and penetrate deeper into the wood. Pick an oil-based stain if your type of wood is prone to blotching. The stains last longer than water-based stains.
Most Minwax stains with a green undertone are water-based. However, you can order an oil-based finish to coat the wood after staining to prevent blotching.
2. Pick a Water-Resistant Stain
It is safe to prioritize water-resistant stains, even for interior furniture. You must protect the wood from cracking and warping to prolong its lifespan.
Most of the Minwax wood stains are water-resistant. However, you need to check the description, especially when painting outdoor furniture.
3. Lighting and Location
The lighting in your home or office will determine the appearance of the wood stain. You may require different shades of stain if you have different lighting in different locations.
You do not need to change the lighting. Instead, order a test stain and apply it to see its appearance. Test the stain with different lighting settings.
Sunlight also changes the appearance of wood stains. Consider the location of the wooden surface and its access to sunshine. Direct sunlight in hot weather causes stains to fade.
Wait for the test stain to dry and penetrate the wood before judging its appearance. You can test different shades on different portions and then clean the wood before staining.
4. Shade and Opacity
Minwax stains have different shades, including light, medium, and dark greens. As mentioned, the shade will appear differently based on your lighting settings and the type of wood.
You can also choose between semi-transparent and solid stains. Semi-transparent stains show the wood grain texture, while solid stains hide imperfections.
Test the shade with different coats. A lighter shade may look better with two or more coats. Outdoor furniture may require several coats. Choose a shade that gives you the perfect finish to match your interiors.
How to Apply Minwax Stains
You can achieve a professional-looking finish with any Minwax stain if you follow the right application process. Avoid shortcuts or rushing through the process because the results will show.
1. Select the Stain
You have already settled for a green undertone. Green Minwax stains are water-based. Your choice at this point is between solid and semi-transparent stains.
As mentioned, solid stains give an even finish, while semi-transparent stains show natural wood grains. Any of the two options will protect the wood texture.
Water-based stains dry fast and have a low odor. The stains are easy to clean with soap and water. However, the stains require additional sanding for a durable finish.
You also need to work fast with water-based stains before the coat dries to achieve a smooth finish. Minwax has oil-based stains but in different colors. You can explore the options for durable results or use a long-lasting finish.
2. Prepare the Wooden Surface
One secret to a smooth finish in any DIY staining project is filling all cracks and holes. Some cracks may be invisible from afar. Inspect the wood under proper lighting and mark the imperfections.
Use a stainable wood filler to even out the cracks and holes and allow the filler to dry. Remove any knobs, hinges, and hardware blocking the wooden surfaces.
3. Sanding
Start with fine-grit sanding paper and then use coarse-grit sandpaper to smoothen the surface. Take your time to remove any excess wood filler and marks. A hurried sanding process leads to uneven marks or dark spots.
Sanding is necessary if you prefer a smooth and even finish on furniture. You can skip the step to maintain a rustic finish, especially when using a semi-transparent stain.
Wipe the surface to remove all the dust. You can use a tack cloth or a damp cloth. Allow the surface to dry completely.
4. Condition the Wood
Conditioning the clean wooden surface with a pre-stain conditioner helps the wood to absorb the stain evenly. The conditioner also prevents blotching.
Order a water-based wood conditioner because you are using a water-based stain. Use a synthetic brush to apply the conditioner generously. Allow it to soak for about two minutes, and wipe any excess conditioner.
Leave the conditioner for half an hour to dry, and then sand the surface again. A 220-grit sandpaper is recommended at this stage. Wipe the dust again and allow the surface to dry.
5. Stain
Stir the stain in the can thoroughly to even out the pigments. Transfer the paint to a clean bucket when using more than one can, and then stir.
Use a brush to stain the wooden surface following the natural grains. Test the stain on a small piece of wood or section of the surface. You will feel the consistency and see the results to determine if you picked the right shade.
Proceed to stain the furniture or surface if you are comfortable with the results. Cover all the areas, corners, and edges with an even coat. A thin coat is easier to spread evenly than a heavy coat.
Use a pad or soft cloth to wipe any excess surface. Remember that water-based stains dry fast. Hence, it is advisable to wipe the excesses as you move along or within two minutes after applying the first coat.
6. Allow the Stain to Dry
Minwax water-based stains dry within an hour. The process may take longer, depending on the humidity and temperature level in the room.
Most people use one coat of wood stain. However, you can use two or three coats for a darker shade. You can also use a different shade for the additional coats if you want to mix the colors.
Allow each coat to sit for at least two hours before applying the next one. The first coat may be dry in an hour, but give it more time to be sure.
7. Seal the Surface
Sealing is optional, but it helps you prolong the new shade and prevent fading. You will also protect the smooth surface from scratches. Minwax has multiple options for water-based finishes.
Minwax finishes dry clear without altering the color. Apply the finish at least 3 hours after applying the last stain coat. Allow the finish to dry as you clean up. Water-based stains and finishes are easy to clean with soap and water.
Conclusion
You have many options for green Minwax stains, ranging from light to dark undertones. Each stain has a solid and semi-transparent option. The type of wood, interior design, and lighting in your home should guide you in choosing the perfect stain.
Minwax stains with green undertones are water-based. Hence, they are suitable for small staining projects on interior furniture and surfaces. Sealing the new coat is recommended to prolong the new stain.
- Can You Unmix Paint: Techniques, Consequences, Alternatives - February 23, 2024
- Does Primer Need to be Mixed? Effective Primer Application - February 22, 2024
- How to Make Old Paint Usable Again: Retrieving and Preserving Paint - February 21, 2024


