A cabinet painting project requires preparation, money, and time. Failing to prepare adequately can lead to a shoddy-looking cabinet, not forgetting the total waste of time. One of the cool ways to prepare is liquid sanding. Liquid sander gives the surface the desired pre-painting feel and texture, which makes it easier for the paint to bond with the surface. It further ensures the paint does not chip away over time.
In our article today, let us learn about liquid sander for cabinets. We will learn what liquid sanding means and the different types there are in the market. We will also look into how you should use it and how good it is compared to the alternative. We will also look at the factors to consider before you opt for liquid sanding.
Understanding liquid sander
Liquid sanding is a good option if you are considering refinishing your kitchen cabinets or other cabinets in the house. Liquid sanding is a substitute for old-school sanding. Rather than using rough grit sandpaper, we use a simple solution to prep the surface we intend to paint.
Liquid sander, sometimes called deglosser, is a combination of chemicals that softens the surface of the wood and makes it ready for a fresh coat of paint. Essentially, a liquid sander acts as a paint stripper. This means it is a combination of chemicals designed to quickly lift, soften and peel away paint, lacquer, or vanish when applied on a surface.
Liquid sander can be said to act the same way nail-polish remover works. When applied, it softens the underlying coat of paint or varnish but not wholly. You will need to give it a few moments before rubbing it off, at which point it will come off together with the paint.
After reading the above description of liquid sander, it becomes apparent that it is not an alternative to traditional sanding. Liquid sanding does not remove scratches or dents on a surface. It does not restore the color of a stained cabinet. If, however, you want to ensure the paint you apply adheres perfectly to the surfaces, the liquid sander is the way to go.
The different types of sander
There are several types of liquid sanders that one can pick from. The different types help you make the right choice that favors you and your projects.
- Water-based liquid sander
A water-based sander does not have many chemicals, such as methylene chloride. As such, if you are sensitive to chemicals, you might want to consider this type of liquid sander. It is an eco-friendly deglosser that doesn’t contain inflammable ingredients. After treatment, you don’t need to use water to rinse it away. Some pastes can remove as many as 15 layers of paint. But just like the rest of the deglossers, this water-based option is still harmful to the skin, and care should be taken during application and storage.
- Trisodium phosphate substitute liquid sander
This type of deglosser is also commonly called a no-rinse cleaner. It is preferred because of its ability to bond base paint and also for removing all grease from surfaces. It doesn’t contain any phosphates, and it is biodegradable.
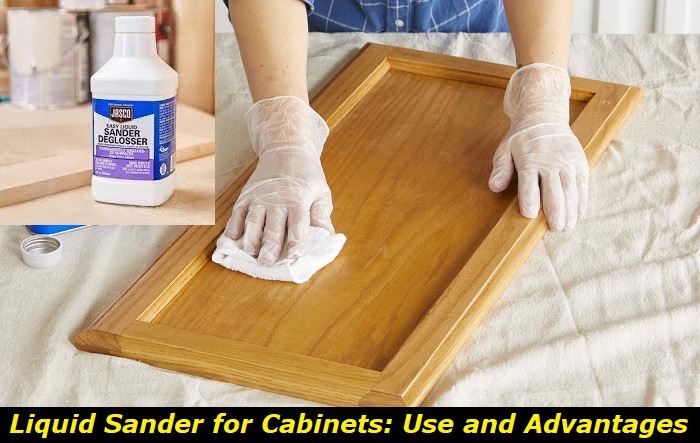
How to use a liquid sander on your cabinet
The cabinet that you want to paint is probably in the kitchen. Like most cabinets, it probably has straight lines, but several curves and grooves accentuate it. These artistic lines give the cabinet character and the room some life. When preparing the cabinet for a paint job, consider buying sandpaper and a liquid sander. Let us take you through the journey of how you should use the liquid sander to achieve excellent results.
- Pick the paint you want to paint the cabinet with. Any paint will do, but enamel scores the highest here.
- Prepare the cabinets for painting. This step involves cleaning the cabinets and removing dust, oil, and grime.
- Remove the doors of the cabinet. This step involves removing the hinges and knobs from the doors. By doing this, the end result will look neat and professional. Of course, take care of where and how you keep the knobs and hinges to replace after the paint job.
- It is now time to apply the liquid sander to the cabinet. The cabinet should be in good condition.
The surface should not be peeling or chipping. Otherwise, you will need to sandpaper the surface first. The liquid sander works well on a polyurethane-coated surface. Rather than spend hours sandpapering the surface, a deglosser whose price can be as low as $10 can do the magic.
Here are the requirements for the deglosser application:
- Buy a protective mask, preferably N95, to prevent you from inhaling any toxic compounds.
- Wear gloves and long-sleeved clothing. This should be the case, especially if the paint on the cabinet was done in 1978 or earlier. Back then, the paint contained a lot of lead, and it was only in 1978 that lead in paints was banned. Lead metal is harmful to your skin, and kids should not come close to such a work site.
- Open the windows and doors for proper ventilation of the room.
- Carefully read the instructions written on the deglosser can. In most cases, you will be required to dip the scouring pad in the sander and gently rub it against the surface of the cabinet. Follow the direction of the grain.
- Wait for the duration recommended on the sander container before wiping it away. Depending on the underlying coat of paint or finish you intend to remove, it is imperative that you wait for a few minutes, which can be extended to hours, for the deglosser to work thoroughly on the surface.
- Wipe off all the liquid sander with a wet rag. Repeat the wiping of the cabinet with a clean rag to ensure the surface is clean and dry. Read the instructions on the deglosser can, as some require wiping the deglosser using a dry cloth while others require the usage of a damp cloth.
- Let the cabinet dry for at least an hour before proceeding.
It is now time to paint the cabinets after they have dried up completely. Apply a primer coat and proceed to apply the final coat.
The final step would be to re-install the doors of the cabinets.
Factors to consider when deciding whether to use a liquid sander
Liquid sander has proved to be a useful and effective compound for painters globally. It has helped revolutionize painting projects and made the otherwise tedious process easy and fun. But liquid sander, even though effective and easy to use, is not a magic compound, and there are several factors you need to consider before applying it to your cabinet;
- Do you react to chemicals, and how do you feel about using them? This is an important question to ask yourself, as liquid sanders contain chemicals that work on the surface of the cabinet to make the paint, lacquer, or vanish ‘dissolve’ and come off. These chemicals can be harmful to your skin and even the environment.
- How much can you afford? A liquid sander will set you back at least $10; the cost can go as high as $50 or more, depending on the project. On the other hand, sandpaper costs cents.
- Did the previous paint on the cabinet contain lead? Lead is poisonous, and there can be serious reactions with some liquid sanders. If the cabinet has lead-based paint, it may not be wise to use a deglosser, or if you must, know the precautions to take.
- Do you have time? As you may be well aware, normal wood sanding takes time and effort. It takes many man-hours to have the surface smooth to the required standard and to be paintable. Of course, we are talking about cabinets that are usually highly visible in a room, and you want them to look immaculate.
- What supplies do you have? If you have the sandpaper already and a sanding machine, it might not make sense to go for a liquid sander. Remember, a deglosser is not an alternative to sandpaper. In some situations, the deglosser is ideal, while sandpaper will give you the desired results in other cases.
What are the benefits of using a liquid sander over sandpaper?
- Less work – when you opt for a liquid sander, you don’t spend hours smoothening the surface. But this is not to say you won’t spend time applying and wiping off the deglosser. We are saying that you spend much less time working with a deglosser than sandpaper.
- Not messy – Sandpaper comes with heaps of dust, and you need to cover all the surfaces in the room to keep the dust from covering every item in the room. Applying deglosser doesn’t come with any dust, and you will not be forced to clean up everything after the project.
- It reaches tricky corners – Sandpaper doesn’t reach those curvy edges, and in some corners and grooves, you might give up on them. With the liquid sander, even those intricate surfaces get perfect sanding.
Conclusion
A liquid sander is the perfect solution for those looking for an alternative to sandpaper. Your cabinets are likely full of curves, and the surfaces might be all intricate and tricky. With a liquid sander, you will achieve excellent results, and what is more, less time is spent doing the job. However, ensure you read the liquid sander’s application instructions before buying.
- Can You Unmix Paint: Techniques, Consequences, Alternatives - February 23, 2024
- Does Primer Need to be Mixed? Effective Primer Application - February 22, 2024
- How to Make Old Paint Usable Again: Retrieving and Preserving Paint - February 21, 2024


