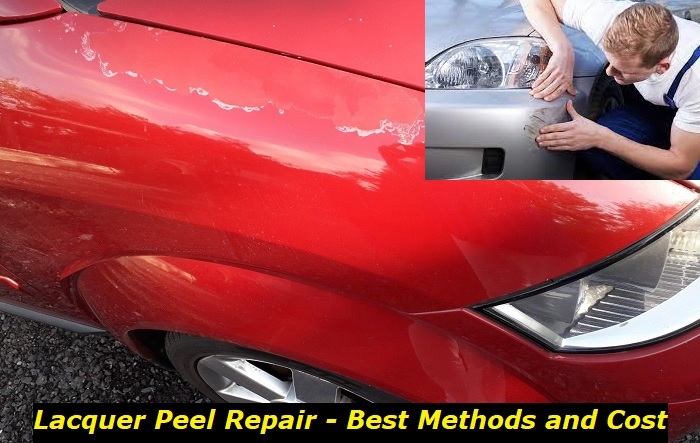
If you have noticed that your car’s lacquer is beginning to peel off, acting sooner rather than later can save you a lot in repair costs. Blistering and bubbling clear coat on a car reflects poorly on its owner. Repairing the damage as soon as you notice it will also spare you the humiliation of riding around in a car whose doors, roof, hood, or trunk are showing signs of neglect.
This article will take you through everything you need to know to deal with the lacquer peel situation.
You can expect to learn more about:
- Why your lacquer is peeling
- Cost of repairing lacquer peel on your car
- Method of repairing lacquer peel on your car
Common Causes of Lacquer Peeling
Fixing the peeling lacquer without solving the cause of the problem only guarantees that you will face the same scenario down the road. Your car’s lacquer clear coat is designed to protect the layers of primer and paint underneath. It also enhances the appearance of the paint to lend a shiny or matte aesthetic depending on preference.
The more you know about the enemies of your lacquer coat, the better armed you will be to preserve it. Here are the most common causes of peeling lacquer.
Prolonged exposure to the elements
Though your lacquer clear coat is designed to withstand moisture and harsh UV rays, you should not push it too far. Over time, constant exposure to sunlight will cause your lacquer coat to begin breaking down. After fading and discoloring because the sun has dried it out, the lacquer coat will become brittle and begin to peel away.
Lack of proper bonding to color coat underneath
The quality of products and workmanship that goes into your vehicle’s paint job will have a significant effect on its durability. Using cheap products or amateur painters may cause ineffective adhesion of the lacquer coat to the layer underneath it. Shoddy work and poor-quality materials will cause one section to begin peeling back, and the chain reaction will rapidly spread to the rest of the car.
Mechanical Damage
Mechanical damage like scratching of the lacquer coat’s surface often goes hand in hand with exposure to the elements. High-quality lacquer coats are designed to withstand damage from light friction caused by dirt and debris. However, if the coat has suffered exposure to the elements, the coat becomes quite brittle and vulnerable to damage.
When cleaning your car ensure you avoid harsh chemicals and abrasive cleaning materials that may strip away your lacquer coat. If you live in areas where road salt is used to melt snow, hose your car down to avoid parking it while salt lingers on your lacquer coat.
Cost of Fixing Peeling Lacquer Clear Coat on Your Car
Fixing a peeling lacquer coat is not cheap. The exact cost depends on the amount of work required, your location, and the expertise level of your painters. Most estimates warn motorists to have at least $500 ready even for minimal damage. Do not let this news get you down.
If you are getting cold feet, remember that paint jobs are expensive because you are unlikely to need another for years. In case you prefer to save some money and do the job yourself, the next section will exhaustively discuss how to fix the damage without any professional assistance.
How to Fix a Peeling Lacquer Coat at Home
The good news is that if you caught the damage early fixing it at home is not as hard as you would imagine. If you are only dealing with a few blisters or bubbles, this repair process will suffice. Damage that has spread throughout a panel or the entire car, you are best off is best handled by professionals. However, if you have the time and energy, you can do the complete paint job at home as well.
Cost of Repairing Peeling Lacquer at Home
Repairing a small area of damaged lacquer should only cost you a couple of hundred dollars in supplies and tools. Not to mention some time and elbow grease.
Gather tools and supplies
Before getting started, you will need to gather these materials:
- Distilled water and isopropyl alcohol mixed in a 1:1 ratio.
- Tack cloth
- Find auto body repair scotch brite
- Microfiber towels
- Wash mitt
- Soap
- Paper towels
- Masking tape
- Sandpaper kit a range of paper suitable for wet and dry sanding
- Polishing compound
- Polishing machine or hand drill with a polishing pad attachment.
- Clean the garage to store the car while the lacquer coat dries. Any location where the car will be safe from dust for twenty hours is good enough.
Prepare Damaged Panel for Painting
Wash your car and allow it to dry. If your car was recently cleaned, you can clean the panel you intend to work on, instead of the entire car. Next, apply masking tape to the edges of the panels adjacent to those you will be working on. This ensures you do not respray areas that have not suffered damage. Take care that the tape covers the panel gap but does not touch the panel you will be respraying.
Remove the Peeling Lacquer Coat
When done with the masking tape, use your scotch brite to rub off the blistered areas using light pressure. Rubbing the clear coat too aggressively may damage the paint coat underneath. Once the color coat is exposed avoid rubbing at it. If the scotch brite is not effective at removing the coat, use 1500-grit sandpaper.
You may need to go up or down in grit depending on the hardness of your clear coat. Do not get tempted to use a razor blade or other hard sharp surface to remove the clear coat. Doing so will create deep scratches in the layers underneath and make the repair job much harder.
Scuff Areas Adjacent to the Repair Site to Create a Blend Zone
Once the flakes of the peeling clear coat are removed, you must scuff the area thoroughly using 2000 grit wet sanding paper or scotch brite. The aim is to create a four-inch blend zone in every direction of the repair site. Use light pressure to scuff the blend zones in a tapered manner as you approach the areas adjacent to the repair zone.
Clean the Repair Site
Clean the blended repair area with water and isopropyl alcohol. Ensure there isn’t any dirt or debris left on the surface. Leave the surface to dry completely.
Mask Areas Adjacent to the Repair Site
Cover areas adjacent to the repair site using plastic foil, masking sheets, or paper towels. The area around the edge of the repair site needs special attention. Fold the masking paper such that it leaves a soft edge around the work area border. It makes it easier to blend the old and new clear coats.
Apply the Lacquer Clear Coat
Ensure you read the instructions on the can of the clear coat before beginning the application process. All manufacturers have clear instructions regarding how the hardener should be mixed in, the number of coats to be applied, the amount of flash time to wait in between coats, the distance between the spray nozzle and the surface, and how fast to move the can.
Failure to follow these precise instructions will affect the durability and appearance of your clear coat. In general, you should wear a protective respirator or face mask to avoid breathing in the substance. The can should be shaken for a few minutes before releasing the hardener and shaking once more.
Hold the can a couple of about eight inches from the surface and cover the repair site. Overlap the areas covered by the spray nozzle to ensure you get an even coating. Ensure you keep your hand moving and do not spray too much in one area.
A rule of thumb is to use a light flow of product to ensure that slow movement does not cause product buildup. The build-up is the last thing you want because it will cause the clear coat to blob, run or drip thereby ruining the finish.
When done applying the number of coats recommended, leave the car to dry off overnight.
Blending, Polishing, and Finishing
Once you clear coat hardens, remove the masking tape from the borders. Wet sand the border areas using light pressure and wet 2000-grit sandpaper. Once done blending the borders polish the area away from the clear coat to avoid peeling it back. Use the polishing machine carefully and do not apply any pressure beyond the machine’s weight.
Shining and Protecting
The final step is protecting your clear coat using a paint sealant or wax. Whichever product you select, ensure it is of high quality and applied with regard to the manufacturer’s instructions.
Conclusion
Repairing peeling lacquer is bound to cost you several hundred dollars whether you do it at home or depend on professionals. Whichever repair method you select, be sure to use high-quality materials and excellent craftsmanship.
- Can You Unmix Paint: Techniques, Consequences, Alternatives - February 23, 2024
- Does Primer Need to be Mixed? Effective Primer Application - February 22, 2024
- How to Make Old Paint Usable Again: Retrieving and Preserving Paint - February 21, 2024