You do not want your guests pulling up to an unsightly sidewalk, driveway, or garage floor. If you have just noticed that your concrete job has not been set correctly, you have every right to be frustrated. Whether you did the job yourself or hired a professional that did not measure up to your expectations, the best course of action is to correct the situation immediately.
We understand that a poorly executed concrete job is literally set in stone and can seem quite daunting to fix. But we have some good news! Do not let the unsightly concrete drive you up the wall just yet. Fixing the issue may be easier than you think. This article will highlight everything you need to know about repairing the problematic concrete job.
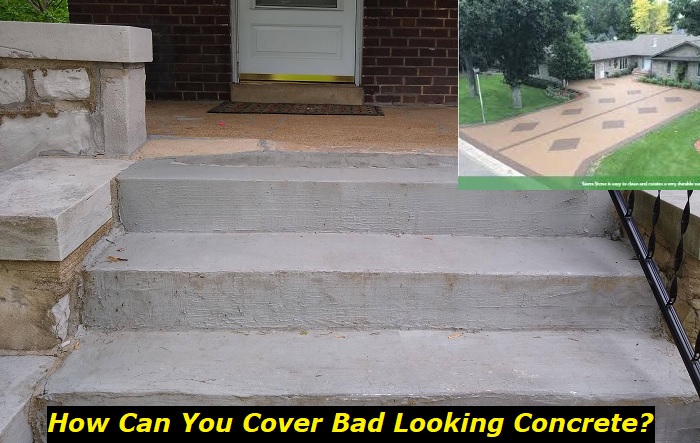
You can expect to learn more about:
- What likely went wrong with the original concrete job
- Various repair methods for unsightly concrete
- How to select the most suitable method for your specific concrete repair problem.
What Causes Unsightly Concrete
The most common reasons for an unsightly concrete job are all tied to poor workmanship. For the concrete to turn out perfectly, your contractors must have:
- Purchased high used high-quality materials that were transported and stored appropriately before their use.
- Mixed the materials, including water in the recommended proportions.
- Ensure the water used to mix the cement is free of salt and other contaminants.
- Practiced excellent workmanship when mixing and pouring the concrete
Common Signs and Causes of Unsightly Concrete
Unfortunately, many things can go wrong when pouring concrete. Whatever the problem, fixing it as soon as you notice it is the best way to avoid the damage increasing alongside the repair costs. At times, unsightly concrete may also indicate structural issues that could pose a physical threat to anyone on your property.
Hiring contractors that do not come highly recommended could result in one (or a combination) of the following eyesores:
- Cracking occurs due to insufficient curing, low-quality material, mixing materials in improper proportions, and failure to use contraction and expansion joints. Avoiding admixtures that contain calcium chloride neat trick to avoid cracking.
- Crazing refers to cracks that form in a spider weblike pattern. This unsightly finish is caused by insufficient curing, using excess water in the mixture, or high temperatures that rapidly harden the top surface before the layer beneath.
- Blistering is caused by air bubbles that are trapped beneath the surface. It is most commonly caused by excessive or insufficient vibration of the mixture and improper finishing techniques
- Delamination is like blistering, except more widespread. It is caused by the rapid hardening of the top layer and causes the entire layer to separate from the one underneath over time. It is caused by improper finishing techniques that create a cavity of water and air between the top and bottom surfaces.
- Dusting or chalking causes powdered concrete to chip away from the surface. This gradual disintegration is caused by mixing too much water into the surface. This can be avoided by using low-slump concrete, the correct amount of water, and using proper finishing techniques.
- Curling causes the edges of your concrete slab to move downward or upward, thus causing a bump or depression, usually in the center. This hazardous condition is caused by the temperature and moisture differences between the bottom and top of your concrete slab. It can be prevented by ensuring the use of control joints, using low-shrink concrete, and reinforcing the edges to ensure they do not shift position.
- Efflorescence causes white staining on concrete surfaces. It is caused by the use of impure water that is contaminated by soluble salts. It can be avoided by using pure water in the concrete mixture.
How to Fix Unsightly Concrete
The best repair method depends on the particular problem you seek to fix. Here are the three top repair methods:
1) Patching
This simple method involves applying a new layer of concrete over the damaged section. Patching is recommended for damage that is restricted to a small area.
2) Resurfacing
This method takes a lot more elbow grease than patching. You will need to grind away the old concrete before you apply a fresh layer. This method works best when repairing a large section of unsightly concrete. Though resurfacing will cost you more time, money, and effort compared to patching, it is guaranteed to produce better results.
3) Staining
Staining is a cosmetic repair option that only works to fix problems like efflorescence. It allows you to change (or in this case hide) the color of the concrete without having to add another layer on top (as in patching) or remove the flawed layer (for resurfacing).
Steps for Repairing the Unsightly Concrete
Whichever repair method you choose for your damaged concrete, you will need to follow these general steps.
1) Clean the Concrete Surface
Ensure you wear personal protective equipment before beginning the concrete repair job. A dust mask, gloves, and goggles will go a long way in ensuring you are not hurt by concrete debris and dust in the air. Knee pads will also come in handy to ensure that your knees do not suffer too much from the hard floor.
Next, use a hammer and chisel to ensure any damaged areas have square ends instead of rounded ones. Creating square edges all around the repair area is the best way to ensure the bonding material sticks properly to the edges.
When done squaring the repair area, sweep away the large chunks of concrete and use a shop vac to vacuum up the finer pieces of debris. Sweeping the smaller pieces of debris with a brush and dustpan will also do the trick.
Use water and a wire brush to thoroughly clean the repair area to allow better adhesion for the bonding material.
Now that you’re cleaning, read the instruction on your bonding agent to find out whether it should be applied on wet or dry concrete.
2) Apply the Bonding Agent
Using a paintbrush, apply a layer of bonding agent evenly on every part of the repair surface. Ensure the bonding agent is covering every part of the repair section before allowing it an hour to dry.
3) Mix the Mortar
As the bonding agent dries, begin mixing your repair mortar in a bucket. When buying mortar from the hardware store, ensure you select the type manufactured for repairing concrete. Pour the dry mortar into a bucket and mix it with the amount of water indicated on the packaging. Use your hands, an electric mixer, or a trowel to mix the water and mortar until it achieves a uniform consistency.
4) Pour the Mortar into the Repair Area
After mixing the mortar for the recommended amount of time and ensuring it acquires the desired consistency, you are now ready to repair the concrete. Pour the mortar onto the repair area using a trowel. Press the mortar into the area so that it covers every section of the repair area.
Once the mortar fills up the space and makes a small round mound, you should press it against the edges of the damaged region. Next, level the surface of the mortar by scraping the trowel lengthwise across the surface.
Identify the direction where the damage is longest and press the trowel on it while pulling towards you. Next scrape in the opposite direction and repeat the process until you are certain the mortar is level and densely packed.
Next, you will need to scrape the mortar onto the damaged edges horizontally to make it flush. Ensure there isn’t a disparity where the edges of the damaged area meet the rest of the concrete. Use a paint scraper or small trowel to repeat this step until the new mortar and old concrete are completely flush.
You might need to repeat this several times. Continue working around the mortar until it’s all even with the concrete.
5) Allow the Mortar to Dry
If your repair job was on concrete that is exposed to direct sunlight, be sure to cover it. Allowing the mortar to dry under direct sunlight will cause it to lose moisture and thus become brittle. A cardboard box will protect your wet mortar from drying unevenly. Ensure that the cardboard box or alternative covering does not come into direct contact with the mortar because it could get stuck.
Indoor mortar can dry without a covering unless it happens to be exposed to direct sunlight e.g. through a window. Ensure all windows are closed when your indoor mortar repair job dries. Whether indoors or outdoors, ensure your mortar has at least twenty-four hours of drying time before you attempt to walk on it. Ensure the repair area is blocked off from interference by children or pets.
Conclusion
Repairing damaged concrete is not a simple task. Determining the correct repair method is dependent on correctly identifying the problem and its cause. Unless you have a reasonable amount of DIY experience, it may be best to hire professional contractors who can guarantee that the job gets done right.
- Can You Unmix Paint: Techniques, Consequences, Alternatives - February 23, 2024
- Does Primer Need to be Mixed? Effective Primer Application - February 22, 2024
- How to Make Old Paint Usable Again: Retrieving and Preserving Paint - February 21, 2024
