Every home improvement enthusiast will eventually need to learn how to join wall tiles to floor tiles. While this process may not seem too difficult at a glance, there are a few things to keep in mind to make sure that the project is completed successfully. Mainly, you want to avoid any cracking that can occur when tiles are joined together.
That said, with a little bit of planning and the right materials, you can create a beautiful, seamless transition between your wall and floor tiles that will last for years to come.
Planning Your Project
Before you begin your project, it is important to take some time to plan everything out. This includes deciding on the type of tile you will use, as well as the color and size. You will also need to take measurements of the area where the tiles will be joined to make sure you have enough material.
Here is a quick guide on how to join the wall tiles to the floor tiles:
- Decide on the types of tiles you will use– This is probably the most important step in the process. You want to make sure that the tiles you select are of similar thickness. If not, one tile will sit higher or lower than the other, which can create an unsightly look and potentially cause cracking. In addition, it is also a good idea to use tiles made from the same material. This will help to create a cohesive look and make it easier to match the grout color.
- Choose the tile color and size– The next step is to decide on the tile color and size. Again, you want to make sure that the tiles are of similar thickness to avoid any issues with cracking. In addition, it is important to select a color that will complement the other tiles in the room.
- Take measurements– Once you have chosen the tiles, it is time to take measurements. This includes measuring the area where the tiles will be joined, as well as the width of the joint itself. It is important to be precise when taking measurements to avoid any issues when it comes time to install the tiles.
- Choose the grout color– The last step in the planning process is to choose the grout color. This is important because you want the grout to match the tile color as closely as possible. This will help to create a seamless look between the two materials.
The materials you will need
Before we start with the project, let’s do a quick rundown of what you will need.
- The tiles– Now this is an obvious one, isn’t it? You will need enough tiles to cover the entire area where you will be joining the wall tiles to the floor tiles. Make sure to choose tiles of similar thickness and material to avoid any issues.
- Grout– You will also need grout to fill in the joints between the tiles. Again, make sure to choose a color that closely matches the tile color.
- Spacers– Spacers are small plastic pieces that are used to create even joints between the tiles. They will be very useful for this project, so make sure to pick up a few at your local hardware store.
- Tile adhesive– Tile adhesive is used to attach the tiles to the wall or floor. Make sure to choose an adhesive that is appropriate for the type of tile you are using.
- A level– A level is a tool that is used to ensure that the tiles are installed evenly. This is especially important when joining wall tiles to floor tiles, as you want to avoid any cracking.
- A tape measure– A tape measure will be used to take accurate measurements of the area where the tiles will be installed.
- A wet saw– A wet saw is a power tool that is used to cut tiles.
- A notched trowel– A notched trowel is used to spread the tile adhesive onto the surface. The size of the notch will depend on the size of the tile you are using.
- A sponge– A sponge is used to clean up any excess grout or adhesive.
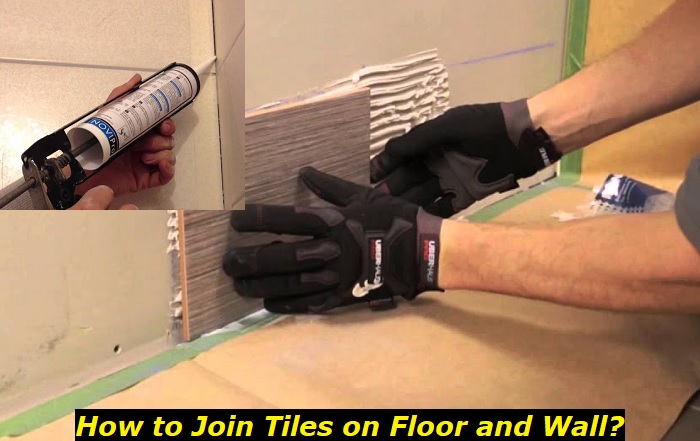
Installing the Tiles
Now that you have planned everything out, it is time to install the tiles. This process is relatively straightforward, but there are a few things to keep in mind to avoid any issues.
Here are a few tips on how to install wall tiles to floor tiles:
- Use a level– The first step is to use a level to make sure the tiles are completely level. This is important because it will help to prevent any cracking that can occur when tiles are installed on an uneven surface.
- Apply adhesive– The next step is to apply adhesive to the back of the tiles. This will help to hold the tiles in place. When choosing the tile adhesive, make sure to pay attention to details such as the thickness of the tile and the type of surface you are attaching the tile to.
- Use spacers– Once the adhesive has been applied, it is time to use spacers to create even joints between the tiles. Spacers are small plastic pieces that can be found at your local hardware store. When applying, just hold the spacer in place and press the tiles together.
- Use a wet saw if needed– If you need to cut any of the tiles, it is best to use a wet saw. This is a power tool that can be rented from your local hardware store. Just make sure to wear safety goggles when using it.
- Place the tiles– Once the adhesive is applied, it is time to place the tiles. Here, you will want to pay specific attention to the joint between the wall and floor tiles. Make sure that the joint is even and there are no gaps.
- Let the adhesive dry– After the tiles are in place, it is important to let the adhesive dry completely. This usually takes about 6 to 7 hours, but it is best to check the manufacturer’s instructions to be sure.
- Apply grout– Even though the adhesive might already be dry to the touch, you will want to give it some extra time before grouting the tiles. This is because grout can cause the adhesive to loosen. Wait at least 24 hours before applying the grout. When applying the grout, make sure to use a wet sponge to clean up any excess. You will also want to pay attention to the joints between the tiles to make sure that they are all filled in.
- Let the grout dry– Just like with the adhesive, you will want to let the grout dry completely before using the area. This usually takes about 24 to 72 hours.
- Examine the project visually and take pictures– Once the grout is dry, you can take a step back and examine your work. If everything looks good, then you are finished! Otherwise, you might need to go back and touch up some areas.
Final words
Joining wall tiles with floor tiles is a relatively straightforward task. As long as you take your time and use the proper tools, you should have no problem creating a professional-looking finish. Just make sure to follow the tips outlined in this article and you will be well on your way to success!
- Can You Unmix Paint: Techniques, Consequences, Alternatives - February 23, 2024
- Does Primer Need to be Mixed? Effective Primer Application - February 22, 2024
- How to Make Old Paint Usable Again: Retrieving and Preserving Paint - February 21, 2024


