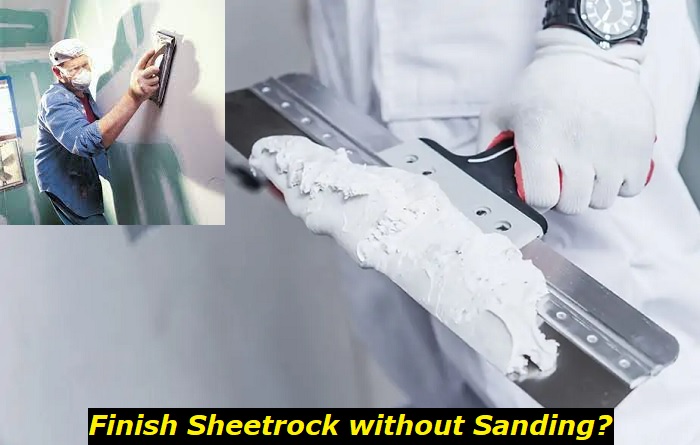
Sheetrock is a vital component of any home, and looks great when finished. But getting it smooth and ready for paint can be a dusty and dangerous process. Is there a way to finish sheetrock without machine dry sanding the dried sheetrock?
Sheetrock can be finished without sanding by using a wet sheetrock sponge. This process is a bit more like gentle rubbing than sanding, and will greatly reduce if not eliminate the dust in the air that would accumulate with mechanized dry sanding. There are a few tips and tricks to keep in mind, though, and this process does require some patience and care.
Keep reading to learn more about how to wet sand sheetrock, the benefits this process offers, and how to make your next sheetrock sanding project simple and mess-free.
Why Avoid Sanding Sheetrock?
While dry sanding sheetrock can lend some very smooth and beautiful results, the amount of dust generated is considerable. This can be a terrible inconvenience to clean up, as the dust gets everywhere, and is easily breathed in if you’re not careful.
People with breathing problems, asthma, or dust allergies can find this especially problematic and even dangerous. For this reason, many do-it-yourselfers may hunt for a less messy way to finish sheetrock, one that generates less dust and is a bit safer.
Dry sanding with a machine or a buffer is far faster, but the noise is considerable. For those with sensitive ears or sensitive neighbors, the excessive noise caused by an electric sander can make it a less-than-optimal choice. Is there a way to cut back on dust, cut back on noise, and save some electricity, too?
Can You Wet Sand Sheetrock?
Yes, wet sanding sheetrock is entirely possible, and is one of the preferred ways to finish sheetrock minus the extra dust. This method involves simply wetting a special sponge called a sheetrock or drywall sponge and gently rubbing down the surface to be sanded.
Once your sheetrock is completely dry (this should take about 24 hours), it is safe to wet sand. While some manufacturers claim that their product will dry within a couple of hours, it’s safest to allow 24 hours for the material to fully dry and to set, as well as to settle.
Wet sanding sheetrock is a very easy and dust-free process, and many people prefer it over dry sanding, simply because cleanup is very simple, and the process is safer for those with respiratory sensitivities. It’s also far less noisy than mechanized dry sanding, so you’ll save your ears, save your lungs, and use simple products to get the job done.
What Tools Will You Need?
The tools needed for wet sanding are minimal, and easy for anyone to use, with or without experience. To wet sand sheetrock, you’ll need:
- a special sheetrock sponge with a smooth side and an abrasive side
- a bucket
- clean, warm water
- a layer of cardboard or cloth for the floor beneath your wet sanding job
- and that’s it! Just fill up your bucket with water, place your protective material (cardboard or cloth) under your project, and begin your wet sanding.
The sheetrock sponge can tend to dry out rather ready, so don’t over-wring it after submerging it in water. Keep the sheetrock sponge moderately damp but not dripping and you’ll have a much easier time, and save water, too.
Use the Abrasive Sponge Side First
When using your sheetrock sponge, you’ll want to use the abrasive side first, to smooth out any noticeable high spots on the sheetrock. Work your sponge with moderate pressure, and use this step to zero in only on the bumps and peaks in the sheetrock, not to sand the entire area.
Don’t press in too hard, just hard enough to wear down the bumps and nubs that can be felt. Sheetrock is rather delicate, and can begin to melt away or require repair if wet-sanded too hard.
Use the Smooth Side Next
Next, switch to the smooth side of your sheetrock sponge. This side will be used to simply smooth down the rest of the wall and help even out any less noticeable roughness. Work from the center outward with broad swipes and gentle pressure.
When you begin to feel the sponge working less effectively, wet it again, and continue working in the same fashion. Keep in mind, this process will take longer than dry sanding, so be patient. You’ll need multiple passes, and when you feel your sheetrock sponge begin to drag, simply re-wet it, and continue smoothing.
Then you can sit back and let your sheetrock dry. Once dry, you can inspect it for any remaining imperfections, and work on those as needed. If you notice any weakening or disintegration of the sheetrock, you can re-plaster those areas, and allow them to dry at this time.
Sheetrock Sponge on Large Areas
The only thing to keep in mind here is that you’ll have the most success if you work in sections. Smooth out smaller areas of sheetrock patch by patch, working on about a three-foot by three-foot space at a time.
This will allow you to fully smooth each area before moving on to the next part of the surface you’re wet sanding. Larger projects will need more water, so keep an eye on the quality of watering your bucket.
Change Your Water
Depending on the areas you’re working on, you may need to change out your water. Some of the sodden drywall dust from the wall will work its way onto the sponge and into the water every time the sponge is re-submerged.
You’ll likely notice your water becoming cloudy, like watered-down milk. Go ahead and dump out the old water, and refill it with clean, warm water. This is especially significant if you’re working in a larger area.
Sheetrock Sponge and Water on Small Repairs
For wet sanding very small repair areas, the same principles apply. If the area you’re working in is quite small, you can typically smooth out the drywall perfectly using only a putty knife, and skip the abrasive side altogether.
Once the compound has been worked in and smoothed over with the putty knife and is completely dry, you can begin wet sanding with the smooth side. Continue wet sanding gently, back and forth, until the dried sheetrock is completely smooth.
You’ll notice some smudging of the drywall over the surrounding paint as you work, and this is completely normal. Just go ahead and paint over this smudged drywall once everything is dry, and it’ll look fine.
Texture Differences
If you’re going to wet sand your sheet rock, be aware that this process may leave your walls with a very gentle wave pattern, as opposed to the much smoother look of dry sanding.
This light texture is going to be less noticeable once the walls are painted, but it is something to be aware of. Also, wet sanding too vigorously can actually wear away excessive amounts of sheetrock. So, while you want to give each area a good wet sanding, don’t stay too long on any one area, or you risk having to redo some of the sheetrock.
Just keep a careful eye on the section you’re wet sanding and move on to another area once the job looks smooth and paintable. Feel free to carefully use your hands to determine texture and finish before moving on to the next section of the wall.
Time Considerations
Wet sanding sheetrock is a much less messy process, but it does take quite a bit of time. This is especially true of smoothing down the job with the soft side of the sponge.
At first, it may not seem as though anything is really happening. But keep at it, as wearing down sheetrock with moisture does take some extra time. Re-wet your sponge when you feel it getting a bit heavy or cumbersome and continue working carefully until the area is completely smooth.
Inspect your work as you go, and make sure to keep your sponge damp, but not sopping. Too much moisture will wear away your sheetrock.
Conclusion
The best way to finish sheetrock without sanding is with a damp sponge and warm, clean water. Use a sheetrock sponge with an abrasive side and a smooth side. Use the abrasive side to wear down any noticeable bumps, and use the smooth side to work the sheetrock completely smooth.
This method significantly cuts down on dust and noise but does take some time and patience, so give yourself ample time to work. Use gently to moderate pressure as you go, and be aware that too much sanding can melt your sheetrock a bit, so be careful.
Wet sanding sheetrock can cause slight texture variation in the sheetrock, and you may have to change out your water if it gets cloudy. This process will take a considerable amount of water, so protect the floor with cardboard or cloth beneath the area you’re working on.
- Can You Unmix Paint: Techniques, Consequences, Alternatives - February 23, 2024
- Does Primer Need to be Mixed? Effective Primer Application - February 22, 2024
- How to Make Old Paint Usable Again: Retrieving and Preserving Paint - February 21, 2024


