Half walls are helpful ways to add greater dimensionality and personality to a room or to separate spaces in a home. They need to be stable, however, and building them on a concrete floor surface can be a bit tricky. So, what is the best way to stabilize a half wall on a concrete floor?
The best way to stabilize a half wall on a concrete floor is with masonry nails (or screws) and adhesive, or with masonry nails or screws alone. Both of these elements will work together to stabilize the half wall, drill and secure it neatly into the concrete, and keep the half wall from shifting on the floor.
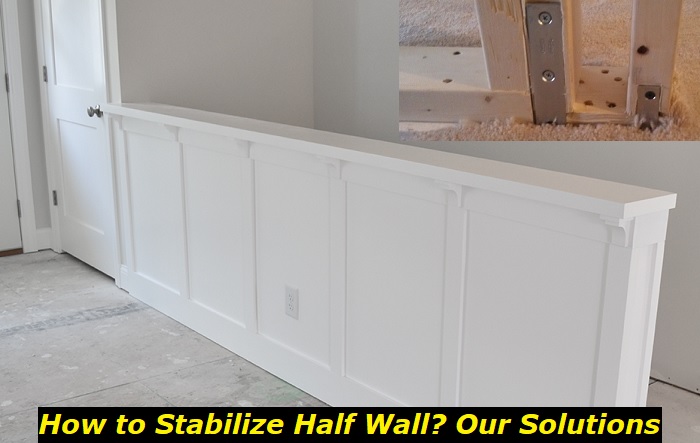
Keep reading to learn more about the process of stabilizing a half wall on a concrete floor, and to learn about all the materials you’ll need for this project.
What is a Half Wall?
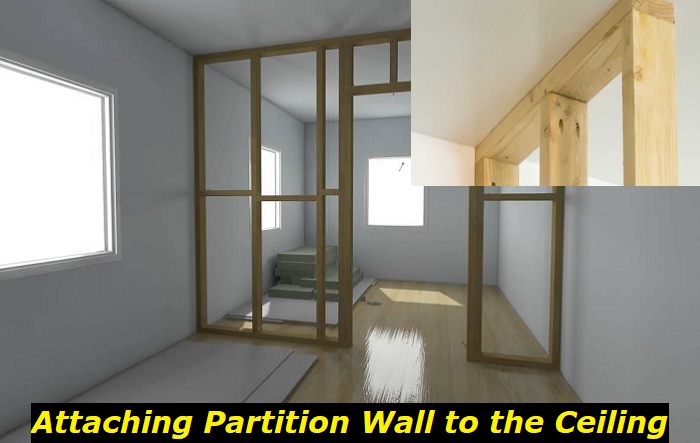
A half wall is a wall that is secured to the main interior structure of the house but only comes up about waist-high. Half walls can be used to separate spaces while maintaining a visual connection from one room to another.
For example, you might see a half wall used to separate the kitchen area from the dining area. This helps to separate the two spaces while allowing the person in the kitchen to see into the dining room and vice versa.
What Are Half Walls Built Of?
The basic structure of the half wall is wood. The skeleton of your half wall, or its frame, is the treated and untreated lumber within which electrical work can be placed and over which drywall plaster is applied for a finished look.
Your half wall is going to need to be a stable and safe part of the room, and securing it tightly on both sides is a top priority. Let’s go through every aspect of securing the half wall over concrete.
1) Chalk
Your first step is going to be to draw out the position of your future half wall on the concrete floor. Specifically, you’ll want to carefully draw the future positioning of the bottom lumber piece that will form the base of your half wall.
Use a measuring rod to ensure that your lines are straight, and make sure that your chalk lines are positioned in front of a wall stud. This will make the sides of your half wall far easier to nail in from the side and provide your finished project with proper stability.
2) Safety Equipment
While not a part of the project itself, things are going to get loud, and a bit dusty. You’ll want hearing protection and eye protection in the form of work goggles before you start any drilling.
A painter’s mask is also recommended to help you avoid breathing in any concrete dust as you work. We recommend a proper mask from the hardware department, not a flimsy bandana or a cloth. Filtering out fine particles is what we’re after here. Once you’ve got those on, we can get down to the hardware.
3) Mark Your Lumber and Drill
Determine where you’d like to put your nails through on your lumber. This will help you work quicker, and eliminate mistakes along the way. Chalk your hardware spacings and make sure the lumber is properly aligned flush with the wall studs, as you’ll be nailing in the sides of the half wall, too.
Now, you get to fasten your wood beam to your concrete floor. Just line up your nails or screws over your chalk markings, and work safely. There are a few different hardware and power tool options to choose from here, and we’ll go over each one below.
4) Concrete Nails
Concrete nails are made of high-carbon hardened steel and are shaped and forged in such a way that makes them ideal for hammering into concrete. They’re ideal for securing something softer, such as wood, into the stone-like density of concrete.
They also tend to resist bending or cracking better than traditional nails and hold up well in tough conditions. You can technically drive concrete nails in by hand, but we don’t recommend it. We feel you’ll get a much smoother and better bond if you use a concrete nail gun, which is the next item on our list.
5) Concrete Nail Gun
The concrete nail gun is your friend. It’s going to help you get a clean, smooth-nailing job every time, and save you a ton of physical labor as well as time. It’s also going to be remarkably loud, so you’ll need your ear protection, as well as your eye protection and face mask.
There are a few options that you can use here. One is a “powder nailer” that uses a combination of gunpowder and the kinetic energy of an actual hammer to get a nail through concrete. Load the nail first, then the cartridge, and never point the powder nailer at people. You’ll have to exert a pretty intense amount of force on the nailer with your hammer, so if you’re a bit weaker, a power tool would be best.
Powered options like rotary hammers and the “hammer” setting on your electric drill can do the trick, too. Just be safe and careful as you work. You’ll use up less physical energy this way, too, and have more stamina for the rest of the project.
6) Masonry Screws
Masonry screws, also known as concrete screws, are another great option that can help secure your half wall to concrete. They’re made of carbonized steel and are specialized for securing items to concrete. They work just as well as concrete nails.
Choose a screw that is 1.5 inches longer than the thickness of the lumber, to make sure it secures well into the floor. You’ll need a power tool for these, too.
7) Masonry Screw Drill Bit
This will be your tool of choice to screw in your masonry screws through the wood. You’ll need to upgrade from a regular screw drill bit thanks to the toughness of the concrete and the difficult time that regular drill bits can have with tougher materials. Make sure your drill bit has a carbide tip and is in good condition.
Follow all typical precautions with safety, and make sure your ears, eyes, nose, and mouth are protected. A hammer drill will also work well with masonry screws, as it is especially tough and rugged.
8) Adhesive Plus Hardware
Can you use hardware and an adhesive? Yes, absolutely. You’ll want to lay down the adhesive first in an undulating ribbon pattern on the base of your lumber.
Epoxy glue is best here, and you’ll want to wait 72 hours for it to fully cure before screwing or nailing in the wood. Keep the lumber still and secured in place while the epoxy glue cures, and then feel free to use hardware to secure it further.
9) Nails for the Wall
You’re going to want to make sure that your half wall is properly secured to the main walls of the room. This will give your half wall added stability from the side, and help it wobble less as a whole.
Nailing into the wall studs is going to be the smartest way to do this. Make sure that you complete this process when the half wall is still essentially just a frame, and before the plaster and paint are applied.
Locating the studs in your wall and securing the half wall’s side to these studs will require a simple hammer or screw job, and can be finished in minutes. It’s a very simple but necessary step and will enhance the solidity of the structure from all sides.
Things to Avoid
So, what do you want to avoid when stabilizing your half wall on a concrete floor? First of all, you’ll want to avoid using the wrong hardware and the wrong adhesive. If your hardware is not specifically built for use in concrete or stone work, it won’t do.
Another thing to keep in mind is that adhesive alone won’t do if you’re seeking to secure lumber to concrete. Even for a half wall, you’ll want to use a combination of hardware and adhesive to secure the bond and increase stability.
Another tip is to make sure your wood is completely dry before using an adhesive or drilling. This will help reduce water damage, mold, or an insecure bond.
Conclusion
To secure a half wall to concrete you’ll need specialized hardware, such as masonry screws or concrete nails. You’ll also need specialized tools such as an electric drill or a powder nailer to drive the hardware in. Chalk will mark out the base of your half wall, and nails will secure your project to the studs of the main wall.
Make sure that your nose, mouth, ears, and eyes are properly protected before beginning. Avoid working with wood or concrete that is damp, and begin and complete your project in a low-moisture environment. Adhesive can be used in conjunction with hardware, but not by itself. Allow all adhesive to cure at least 72 hours before drilling or nailing.
- Can You Unmix Paint: Techniques, Consequences, Alternatives - February 23, 2024
- Does Primer Need to be Mixed? Effective Primer Application - February 22, 2024
- How to Make Old Paint Usable Again: Retrieving and Preserving Paint - February 21, 2024
