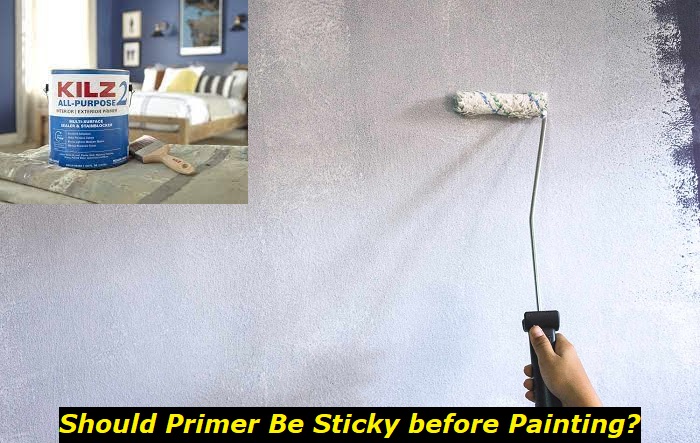
Priming is an essential preparatory step to getting a proper painting job done. Not only does it smoothen the surface and make it uniform, but it also protects it, hides imperfections, improves paint adhesion, and makes it more durable. However, whether or not a primer is supposed to be sticky is a question that is frequently asked.
Primers are made of synthetic resins, solvents, pigments, and additives. However, they contain more resins or binders than pigments, which can make them quite sticky, especially when wet. This stickiness allows them to grab on surfaces and bind well with paints.
While some manufacturers explicitly state that their primer might stay a tad sticky when dry, not all primers are supposed to. For primers intended to remain sticky when dry, you need not worry about the stickiness. You can apply the paint after waiting for the appropriate drying time.
In the rest of this article, we will discuss the causes for concern about sticky primers, how to fix excessively sticky primers and tips that will make your painting process more hassle-free.
When Should You Be Concerned About A Sticky Primer Situation
Primers are typically sticky when wet due to the high content of resins in them, but some brands become non-sticky as soon as they dry. However, as we said earlier, some primers are intentionally designed to remain slightly tacky when dry.
Therefore, it is important to read the product labels or contact the manufacturer to gain clarity about the properties of the primer brand you are using. It might also help to stick with a brand you are familiar with.
So, when should you be concerned about sticky primer? The stickiness of a primer can become a cause for concern when it does not conform to the drying time declared by the manufacturer. Also, if it does not conform to its property as stated by the manufacturer.
For instance, if, according to the manufacturer, the primer should be non-sticky when dry, but you find yourself in the opposite situation, that is a good reason for concern. Another reason is if the sticky primer is very gooey and prone to smearing.
Factors That Determine The Drying Time Of Primers
Although all primers have a recommended drying time, some factors might prevent them from drying as they should. Thereby making the primer excessively sticky. These factors are:
- The type of surface primed
- The type of primer used
- Environmental factors
The type of surface primed
Different surfaces, such as plastic, wood, metal, drywall, etc., all react to primer differently and, as such, can have varying drying times. Typically, drywalls dry quicker, followed by wood, plastic, and metal. Nonetheless, it is vital to use a primer that is suitable for the surface.
For instance, when choosing a primer for plastic, you must ensure that its solvent will not make the plastic warp or leach the volatile chemicals in it. Using unsuitable spray primers for plastics can make the primer excessively sticky or extend its drying time.
The type of primer used
Primers are categorized into different types based on two factors:
- The solvent used in making them
- Their mode of application
Primers are made from different solvents, so they have different properties, which determines their stickiness and drying time. There are mainly three types of primers based on the solvent used in making them, they are:
- Oil-based primers
- Water-based primers
- Shellac primers
1) Oil-based primers
These types of primers use oil as their solvent. Oil-based primers are water-resistant, making them suitable for sealing surfaces prone to water damage, such as wood and metals. They are also suitable for sealing surface stains like wood tannins, preventing them from staining the paint layered atop the primer.
Oil-based primers take longer to dry than other primers. Ideally, they become dry in 30 minutes to a couple of hours. However, you might need to wait up to eight hours before applying paint over the primer.
They are compatible with oil-based and water-based paints. However, oil-based primers release toxic fumes, which makes them environmentally unfriendly.
2) Water-based primers
As their name implies, these primers use water as their solvent. Water-based primers are also known as latex primers. They are used on surfaces like plastered walls, ceilings, and furniture.
Due to their water content, they are unsuitable for use on surfaces susceptible to corrosion. And because water is their base, they tend to dry quickly as soon as it evaporates. Typically, water-based primers become dry to the touch between 30 minutes and 1 hour.
However, you might need to let it cure for up to 2 hours before painting. These primers are environmentally friendly because they do not emit harmful fumes like other primer types. Water-based primers are compatible with latex and acrylic paints.
3) Shellac primers
These types of primers are made by suspending shellac in denatured alcohol. The resulting mixture serves as a primer for wood, metal, plastered walls, glass, and plastic.
Shellac primers have an excellent adhesive property, which enables them to work well on high-glossy surfaces like glass. It also makes them work well as surface sealants as well as stain and odor blockers. Due to their excellent adhesive property, shellac primers tend to be stickier than other primers.
Similar to water-based primers, shellac primers dry very quickly because the alcohol in the mixture evaporates fast, leaving behind the hard coat of shellac on the surface. Typically, shellac primers dry within 30 minutes to 1 hour.
These primers are compatible with latex or oil-based paints. However, one caveat with shellac primers is that they emit harmful VOCs (volatile organic compounds).
Types of primers based on their mode of application
How primers are applied to the surface can affect their drying time and stickiness. Primers are categorized into two types based on their mode of application, namely:
- Spray primers
- Brush-on primers
1) Spray primers
As the name suggests, these primers are sprayed onto the surface. They typically come in compressed cans, which are shaken before use.
Ideally, spray primers dry pretty fast. However, failure to shake the can properly before application can slow down the drying process of the primer or make it excessively sticky. With spray primers, getting an even coverage and airbrush effect is easier without applying the primer in thick layers.
However, this method of primer application tends to result in product wastage, is less suitable for indoor use, and is generally not environmentally friendly.
2) Brush-on primers
These types of primers are applied to surfaces using a suitable paintbrush. They usually take longer to apply, especially on large surfaces. It is also relatively easier to apply too-thick layers of primer when using a brush, which can slow down the drying time of the primer.
However, brush-on primers work well at minimizing product wastage, are safer for indoor use, and are less hazardous to the environment.
Environmental factors
Another factor that determines the drying time of primers or how sticky they can get is environmental conditions. High humidity and low temperatures can extend the drying time of primers and make them excessively sticky.
Lack of proper ventilation is another cause of the extended drying time of primers. Proper ventilation not only improves the drying time of primers and curbs excessive stickiness, but it also eliminates harmful fumes.
How to make primer dry faster
It is important to let the primer dry before proceeding to paint. Hence, it is crucial to wait for the required drying time as instructed by the manufacturer. If your primer takes longer to dry due to environmental conditions or other factors, it might help to wait for some additional time.
Here are some helpful tips that can help your primer dry even faster:
- Ensure proper ventilation by opening the windows and doors of your project area.
- Increase air circulation by turning on fans and air conditioners.
- Use a dehumidifier to reduce the humidity of your project area.
- Turn on the heater to increase the temperature. You can also use a hand dryer to blow over the excessively wet or sticky primer areas.
Painting Tips
Here are some helpful tips that can make each step in your painting process, from preparation to finish, seamless:
- Although priming is one of the steps to get the best painting result, it is not the first. The first step to take when preparing a surface for painting is to start by sanding the surface with 150-grit sandpaper before applying primer.
- Test the primer and paint on an inconspicuous area of the surface.
- Use protective gear and work in a well-ventilated area.
- Keep primers and paints away from the flame.
- Wait for the optimal time between primer coats, priming-painting, and painting coats.
- When using spray primers and paints in extremely cold conditioners, it can help to shake them rigorously before application. You can also dunk them in warm water to warm the can before shaking and spraying.
- Using a matching primer and paint color can reduce the paint needed.
- Ensure compatibility between primer and paint.
- Can You Unmix Paint: Techniques, Consequences, Alternatives - February 23, 2024
- Does Primer Need to be Mixed? Effective Primer Application - February 22, 2024
- How to Make Old Paint Usable Again: Retrieving and Preserving Paint - February 21, 2024


