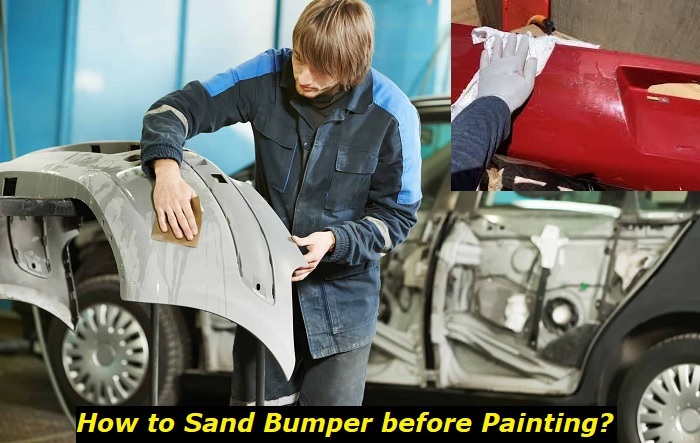
Do you want to change the outlook of your automobile and you need help on how to sand the plastic bumper cover for painting? The secret to getting a smooth expert finish when painting a plastic bumper cover is appropriate surface preparation. One of which requires that the surface be sanded properly in order to create the perfect surface for paint adherence.

In six simple steps, here is how to sand a plastic bumper cover in preparation for painting:
- Remove the bumper cover or mask off surrounding areas.
- Clean the bumper cover and leave it to dry.
- Wet sand the surface with 400-grit sandpaper.
- Repair surface imperfections.
- Wet sand using a finer 800-grit sandpaper.
- Clean the surface and let it dry.
Bumper covers are quite vulnerable to scratches due to their location and plastic construction. Hence, you might find the need to repaint them once in a while so your car continues to look its best. In the rest of this article, we will walk you through the processes involved in sanding your plastic bumper cover for painting in more detail.
Removing the bumper cover or masking off surrounding areas
The decision to remove the bumper cover or simply mask off surrounding areas before proceeding with the surface preparation depends on some factors. These factors include:
- Your level of expertise
- Reachability of your vehicle’s bumper
- The degree of imperfections on the bumper cover
Level of expertise
Your level of expertise should be taken into account when deciding whether or not to remove the bumper cover for sanding and painting. It is easier for a car repair expert to quickly achieve a professional result without the need to remove the bumper cover. However, if you are not an expert, taking off the bumper cover can improve efficiency and the outcome.
Reachability of the bumper
Considering the position of your vehicle’s bumper, you can decide to remove the cover and then put it on a work table to sand and paint. Doing so will make it easier to access the edges and achieve a thorough prepping and painting job.
However, if you don’t want to go through the process of removing the bumper cover you can raise the car with a jack stand. Therefore, making it more convenient to reach the bumper cover without straining your back from too much bending.
The degree of imperfections on the bumper cover
If the damages on the bumper cover are limited to surface scratches and slight dents, you can easily sand and paint it without removing it. However, if there is severe structural damage on the surface, you need to remove it to repair the imperfection.
Cleaning and drying the bumper cover
The next step in prepping the bumper cover’s surface is to clean and dry it. To clean the surface, you can use mild soap on a damp washcloth to remove dirt and grease. Afterward, you need to rinse the surface with clean water.
Finally, use a soft clean cloth to dry the bumper cover and give it some minutes to air dry.
Sanding the bumper cover with 400-grit sandpaper
The next step in prepping your bumper cover for painting is sanding to remove old paint and smoothen the surface. Sandpapers come in different grit sizes determined by how coarse or fine they are. But, because bumper covers are plastic-built, it is required to use fine grit sandpaper.
Hence, we will start the sanding process with 400-grit sandpaper. Here are a few points to note when sanding:
- It is recommended to move in a back-and-forth motion
- Wet sand and rinse
Best sanding technique – Back-and-forth motion
Generally, it is recommended to sand the surface using a back-and-forth motion instead of a circular motion in order to achieve the best result. Here is why:
- Better control and precision
- Minimizes scratches
- Consistency
- Maintains shape
1) Better control and precision
With a back-and-forth motion, it is easier to sand the surface bit by bit while controlling the amount of pressure applied. Also, it ensures that you do not over-sand a specific spot more than the others. Thereby, making it easier to create a leveled surface.
2) Minimizes scratches
Sanding in a circular motion will cause swirl patterns which may be more difficult to smoothen. Using a back-and-forth sanding technique will lower the possibility of these visible scratches.
3) Consistency
To achieve a smooth finish, you need to keep the sanding process consistent across the surface. Meanwhile, it is easier to maintain a uniform sanding pattern when you move in a back-and-forth motion instead of a circular motion.
4) Maintains shape
Using a circular sanding motion can alter the contours and shape of the bumper cover. However, with a back-and-forth motion, you can easily achieve a smooth sanded surface while maintaining the bumper cover’s original shape.
Wet sanding and rinsing
It is recommended to wet sand the bumper cover’s surface rather than dry sand. This will help achieve a more polished finish without sanding out too much of the plastic material. To wet sand, you need to soak the sandpaper in water.
Then, use a spray bottle wet to wet the surface or simply pour water on it. Throughout the process of sanding, it is important to keep the sandpaper and bumper cover’s surface wet. It is also required to frequently rinse the surface and sandpaper with water to avoid clogging.
Repairing bumper cover imperfections
The first process of sanding might be sufficient to get rid of imperfections like shallow scratches on the bumper cover. However, for deeper imperfections like dents, cracks, gouges, and deeper scratches, you might need to do more in order to return your car to its former glory. Here are some things you can do to get your car bumper cover back in perfect shape:
- Use a filler
- Heat the bumper cover and reshape
Using a filler
To choose the right filler for your bumper cover, you need to know the type of plastic that it is made from. The different types of plastics used in designing vehicle bumper covers include:
- PP (polypropylene)
- PPO (polyphenylene oxide)
- TPE (thermoplastic elastomer)
- PUR (polyurethane plastic rigid)
- TPUR (thermoplastic polyurethane elastomer)
You can easily identify the type of plastic your bumper cover is made of by removing it from the car and checking the stamp on the back. Consequently, choose a filler that is suitable for your bumper cover’s plastic type. Because fillers can emit dangerous fumes, it is recommended to apply them in a well-ventilated area.
When all is set, apply the filler using the steps below:
- Firstly, apply an adhesion promoter to make the filler stick to the plastic bumper cover better.
- Then, mix the filler and hardener following the instruction on the products.
- Use a plastic applicator to apply the mixture in the affected area, start from the center, and gently blend the filler into the surrounding areas.
- Apply the filler in layers, letting each layer completely harden before adding another layer. Read the instruction on the products for the required drying time.
- When the dent is filled and the fillers cured, use the 400-grit sandpaper to sand the filled area until it blends with the rest of the surface.
Heating and reshaping
Sometimes the bumper cover’s shape is deformed and it requires reshaping before it returns to its normal state. Heating the plastic cover will make it more malleable and easy to reshape. The heating method can be used to recover deep dents and bulges on the bumper cover’s surface.
Here is how to heat and reshape damaged bumper covers:
- Use a heat gun to apply heat gently on the affected area. Caution must be taken in order not to overheat the plastic as this can result in more damage.
- When the plastic is pliable use a suitable tool to mould or push the plastic back into shape.
- Then, let the plastic cool.
- You can go over the heat-treated area with the 400-grit sandpaper to level and smoothen it with the surrounding areas.
Wet sanding with a finer 800-grit sandpaper
After all imperfections on the bumper cover have been repaired, the next step is to wet sand the entire surface with a finer 800-grit sandpaper. This will give the surface the final smooth finish in readiness for the paint application.
Remember to keep the sandpaper and bumper cover surface wet while sanding. Additionally, it is important to rinse the surface frequently to avoid clogging.
Clean the surface
Finally, clean the surface by rinsing off all residues and giving it ample time to dry before proceeding to apply an adhesion promoter and paint thereafter.
How long does it take to sand a bumper cover for painting
Restoring the beauty of a bumper cover requires proper surface preparation. Hence, this can take anywhere between a few hours or a day. A number of factors should be taken into account to specifically determine how long the process can take.
These factors include your speed of work and the severity of damage on the bumper covers especially when considering the drying time needed for each layer of filler. Therefore, it is recommended to take your time. Work at your own pace while focusing on achieving a smooth professional finish in readiness for paint application.
- Can You Unmix Paint: Techniques, Consequences, Alternatives - February 23, 2024
- Does Primer Need to be Mixed? Effective Primer Application - February 22, 2024
- How to Make Old Paint Usable Again: Retrieving and Preserving Paint - February 21, 2024


