A house is probably the most expensive asset you will buy in your lifetime, so it is important to keep it maintained, and fix and upgrade it from time to time. If you do this upkeep when your property first starts showing signs of wear and tear, you can save the money, time, and effort it would take to do it when your house starts to fall around you.
One of the easy enough maintenance you can do yourself is to clean up the mortar around the bricks of your walls. This serves to strengthen your masonry and give it a seasoned look.
A Good Cleaning
Before jumping ahead to the use of lightening products on the mortar between your bricks, give the wall a good cleaning. A high-pressure hose may be useful to get remove dirt and grime between the bricks. Ensure that you wash at the right pressure and angle to not damage the existing mortar.
Examine the wall for signs of stains from mold or water damage that may be evident when the wall is clean. These will need to be remedied before cosmetic alterations can be made else you will end up with the same issue again.
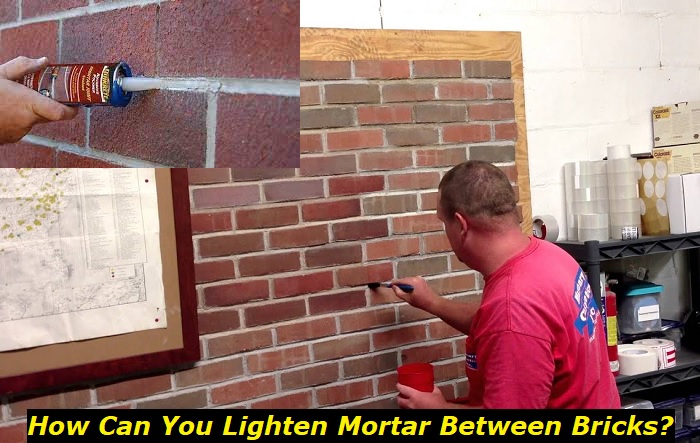
Lightening The Mortar
There are various ways to lighten mortar between bricks for repairs which will not cost you an arm and a leg. These include mixing new thickeners with existing mortar, using a clay bar, or patching and repainting with a lighter mortar mix.
Other products you can try are titanium dioxide or another white pigment. Your first job is to remove any clumps of old mortar that may be stuck on the surface, clean it with a damp cloth, and then roughen the surface of the mortar by running a small chisel over the surface.
Using Kitchen Supplies
Before spending large amounts of money buying commercially made lightening tints and pigments, there are a few products that you can use directly out of your pantry or supply cupboard.
Equal parts of hydrogen peroxide and water may be applied using a spray bottle. Be sure to wipe off any excess liquid from the bricks to avoid splash marks. After a few minutes, scrub the mortar with a stiff brush. Repeat until the desired color is obtained. Baking soda and water made into a thick paste and applied to the motor will also help to lighten it if it is not too old and discolored.
If you think that your mortar job may need more than kitchen supplies it is always wise to consult with a mason or building expert, who will give you the information you will need to do a professional-looking job.
Mixing New Thickener
If these handy household hints do not work, you may have to resort to something stronger.
The purpose of roughening the mortar around the bricks is to allow the new thickener and existing mortar an opportunity to bind by allowing the thickener to penetrate the brick.
To do this correctly take note of the following points:
- Mix the new thickener with the existing mortar thoroughly. Break up any lumps and ensure the mixture is not too thin.
- Distribute the thickener/mortar paste evenly over the full surface of the brick.
Using Muriatic Acid
This method is only used when very little lightning is required. Ensure that you wear gloves and eye protection when working with acid. Use a 10% solution and apply with a small brush. The acid is mild and should not affect the brick as long as you don’t leave it on for longer than about 5 minutes or until it stops fizzing.
Rinse the area with water and leave it to dry. This process can be repeated in a few days if the desired result has not been accomplished.
Using A Clay Bar
A clay bar is a useful tool when removing mortar from between bricks. It is made from a flexible, soft metal. Before you can work with a clay bar effectively, you must clean away dust and grime from the mortar surface by gently using a damp cloth or wire brush.
Wipe down the surface after you have cleaned. Do not be too rough with the clay bar either as you can damage the surface. Store the clay bar in a dry place to be suitable for future use.
Patching and Repointing Mortar with a Lightening Additive
The supplies you will need to patch and repoint mortar are a trowel, tuck pointing tool, cement and/or adhesive grout, and your lightening additive. Ensure you are safety conscious by wearing gloves, a dust mask, and eye protection.
You may need to remove old clumps of mortar with an angle grinder or chisel and hammer. Once your surface is ready, apply your new mortar mix, ensuring that you fill into the cavities between the bricks well. After you have allowed it time to dry, you may want to apply some muriatic acid to the surface if the desired color has not been achieved.
Using Lime
This method may take some trial and error to obtain the exact shade of the existing mortar if you are replacing old joins or the color you want when working on a new project. It is worth your while to do some test mixtures.
In a couple of buckets mix the same amount of sand, but differing amounts of cement and lime. Add a little water to each bucket and mix well. Scoop out a small amount from each bucket and apply a thin layer to a piece of wood or other test surface.
Allow to dry thoroughly and compare. Ensure you write down the amounts of each test material for when you mix up your large working quantity.
Stains, Tints, and Pigments
Another way of lightening mortar is to use various stains and tints, these are normally commercially manufactured and added to the mortar mix. Fine pigment powders become part of the matrix forming part of the hydrates of the mortar.
Pigments do not color or dye mortar material. They surround the mortar particles and become included in the mix. They do not dye the mortar.
Sand
As mentioned above, the color of the sand plays a very important part in the final color of the mortar. Want. The color of the sand depends on the source. It will do you well to know your local sands and whether you will be able to use them to obtain the color you wish.
If you are unable to use naturally occurring sand in your area, light-colored white or silica sand can be bought. Other options are light grey granite or washed masonry sand. A few criteria to ascertain whether the sand you use is suitable are if it is naturally light or dark, uniform or made up of various shades, and free of lumps.
Remember that dark sand will make light pigments or stains look dirty and light sand may make lighter colors look washed out. Try and obtain a sand type that compliments the color you want.
Cement
The color of the clinker limestone used to manufacture the cement will widely influence the color of the mortar even when mixed with pigments or stains.
Again try and use cement that compliments and enhances the color you want to achieve. Many types of cement are artificially colored these days but you can buy natural beige, natural grey, cream, and white.
Water
Although water is a clear liquid, it does influence the color of mortar. As cement is pulverized, dehydrated limestone, when water is added the mixture rehydrates and forms a cement matrix that has a crystalline structure. The more water that is added, the more crystals form, and the lighter the color of the mortar, and the less water added, the darker the mortar will be.
Be Consistent
Consistency is key when working with mortar colors. Ensure you make note of the sand, cement type and color, any pigments or stains you have used, and your measurements of all the components of your mortar. By doing this you will be able to replicate the mixture when repairs or future building projects are on the go.
Cleaning
An important last step to influence the color of your mortar is cleaning. Make sure to remove any excess mortar or stain from the surface of the bricks. Be careful of the amount of chemicals and force you to use in the cleaning as this can remove the surface and bare sand particles which can influence the color.
Last Thoughts
The final color of the mortar is a result of the color and characteristics of all the materials used in the mix. These include the color of the sand, cement, any pigments or stains, the addition of lime, and the amount of water you use in the mix.
If you wish to lighten existing mortar, using thickener or muriatic acid on it after cleaning and removing old lumps and loose cement, will give your wall a fresh look. Before and after lightening your mortar, a good cleaning should be done to remove any excess clumps and to give your wall a professional-looking finish.
Always be safety conscious and use protective gear when working with chemicals and tools to prevent accidents and injuries. If you feel that the job may be more than your DIY skills, consult with a professional.
- Can You Unmix Paint: Techniques, Consequences, Alternatives - February 23, 2024
- Does Primer Need to be Mixed? Effective Primer Application - February 22, 2024
- How to Make Old Paint Usable Again: Retrieving and Preserving Paint - February 21, 2024


