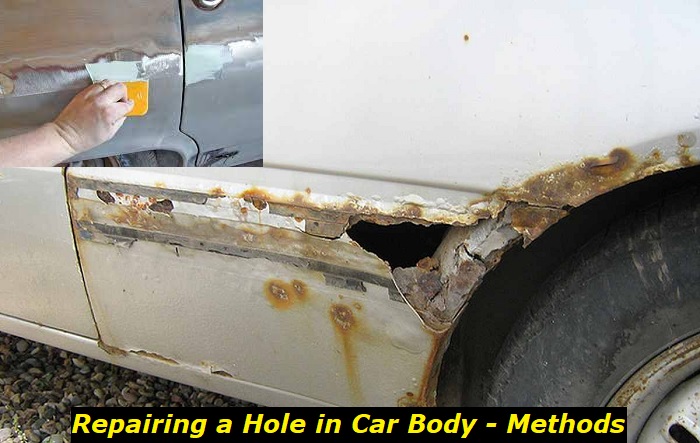
Most holes in car bodies result from rust. If you do not notice and fix a small rust hole, it expands and becomes a large hole. Luckily, you can repair the hole at home with the right tools and car body filler.
In this article, we will outline the best methods of fixing a large hole in any car body. You will have a systematic guide to follow no matter the materials you choose to patch the hole. The article also gives a guide for repainting the car after the repair.

Step-By-Step Guide to Fixing a Hole in Car Body
You need to set at least two days for this repair for professional results. Take time to inspect the car for any other tiny holes that require immediate repair, especially if you are fixing a rust hole. Here now is the complete repair process.
1. Protect yourself
Lots of dust will fly around during the repair. Hence, you need protective eyeglasses and tough gloves. Dress appropriately for the repairs to avoid soiling your clothes. Protection also involves getting the right tools for the job.
Improvising tools while working with metallic objects is risky. You probably have most of the tools in your garage if you like DIY repairs. The necessary tools include a drill with a wire brush, tin snips, sanding paper or disc, and a ball-peen hammer.
The tools are available in most garage and car shops. It is important to specify the intended use when ordering the tools if you are attempting the process for the first time.
2. Prepare the affected area
To prepare the hole and the surrounding area, connect a wire brush to an electric drill to remove all the paint and rust around the hole. Alternatively, use a sanding or flapper disc to sand the paint around the hole.
Removing the paint helps the filler stick to the car’s body. The wire brush does a better job of removing any rust and dust than sanding paper.
3. Remove the rusted metal
Use the tin snips or grinder to cut off any rusted metal around the hole. You may skip this step if the hole is not rusted. However, you need to treat the surrounding part with a rust inhibitor when treating a rust hole.
The rust may spread if any traces of rust remain after sanding. The next step after the rust inhibitor dries is evening out the edges of the hole. Use a ball-peen hammer to hit the edges inwards slowly without causing any dents on the body.
4. Trace and fill the hole
Repair methods differ at this stage depending on the materials you choose. Some of the body fillers come with mesh patches or fiberglass mats to make the repair work easy. However, some filler brands require you to create your own patches.
Let us discuss some of the common materials you can use to patch the hole.
- Using a mesh body patch
Some filler brands like Bondo come with a mesh body patch. Your part is to cut the provided patch in the shape and size of the hole. Cut the patch at least an inch larger than the hole’s size all around.
If the patch is self-adhesive, press the edges for the patch to remain steady while you apply the filler. If not, use part of the filler to hold the patch in place. Set the first mesh body patch under the hole and another over the hole.
This stage may be easy or complicated, depending on the location of the hole. Try all angles of fixing the patch such that its surface is level and firm.
- Using a wax paper or plastic sheet
A wax paper is easy to use depending on the hole’s size and the filler’s thickness. Place the wax paper over the hole and use tape to set it in place for this method. Use a pencil or marker to trace the hole on the wax paper or plastic sheet.
Ensure that the paper is at the center of the paper for easy tracing. In addition, give the hole a quarter or half an inch allowance to ensure that the filler covers the hole completely. You can extend it to a full inch if the car body is old and rusted.
- Using an expanded metal
An expanded metal sheet is a great alternative to create a patch if the filler brand you have does not come with a premade patch. The process is the same, except that you need tin snips to cut the metal to the size and shape of the hole.
The metal sheet patch needs an allowance of an inch from the outline of the hole. Apply filler all around in small lumps to fix the metal patch under the hole. You may need wire hooks to keep the metal patch in place until the filler sets depending on the location.
5. Prepare the fiberglass filler
Most manufacturers supply fiberglass filler with a hardener. The package has the mixing ratios. Follow the instructions carefully to achieve the right consistency and results. You may mix the filler and hardener with an old brush or wooden dowel.
Here is a tip that every car owner needs when repairing a hole in the car’s body. Manufacturers allow you up to ten minutes to mix and use the filler mixture. However, the filler dries fast, making it hard to apply.
If you are slow, the filler will form lumps. You will have to sand it down and reapply until you achieve a flat surface. Car owners recommend that you mix and use the filler within a minute or two. This means that the surface must be ready with a steady patch before you mix.
6. Apply the filler mixture
The application process will depend on the type of patch. Use the brush or dowel to spread the mixture on the mesh or metallic patch following the contour on the car body. Ensure that the body filler covers the patch fully.
If you are using the traced wax paper or plastic sheet, spread the mixture on the trace shape on the hole. Extend the patch by half an inch on the drawing. Cover the edges of the hole with the same mixture and then place the patch on the wax paper or plastic sheet on the hole.
Place the paper or sheet immediately before the filler begins to dry. Use your fingers to press the patch gently into place and allow it to dry.
Fiberglass dries within an hour or less. The process may take longer in a closed garage or in cold weather. Ventilate the garage to speed up the process. The wax paper is easy to remove when the filler is dry.
7. Sand the surface
Do not attempt to sand the patch before the filler is dry. It is safe to give it an extra hour to be sure or allow it to set overnight for excellent results. If you are sure that the patch is dry, use 220-grit sandpaper to smooth out the surface.
Again, be gentle when sanding to avoid breaking the new patch. You can apply a new filler layer if you make a mistake and allow it to dry before sanding. In addition, you are allowed to spray water on the patch while sanding for a smooth finish.
8. Apply the primer and paint
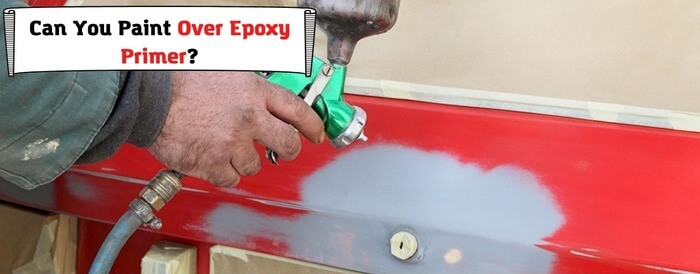
The next step after achieving the smooth fiberglass surface is to apply the primer. Spray the primer from a distance and ensure it covers the patch and any surrounding areas that require repainting.
The final look should blend seamlessly with the rest of the body. Hence, you need to pick a quality primer and the exact color of your car body. Otherwise, the patch will be obvious.
Your mechanic can help with the color shade if you have never repainted the car at home. If you are fixing several holes in different parts of the car body, a full body repainting job can give your ride a new look.
Allow the primer to settle overnight and then gently sand it for the paint to hold. Mechanics recommend two coats of paint and lacquer for a shiny finish. However, you must be careful when working with heavy paint.
A heavy coat will form bubbles, forcing you to sand the patch and repaint it. A light paint coat spreads fast. Test the viscosity of the paint first to avoid mistakes. Another trick is to paint the whole car part instead of the patched area.
For instance, when fixing a hole in the car door, you can sand and repaint the whole door for a professional finish. Allow the paint to dry before spraying the lacquer coat. Your car is ready to use as soon as the last coat dries.
Conclusion
Prevention is always better than cure. Fix any tiny holes or dents that you see on your car body before they expand. However, if you are already dealing with a large rust hole, you can seal it with quality body filler. The repair process involves removing any rust around the whole and creating a patch to hold the filler in place as it dries. You must also apply a primer and paint the patch or panel to complete the process.
- Can You Unmix Paint: Techniques, Consequences, Alternatives - February 23, 2024
- Does Primer Need to be Mixed? Effective Primer Application - February 22, 2024
- How to Make Old Paint Usable Again: Retrieving and Preserving Paint - February 21, 2024


