Removing cabinets can be a daunting job, and doing it safely and carefully is paramount. You don’t want to hurt yourself, and you don’t want to damage the wall your cabinets are attached to, either. So, what is the best way to safely remove built-in cabinets?
To remove built-in cabinets without damaging the wall, first, remove all utensils from the cabinets, and then remove doors and drawers. Unscrew the screws that keep the cabinets fastened to the wall, bottom to top, and gently lift away from the wall, with help. Use a crowbar for glued cabinets, and make sure you have a spotter or a helper with you.
Keep reading to learn more about the steps to safely remove a kitchen counter, and what practices to keep in mind to keep yourself safe, and your walls beautiful.
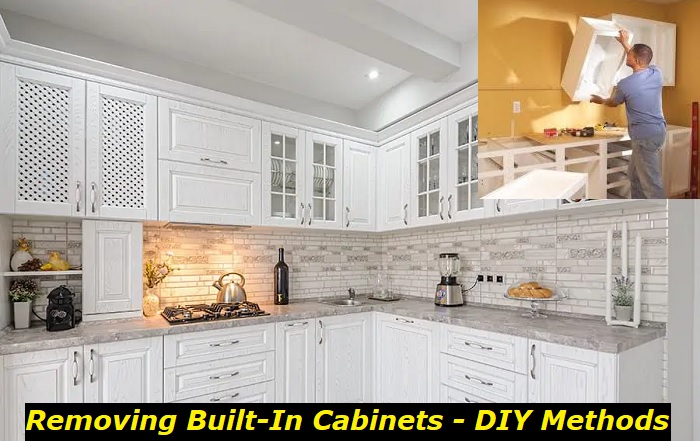
How Are Kitchen Cabinets Attached to a Wall?
Cabinets are generally attached to the wall in one of two ways; either with drywall screws or with glue. Screws are one of the easiest things to remove, and a cabinet that has been screwed into the drywall will not be too difficult to remove, so long as all screws are removed by hand first.
Cabinets that have been glued to the wall will be a bit trickier, but there are tips and tricks to help minimize wall damage and keep your drywall looking its best. Let’s go over everything you’ll need, first, and walk you through each step.
What Tools Will You Need?
Making sure you have the right tools before tackling this project is going to make the task ahead much easier. Before you begin, make sure you have
- A crowbar
- A hammer
- A screwdriver
- An electric drill
- Cardboard boxes
- Goggles or other eye protection
- A human helper for lifting away and carrying the cabinets
Your crowbar is going to help you pray away the cabinet from the wall. The hammer and drill can be used to pry out or unscrew nails and screws that may be attaching your cabinet to the wall.
The goggles will help protect your eyes from debris and dust, and the human helper can act as a spotter, and bear some of the weight of the heavy cabinets.
Some steps you should follow
There are several steps to safely removing kitchen cabinets to avoid damaging walls, so let’s go through them one by one.
1) Emptying the Cabinets
Empty your cabinets first. This sounds rudimentary, but you’ll want the units to be as light as possible before removing them. This will help minimize any possible damage to the wall.
Store like items in separate cardboard boxes for easy re-location to new cabinet units. This will keep all kitchen utensils organized and out of your way, allowing you the maximum amount of room to complete your project.
2) Turning Off Electricity and Water
This is an oft-overlooked step, but it’s important. If removing a kitchen cabinet, make sure the water flow to the sink has been turned off, and make sure that the electricity to your kitchen has been turned off at the breaker.
This will help minimize messes, harm, or electrocution risks. Many kitchens have cabinets placed over outlets, so be sure to keep an eye out for outlets or wires as you work.
3) Unscrewing the Doors
Removing the cabinet doors can be done with a simple electric drill or even a screwdriver. This will lessen the weight of the cabinets, and allow you to remove them a bit easier.
Put your cabinet drawers off to the side on a soft surface, such as a rug or a blanket, to avoid damaging them, or scratching the floor. Remove them one by one, and keep them arranged in the order they were taken off. This will make it easier to match them to base or wall units if necessary.
Keep all hardware with the cabinet doors, and save all screws for future use, if you’re re-installing the units elsewhere.
4) Remove Cabinet Drawers and Shelves
The next step will be to remove cabinet drawers and shelves from the units. This is a simple process of disengaging the drawers from their rolling tracks, which can usually be accomplished by pulling out and then gently up, and lifting away or unscrewing any shelves.
This will lighten the burden, and give you plenty of room to get into the main, empty cabinet unit and detach it successfully.
Again, keep each unit’s drawers and shelving aside in case you wish to reuse the shelving elsewhere in your house, and give yourself plenty of room to work in the kitchen. Storing all of these components in another room will help you keep the space free of debris and trip hazards.
5) Find the Main Unit’s Screws
Now, you’ll want to locate the screws that are securing your cabinets to the wall. You’ll typically find them in the rear of the cabinet’s back panel, near the upper and lower corners. If the cabinets are screwed into one another side-by-side, remove those screws first so that each sub-unit can come off individually.
Make sure you know where the screws are and get your human spotter to help you steady the unit as you begin to detach it. This will help ease the weight of the unit, and minimize possible wall damage as the unit comes off.
6) Remove Base Units
Now, you can begin to unscrew the base/floor cabinet from the wall. Starting at the bottom and working your way up, unscrew each piece of hardware. Once every screw has been removed, the unit should gently be pulled away from the wall and moved aside.
Your cabinet unit will likely be quite heavy, so again, use your spotter/helper to lift or drag each piece of the floor cabinetry to the side. Be sure to be careful that every part of the larger unit has been fully unscrewed. Pulling away a cabinet that is still partially screwed in could damage your wall.
7) Remove Wall (Top) Units
Follow the same procedure with top units, being sure to have a spotter help lift on or support the units as they come off of the wall. Unscrew any connections between individual cabinet units, and then unscrew the units from the wall.
Removing units in this pattern will help you reach up towards and support the top units with greater ease, and give you quite a bit more room to move around. This can also make the job less dangerous, and tedious.
Once all of the screws have been removed, help ease the wall unit to the ground, and put it aside as you work down the row. Be careful with your back, shoulders, and posture as you remove these elevated cabinets.
Removing Glued Kitchen Cabinets
So, what do you do if your kitchen cabinets are glued onto the wall, rather than screwed in? This presents a set of unique challenges and will require both elbow grease and special care.
The crowbar and the hammer will come in handy here. Begin at the corners of the unit, and begin to carefully pry the cabinets away from the wall. You’ll want to locate the wall studs behind the plaster of your drywall and focus your prying efforts there as well, to minimize damage to the wall itself.
Just as with screwed units, make sure a spotter helps ease the burden of the weight of the units as they come away from the wall. Use a wedge of wood to help ease this process, and make the prying less violent. The easier you are on the unit, the easier you’ll be going on your wall, as well.
Using Alcohol on Glue
Stubborn glue can also be partially dissolved with alcohol to help break the bond and save your wall from damage. Try mineral spirits for this task, and use a cloth dampened with spirits to apply the alcohol to the stubborn glue.
Let this dampened cloth sit for about four hours, then begin again to remove the cabinet unit. The glue should be dissolved at this point, and the cabinet should pry away easily.
Another option? Use vinegar. It’s quite a bit gentler than mineral spirits, but can also help soften stubborn glue a bit, and give you an advantage over tough adhesives.
Conclusion
Removing built-in cabinets without damaging the wall can be done by removing all doors, shelves, and drawers, and then carefully unscrewing the unit from the wall. Having one person unscrew the unit and another help support its weight as it is lifted away can also help reduce wall damage.
When removing glued-on cabinets, a crowbar can be used to gently pry away the cabinet at the corners, and near-wall studs. Stubborn glue can be dissolved with mineral spirits to make this task easier, and reduce pull-away from drywall.
Be sure to turn off all electricity at the breaker and all water before beginning this project, and be sure to use protective eyewear as a precaution.
- Can You Unmix Paint: Techniques, Consequences, Alternatives - February 23, 2024
- Does Primer Need to be Mixed? Effective Primer Application - February 22, 2024
- How to Make Old Paint Usable Again: Retrieving and Preserving Paint - February 21, 2024
