Many mechanics and do-it-yourselfers use threadlocker adhesives, such as Loctite, to keep nuts and bolts from loosening. When these products are used properly, they can effectively prevent pieces from coming undone.
However, there may come a time when you need to remove a fastener that has been treated with threadlocker adhesive. In this blog post, we will provide some tips on how to remove blue Loctite from metal surfaces. But first, let’s look at what Blue Loctite is and what it’s used for.
What is Blue Loctite, and What is it used for?
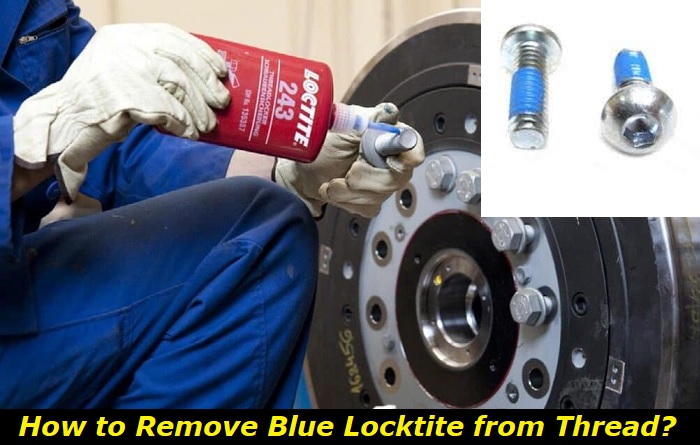
Blue Loctite is a type of adhesive made by the Henkel corporation. It is typically used to secure bolts and nuts in place, although you can also use it for other purposes, such as holding together plastic or metal parts.
Blue Loctite is different from other types of adhesives because it is designed to be removable. As a result, it can be loosened with hand tools, making it ideal for applications where parts must be regularly disassembled and reassembled. In addition, blue Loctite has a stronger bond than most adhesives, making it ideal for high-stress applications.
However, because of its strong bond, blue Loctite can be difficult to remove if it is not applied correctly. As a result, It’s crucial to properly follow the manufacturer’s directions when using this product.
What happens if you use too much Blue Loctite?
Loctite is a brand of adhesives and sealants that are used in a variety of applications. One of the most popular products is blue Loctite, which is often used to secure bolts and nuts. However, if too much blue Loctite is used, it can cause problems.
First, the excess adhesive can seep into the threads and make removing the bolt or nut difficult. Second, the adhesive can harden and cause the parts to become permanently locked together. As a result, it is important to use blue Loctite sparingly and only apply it to the areas that need to be secured.
Excess adhesive can lead to costly repairs or parts replacement, so avoiding using too much blue Loctite is best.
Recommended Step-by-Step Guide to Remove Blue Loctite
Blue Loctite is a product used to bond two surfaces together. It is great for use on metal, plastic, and glass. However, sometimes you may need to remove it. Here are five steps to remove blue Loctite:
- The most common way to remove Loctite is to heat the fastener with a soldering iron or heat gun. This will soften the Loctite, allowing it to be removed from the thread. In some cases, it may also be necessary to use a tool to break the bond between the Loctite and the thread. Once the Loctite has been removed, the fastener can be removed using a wrench or other appropriate tool.
- Once the area is heated, try to remove the item that has the blue Loctite on it. You can use a pair of needle nose pliers to remove blue Loctite if it is a small object. If the object is too large to be removed with pliers, you will need to use a chisel and hammer to break the Loctite bond. Once the bond is broken, the object should come free.
- You can use a solvent such as acetone or alcohol if it’s still stuck. Apply the solvent to a cloth and then rub it onto the area with the blue Loctite.
- Once the solvent has had a chance to soak in, try to remove the item again. If it is still stuck, you can repeat steps 2-4.
- If all else fails, you can try breaking the item into pieces. This will usually cause the bond to fail, allowing you to remove the Loctite without damaging the underlying components.
Tips to Remove Blue Loctite
Here are some tips to guide you in removing blue Loctite.
- Tip #1:Wear gloves and safety glasses. If you intend to work with your hands with this stuff, you better protect your skin and eyes by wearing gloves, safety glasses, or goggles. Blue Loctite can ooze out of an area where you previously applied it and onto the surface of nearby objects such as skin or glasses, so be extra careful around the stuff! Also, if you’re planning on taking a page from the “Teflon hand” method, you might consider wearing plastic gloves.
- Tip #2: Don’t use too much blue Loctite. If you’ve been cleaning up a mess left behind by a blue Loctite application and still can’t get the stain out, it’s time to take another look at how much of the stuff you used. Most hardware stores have this stuff in handy little bottles, so it’s easy to measure how much went into each piece of hardware, but sometimes they neglect to include an accurate volume listed on the bottle label. Always check the inside of the bottle before and after you finish so, you know exactly what you’re working with. Go easy on the blue Loctite when in doubt, and you can always add more if needed.
- Tip #3:Use heat to loosen blue Loctite. One of the best ways to loosen up a mess caused by blue Loctite is to use heat. Try using a propane torch, a can of compressed air, or even an oven to speed up the dissolving process. Remember that this is an extreme measure, and there’s no guarantee it’ll work, but it might get things moving in your favor.
- Tip #4:Use the right solvent. If you’re looking to dissolve blue Loctite, many different solvents are available.
We’ve listed a few of our favorites below:
- Acetone– The classic and most commonly used solvent for dissolving Loctite. It’s like kryptonite for this stuff because it doesn’t matter how much it is used; it always seems to get the job done.
- Mineral spirits:A petroleum-based solvent that can dissolve blue Loctite with good efficacy. It’s easy to use, cheap and effective.
- Turpentine:A solvent that has been a staple in many automotive shops for removing blue Loctite. It evaporates quickly and can be reapplied as often as needed.
The Best Blue Loctite Removal Tools/Solvents/Tips.
If you want to find out what tools work best for dissolving blue Loctite, we’ve got some recommendations below that should help you!
Recommended blue Loctite tool: Caulking Gun – This is a great tool around the shop because it’s effective for de-gluing vinyl or plastic when working on cars and other similar projects. The G3 Caulking Gun is a popular choice among car enthusiasts because it comes with a decent set of unique accessories that allow you to get around the shop more easily. It also has a decent trigger speed and pressure to go along with its low weight, so it’s great for users who need to work with large materials.
Recommended blue Loctite solvent: DAP Super Duty Breaker – If you have an oxy-acetylene torch and some acetone, this stuff will do the job just fine.
Recommended blue Loctite removal technique: Blue Painters Tape – If you try to manually remove blue Loctite with a solvent, then this one is a good choice because it’ll protect your skin and help prevent the spillage of solvent. Also, be sure to use heat sparingly if you plan on using this stuff because it can irritate your skin.
Recommended blue Loctite removal tool: Utilitech 1 Ton Electric Breaker Freezer – If you have any concerns about messing up the hardware while removing blue Loctite, this tool is an excellent choice.
Conclusion
Removing blue Loctite from metal surfaces is not difficult, but it does require some patience and care. Loctite is a product that is used to bond two surfaces together. It is commonly used in automotive and industrial applications. While Loctite can be very effective, it can also be difficult to remove.
One way to remove Loctite is to use a heat gun. You can purchase heat guns at most hardware stores. To use a heat gun, hold the gun close to the bond line and heat the area until the Loctite begins to soften. Once the Loctite has softened, you should be able to scrape it away with a putty knife or similar tool.
Another way to remove Loctite is with acetone. Acetone can be found at most hardware stores or home centers. To use acetone, apply a small amount of acetone to a cloth and then rub the cloth over the bond line. Continue rubbing until the Loctite has dissolved. Once the Loctite has been dissolved, you should be able to remove it using a clean cloth.
If neither of these recommendations is effective, you may need to use a drill bit. You can purchase drill bits at most hardware stores or home centers. To use a drill bit, drill a hole through the center of the bond line. The hole should be big enough to insert a putty knife or other tool and separate the two surfaces.
We hope that these tips will be of assistance the next time you need to remove thread locker adhesive from a fastener.
- Can You Unmix Paint: Techniques, Consequences, Alternatives - February 23, 2024
- Does Primer Need to be Mixed? Effective Primer Application - February 22, 2024
- How to Make Old Paint Usable Again: Retrieving and Preserving Paint - February 21, 2024


