A flawless finish on wooden floors and furniture is every homeowner’s desire. Sanding should remove ugly blemishes and reveal the wood’s natural beauty. Hence, seeing ugly black spots after a sanding project is frustrating. Why do black spots appear after sanding? We will answer this question and explain how to remove the spots. You will also learn the best sanding techniques to prevent black marks.
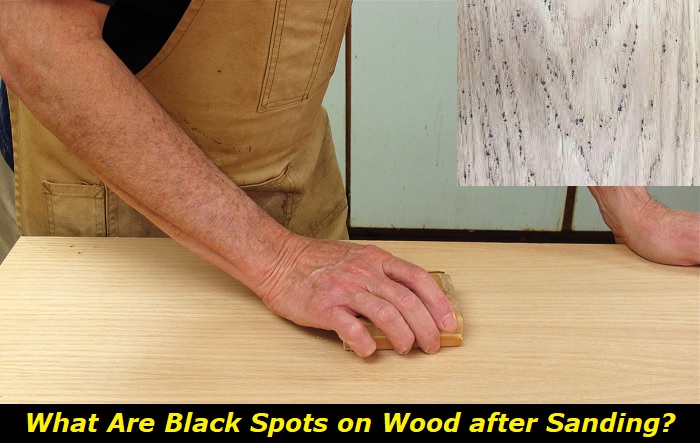
What Are Those Black Spots on Wood After Sanding?
The black spots on the wood are iron or metallic stains resulting from a chemical reaction between the chemicals in wood and elemental iron. The chemical reaction requires wood, iron, and moisture to form black blemishes.
Wood naturally contains phenol chemicals that trigger the reaction. For instance, oak wood contains tannic acid, which reacts with water and iron, leaving black marks. Sanding reveals the concealed black spots after the wooden surface contacts metal and water.
Other contaminations may also cause black blemishes on wood. Let us discuss the possible causes to help you pick the appropriate method to remove and prevent ugly black marks.
What Causes Black Spots on Wood?
Several factors cause black spots on the wood, including chemical reactions, moisture, and bad sanding techniques. Resin and dirt can also leave ugly spots. Understanding the causes is essential to picking the right procedure to remove dark spots. In addition, some reasons are preventable.
1) Chemical Reactions
The chemical reaction between the phenol, tannin, and acidic components in wood and metallic components causes black stains. The wooden surface may discolor if it contacts nails, screws, and other metallic objects. However, the reaction requires moisture.
Particles from metallic objects in the background may also contaminate the surface during the sanding process. Sanding embeds the particles into the surface, leaving black blemishes. In addition, the particles may remain invisible until the wooden surface contacts water.
Sometimes the finish or coat used after sanding reacts with tannin components in wood. The discoloration will only show after buffing and coating the wooden surface. Some wood glue types also react with tannin and acidic components.
It is advisable to test the coat on a small part and allow it to rest for some time. Sand the affected area in case of discoloration and choose a different finish. In addition, suppliers can advise you on the best coats for soft and hardwood based on their natural properties.
2) Water and Moisture
Moisture content or water is the next leading cause after the chemical reaction with wood’s natural components. Black spots will appear if you sand wood while wet. Sanding also exposes a new layer of wood that can trap moisture from the atmosphere or spilled water.
It is essential to check the wood’s moisture content before sanding. A humid atmosphere will affect the results. In addition, apply a waterproof coat or finish after sanding so that the new layer does not absorb moisture.
3) Resin Stains
Resin is a sticky substance on wood that occurs naturally or in case of an injury as the tree grows. Multiple injuries may cause resin pockets within the wood. Pinewood naturally has high resin content.
Sanding exposes the resin content. You may accidentally smear resin stains across the surface. Resin stains are sticky and stubborn. The recommended approach is to clean any sticky substance or oil stains on wood before sanding.
Buy the appropriate cleaner for your type of wood to remove resins and other visible stains. Resin residues, in most cases, are in visible pockets. Apply the cleaner to the stained areas and allow the wood to dry before sanding.
4) Bad Sanding Techniques
Your sanding techniques may leave black spots on the furniture or floor. A common sanding problem is using poor-quality sandpaper. The grit should be tough enough to remove any contamination on the surface without damaging the wood.
Fine grit sandpaper may spread stains and sawdust instead of removing them. Aggressive sanding with coarse grit sandpaper may also cause black stains. You will remove the protective finish on the wood, exposing the inner layers to dirt and moisture.
Another common mistake is to sand against the natural grains. The right technique is sanding along the grain. You will also have black spots if you do not remove all the dust after sanding.
The loose dust settles in pores, forming ugly dark patches. Clean the surface with a wet cloth after sanding or vacuum the wooden floor. Many homeowners also rush the finish after sanding.
Give the wood time to dry after cleaning the dust and apply the finish. Before painting the whole floor, remember to test the finish or coat with a small section.
How to Remove Black Spots on Wooden Surfaces
The appropriate procedure for removing black spots on wooden surfaces depends on the cause and level of the stain. Bleaching or applying a commercial stain remover works on dark blemishes near the surface. Homemade solutions can also clear thin layers of stains. However, deep stains require sanding to restore the clean finish.
1) Use Wood Bleach
Wood bleach removes black stains from the chemical reactions with iron and other ferrous metals. It can also clean resin stains. Most wood bleaches are suitable for all wooden surfaces. However, it is advisable to specify your needs when ordering wood bleach to protect the surface from further damage.
Read the instructions for mixing proportions on the container to form a water and bleach solution. Wear protective gloves and apply the bleach on the affected areas. Use a soft brush to scrub off the stains, and rinse with clean water.
Bleaching leaves the stained surface looking new and clean. However, over-bleaching damages the appearance of the grains and finish. Remember to bleach any stains first in the next sanding project.
2) Apply a Stain Remover
A stain remover is an excellent alternative to wood bleach. You can buy iron oxide stain cleaner to remove dark spots from metallic iron. The remover works on other stains as well. The advantage of wood stain removers is that they do not discolor the wood or damage the finish.
Apply the stain remover to all dark areas and allow it to dissolve the stains. Scrub with a soft-bristled brush and wipe with a damp cloth. Repeat the process for stubborn stains until the discoloration disappears.
Woodwork shops have special tannin spot neutralizers for tannin stains. Buy a neutralizer if you identify the dark spots as tannin stains. The neutralizers have directions to use and may remove other wood stains.
3) Vinegar and Baking Soda
Household solutions, such as white vinegar and baking soda, remove most wood stains, including black spots. Woodworkers recommend adding olive or an alternative oil to keep the shiny finish after removing the stain.
Mix vinegar and olive oil in equal measures. Apply the solution on the stained surface in the same direction as the wood grains. Repeat the process until the stain disappears.
You may add baking soda to the solution if the stain is stubborn or use baking soda as a separate stain remover. Use equal parts to make the baking soda-vinegar solution and apply the paste on the stain.
Scrub the paste with a soft-bristled brush and rinse with water for a clean finish. Dry the surface with a cloth and apply olive oil as a finish.
An alternative process is mixing baking soda with enough water to form a thick paste. Apply the paste on the dark blemishes with a soft cloth until the stain clears. Follow the grains for a clean finish, and avoid touching the unstained areas.
Use clean water or a damp cloth to rinse the paste. A mixture of white toothpaste and baking soda also works on some stains, especially dark spots from dust or dirt.
4) Sanding
Sand the stained areas if the dark spots are deep into the wood. Wood bleach and stain remover may not remove such stains effectively. Allow the wooden surface to dry to avoid new stains. Choose the right sandpaper or use a machine for sanding down the blemishes.
Remember to apply the right sanding techniques, including following the grains and using minimal pressure. Clean the surface thoroughly before buffing.
Essential Tips for Protecting Wooden Surfaces from Black Spots
Preventing dark stains on wood is easier than removing them. Here are some tips to avoid a reoccurrence of stubborn stains.
- Keep the wood surfaces dry. Avoid any leaks or standing water on a wooden surface. Wipe any liquid spills immediately with a damp cloth.
- Learn the proper sanding techniques or engage professional woodworkers for sanding projects.
- Thoroughly clean and dry wooden surfaces before and after sanding.
- Use a protective coat or sealant on all wooden surfaces, especially after sanding. Pick the proper coat or finish for your type of wood to prevent chemical reactions that discolor wood.
Conclusion
Sanding should reveal a flawless layer of wood. Choose the appropriate technique if you notice any blemishes after sanding. Vinegar, baking soda, wood stain removers, spot neutralizer, and wood bleaches remove most wood stains. However, sanding is advisable to remove deep stains. Remember to pick the proper sandpaper and follow the grain when cleaning.
Preventative measures are important to keep your wooden surfaces spotless. Keep wood dry and remove stains fast before the stains penetrate deep into the wood. In addition, hire professional services for sanding wooden floors for the best results.
- Can You Unmix Paint: Techniques, Consequences, Alternatives - February 23, 2024
- Does Primer Need to be Mixed? Effective Primer Application - February 22, 2024
- How to Make Old Paint Usable Again: Retrieving and Preserving Paint - February 21, 2024


