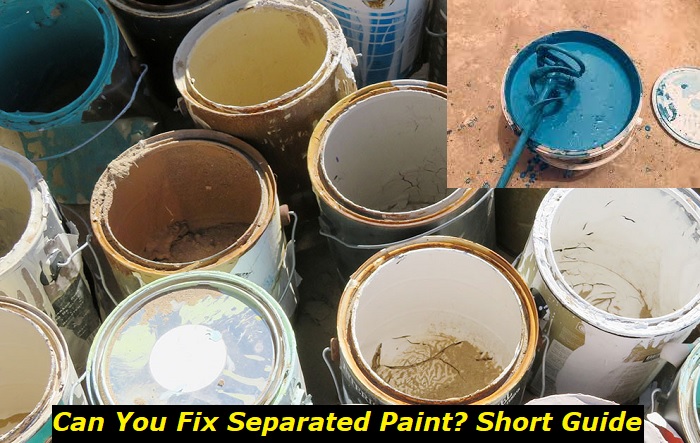
Understanding how to fix separated paint is crucial knowledge for anyone involved in home decoration or dealing with paints. Separation in paint occurs when the components of the mixture disband, leading to an inconsistent and unattractive finish. This could be due to adversely affecting factors from incorrect mixing or storage conditions to natural aging of the paint. Such a problem can ruin not just the aesthetic appeal of a painted surface, but also the paint’s protective qualities.
Our upcoming blog article will provide you with a comprehensive guide on identifying the causes of paint separation and the preventive measures you can adopt. It will also delve into a detailed, step-by-step guide on fixing the problem and choosing the right tools necessary for the process, ensuring a properly mixed paint for an appealing finish. This way, your paint maintains its blend, ensuring longevity and visual charm.
Understanding the Causes of Paint Separation
Delving into the fundamental causes of paint separation can aid you in preventing the problem and preserving the lustre and longevity of your paint. So, what exactly prompts paint to separate?
One key cause can be improper storage conditions. This is specifically true for oil-based paints, which need specific storage conditions to maintain their consistency. Storing paint in places with high heat or extreme cold can catalyse the separation process. It’s crucial to store paint in a temperate and stable environment to keep its components well-blended.
Another widespread cause is the natural aging process of the paint. As paint gets older, the components tend to separate and degrade, affecting the paint’s quality. This separation can happen whether the paint is in its can or on a surface, demonstrating how natural aging can be a formidable foe to paint stability.
Additionally, improper mixing can also lead to paint separation. Often, the stirring process for paint is not given the attention it deserves. However, thorough and careful stirring is essential to ensure all the components blend into a paint that applies smoothly and consistently.
Last but certainly not least, is the use of poor-quality thinners or additives. These can interrupt the consistent blending of the paint, causing elements to disassociate and your paint to separate.
In essence, multiple elements can contribute to paint separation. Whether its detrimental storage conditions, simple aging, subpar mixing techniques, or the use of low-grade additives, understanding these triggers can help avoid the predicament of separated paint and ensure a lasting, appealing finish.
Preventive Measures: Tips to Prevent Paint Separation
Paint separation can be quite frustrating, especially after having invested time and effort into achieving the perfect finish. However, fret not, for there are some effective preventive measures you can put into practice to avoid reaching this stage.
Storing Paint Properly: Proper storage plays a crucial role in preventing paint from separating. Ensure your paint cans are tightly sealed and kept in a moderate environment. Avoid places with extreme temperature fluctuations. A well-insulated part of your house, such as a utility room or basement, can be a good storage choice.
Mixing Thoroughly Before Use: Be sure to mix your paint thoroughly before every use. However, do not stir too vigorously as it can introduce air bubbles. Rather, aim for a slow and steady mixing process.
Only Mix What You Need: While mixing paint, only mix the amount you’re sure you’ll use in one session. This can help prolong the lifespan of your paint and prevent wastage.
Using Paint Within its Shelf Life: Always keep an eye on the shelf life of your paint. Outdated paint is more likely to separate and have a less desirable finish. Using paint within its intended shelf life ensures the optimal performance and consistency of your paint.
In conclusion, correct storage and handling of paint are fundamental to prevent separation. Attention to these details can save you from unnecessary stress later on, and allow you to maintain the aesthetic appeal of your painted surfaces without interruption. It’s all about giving your paint the care it requires for it to display its full potential.
Repairing The Damage: Step-by-Step Guide on How to Fix Separated Paint
Amidst the array of complexities that one may encounter in home renovation, separated paint stands out because it can turn a potentially beautiful paint job into an unsightly mess. But worry not, it is indeed possible to salvage separated paint and restore it to its former glory. Here’s how:
The first essential step is to detect the problem early. Keep a watchful eye on the paint as you mix and apply it. Separation most often comes across as an uneven texture or discoloration on the paint’s surface, so be quick to notice these signs.
Next, you must isolate the separated paint. Remove any loose or flaking paint from the affected area using a scraper. Ensuring you are down to a solid surface is crucial for the next steps.
Once you have a clean and stable surface, your next step is to sand it down. Employing a fine-grit sandpaper, gently smooth the surface to promote better adhesion for the new paint.
Post sanding, it is crucial to clean the surface. Remove dust and debris because paint clings better to clean surfaces. Use a damp cloth or a vacuum cleaner for best results.
After prepping the surface, you can now apply a high-quality primer. This prepares the surface to receive the new paint and ensures a uniform and long-lasting finish.
Upon primer application, allow time for drying. It’s best to refer to the manufacturer’s instructions for the appropriate drying time. Then, finally, you can apply the new paint. Use long, even strokes with a brush or a roller, ensuring you cover the surface uniformly.
When it comes to repairing separated paint, a well-paced, methodical approach can make a world of difference in achieving an even, robust, and aesthetically pleasing paint job.
Selecting the Right Tools: Necessary Equipment for Repairing Separated Paint
Arming yourself with the right tools is half the battle won in most cases, and repairing separated paint is no exception. When equipped with the appropriate materials, the repairing process becomes more efficient and seamless, often resulting in a more professional and visually appealing end product.
For starters, having a good-quality paint stirrer is paramount. This tool is crucial in re-integrating a paint mix that has separated. It’s important to choose a sturdy stirrer that can effectively blend the paint ingredients fully, eliminating any trace of separation.
Next, a paint strainer should not be overlooked. This accessory comes into play after you have stirred the paint thoroughly as it allows you to remove any lingering, unmixable particles or clumps that the stirring process could not resolve. Paint strainers come in different sizes and mesh types, and it’s vital to select a variety that suits the texture and consistency of your paint.
A considered choice of paintbrush or roller can also make a big difference to your final finish. A quality brush allows smooth application and even distribution of the paint, providing that professional touch. And in the case of larger surfaces, a roller could be your best bet for efficient application. While selecting, keep in mind that the type of brush or roller should match the kind of paint and the surface being painted on.
Lastly, remember the importance of proper cleaning materials. These comprise of soaps or detergents suitable for cleaning your brushes and rollers, as well as for spot-cleaning on painted surfaces, if required. Using the correct materials will ensure the longevity of your tools and maintain the aesthetics of the painted surface.
Equipped with the right tools and knowledge, you’ll be well on your way to not just fixing separated paint but also acing a paint job that’s as close to professional as it gets.
- Can You Unmix Paint: Techniques, Consequences, Alternatives - February 23, 2024
- Does Primer Need to be Mixed? Effective Primer Application - February 22, 2024
- How to Make Old Paint Usable Again: Retrieving and Preserving Paint - February 21, 2024


