Medium-Density Fibreboard, commonly known as MDF, is a widely used material in construction and decor due to its affordability, versatility and workability. MDF is an engineered wood product made from wood fibres that are glued under heat and pressure. This attribute enables it to exhibit consistent strength and flexibility, making it a viable material for a variety of applications including furniture, cabinetry, and mouldings.
On the other hand, wood filler is a substance used to fill imperfections in wood such as knots, scratches, and nail holes. It comes in different types and compositions, designed for specific purposes. The successful use of wood filler largely depends on its compatibility with the material at hand – in this case, MDF. This article will address whether wood filler can be used on MDF and, if possible, provide you with a guide on how to properly use it including tips and best practices.
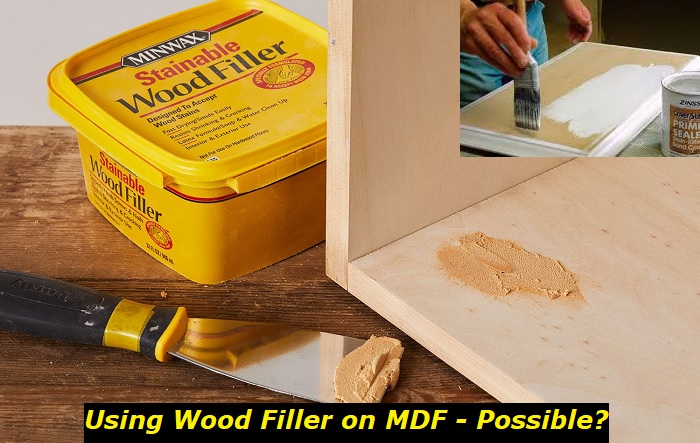
Understanding Wood Filler: What Is It and How Does It Work?
Delving into the world of paints and decoration materials, you will inevitably come across a product called wood filler. It is essentially a substance that’s designed to help you conceal the imperfections that might mar the beauty of your woodwork. But what exactly is wood filler, and how does it function?
Wood filler is a putty-like material primarily used to fill in the dents, cracks, and other surface irregularities in wood. It is typically composed of wood dust mixed with a binder, which could be water, solvent, or epoxy based. These different types cater to various needs and preferences, but the overall goal remains the same – achieving a smooth, unblemished surface.
The mechanism of wood filler is quite straightforward. When applied, it fills in the gaps, scars, or holes in the wood, providing a level surface for further processes such as sanding, painting, or staining. It essentially acts as a solution to inconsistencies in the material, aiming to create a uniform appearance.
A critical aspect to touch on is that wood filler works differently with different materials. With MDF, for example, the filler needs to have the right consistency and durability due to MDF’s distinctive cellular structure and density. This compatibility ensures proper adhesion and long-lasting results for your DIY or professional projects. The question of whether or not wood filler can be used on MDF, therefore, rests heavily on these factors.
Can You Use Wood Filler on MDF?
The simple and precise answer to the question, “Can you use wood filler on MDF?“, is yes, absolutely! Due to MDF’s smooth and non-porous surface, it provides an excellent base for wood filler. However, even though it is possible, it doesn’t mean that it should be done without prior knowledge or preparation.
The compatibility between wood filler and MDF lies in their shared trait for adaptability. MDF, being made of fine wood particles, has a uniform, dense surface with no knots or grain patterns. This makes it a suitable canvas for wood filler as it can easily adhere to MDF’s surface and create a flawless, seamless finish once sanded and painted.
It’s worth noting that the type of wood filler used should be chosen meticulously. Not every wood filler may give the desired results. For instance, water-based wood fillers, despite being easy to clean up, may not be an optimal choice due to their tendency to dry too fast and shrink, leaving behind unsightly cracks. Meanwhile, solvent-based wood fillers, while more durable, may be harder to work with due to their strong odour and longer drying times.
Regardless of the type of wood filler you decide to use on MDF, remember that proper surface preparation is key. Always ensure the MDF surface is clean, free of dust, and thoroughly sanded to ensure a good bond between the wood filler and the MDF material. Otherwise, the wood filler may not adhere properly and could easily chip or flake off after it has dried.
How to Properly Apply Wood Filler on MDF
Familiarising yourself with the proper method of applying wood filler on MDF is key to achieving flawless results. The first step is to prep your MDF surface. Clean the area to remove any dirt or debris that may interfere with the adhesion of the wood filler. If the MDF has any sort of finish or coating, it helps to lightly sand the surface to create a bondable surface.
Once the MDF surface is ready, it’s time to apply the wood filler. Always start with a small amount of filler – you can add more if needed. Use a putty knife or a similar tool to spread the filler into the blemish or crack. Aim for a smooth, even application that flushes perfectly with the surrounding surface. This will require patience and a bit of finesse. Too much filler can lead to clumps that are hard to smoothen out, so apply conservatively.
A drying period follows this application process. The duration will depend on the specific wood filler brand and type you are using, but usually ranges from a few minutes to a few hours. Patience is key here – rushing to the next step before the filler has fully cured can compromise the final finish.
After ensuring the wood filler is dry, you must sand the filled area. Start with coarse-grit sandpaper to knock down the high spots then move to fine-grit for a smooth finish. Wipe off the dust to leave a clean, ready-to-paint surface.
The final step is painting. Apply a primer first to provide a good base for your finish coat, enhancing adhesion and overall look of the paint. Then, you can proceed to apply your topcoat following the manufacturer’s instructions for the best results.
Remember, applying wood filler to MDF takes patience and precision, but with practice and by following these instructions, you can create a perfectly repaired MDF surface.
Tips for Using Wood Filler on MDF
Using wood filler on MDF does not have to be a daunting task. With inside tricks up your sleeve, you can attain a finish that is both durable and aesthetically pleasing. Here, we provide some valuable tips that can come in handy when applying wood filler on MDF.
First, for a smooth finish, always ensure that the surface is properly sanded before applying the wood filler. This not only gets rid of imperfections but also improves the adherence of the filler. For the best effect, start with a coarse sandpaper to knock down the major imperfections, and then use a finer grit to smooth out the remaining surface.
Next, when applying the filler, less is more. Apply it in thin layers rather than a heavy, single coat. Allow each layer to dry before applying the next. This method makes the filler blend in seamlessly with the MDF and is also less likely to result in shrinkage or cracks when drying.
Importantly, choose the right type of filler. Not all wood fillers are created equal; some are better suited for MDF than others. Look for a filler that is specifically formulated for use with MDF or engineered wood. These types of fillers will bond better with the MDF and will be more durable over time.
Remember to prime the MDF surface after filling. MDF is highly absorbent, and applying a primer first will prevent excessive absorption of the paint, ensuring an even and long-lasting finish.
Lastly, ensure your safety throughout the process. Wear protective clothing, especially a mask and eye protection, when sanding MDF as its dust can be harmful if inhaled or if it comes in contact with your eyes.
Patience is the key when working with wood filler on MDF. The processes of applying filler, letting it dry, and sanding it down are worth the wait. Each step contributes to a high-quality, smooth, and lasting finish that you desire for your construction or decor project.
- Can You Unmix Paint: Techniques, Consequences, Alternatives - February 23, 2024
- Does Primer Need to be Mixed? Effective Primer Application - February 22, 2024
- How to Make Old Paint Usable Again: Retrieving and Preserving Paint - February 21, 2024
