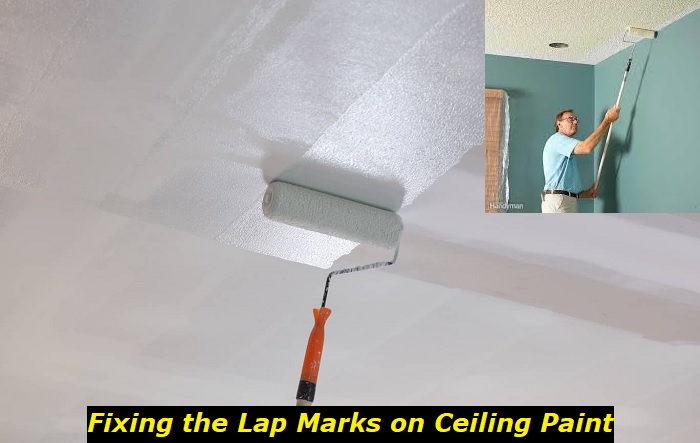
Ceilings are tricky for DIY painters. You need to navigate light fixtures and corners without leaving streaks. The process does not always end as intended. You may make mistakes and leave unwanted lap marks or paint lumps in some parts.
This guide outlines the best DIY methods for removing lap marks on a ceiling. We will also give you professional tips to prevent streaks in the future. First, let us talk about the reasons why you have lap marks in the first place.
Top Causes of Lap Marks When Painting Ceilings
Lap marks may appear after DIY painting projects for the following reasons:
1. Low-quality paint
Painting is a hobby for some homeowners and a need for others. You may opt to paint your ceiling to save a coin. However, you end up with streaks if you pick bargain paint to save money. You will incur higher costs than planned to fix the mistakes.
2. Using the wrong roller
You may also opt for the cheapest roller or use any roller at home. The results will show. A quality roller ensures that you pick enough paint and paint an even coat every time. In addition, specific types of paints require specific rollers for a smooth finish.
3. Loading little paint
Here is another possible cause. You have the best paint and roller, but you are trying to cover as much as you can with the paint. Consequently, you load just a little paint or stretch the roller too far. The result will be ugly marks on the ceiling.
4. Applying uneven pressure
One of the secrets to an even finish is to maintain the same pressure from the start to the end. You may not get it the first time, especially with a new roller on a high ceiling. You will see lap marks every time you increase the pressure.
The downside is that you may not notice the difference until the paint dries. You will learn how to fix the lap marks in a moment. However, you need to explore new painting projects to master the right pressure for different surfaces and paints.
5. Poor lighting
Poor lighting can mess up your DIY painting projects. Some marks do not appear until you turn on the lights in the evening. It is advisable to keep the lights on even when painting during the day.
How to Fix Lap Marks on Ceilings
The mistake has happened. The ugly streaks are noticeable. Where do you start? Here are the simplest methods to fix the marks.
1. Touch up minor marks
Minor streaks are easy to clean up with a new paint coat. Paint over the marks lightly if you notice the marks as you paint. Some experts recommend waiting until the paint coat dries to fix any mistakes. In addition, you can tell with the first mark if the touch-ups will work.
2. Add an extra coat
You hardly get a smooth finish with a single coat. Adding an extra coat of paint will hide some lap marks. Vary the amount of paint at the sections with lap marks. You have a chance to correct your mistakes when applying an extra coat.
Use enough paint this time if you have spread the first coat too thin. Also, take your time to master the required pressure and amount of paint to load onto the roller. Speaking of the roller, let us talk about your choice of a paint roller.
3. Change the roller
A bad roller can make you doubt your painting skills. First, consider the size of the roller. Large surfaces require a large roller that can soak enough paint. You will not like the results of a small roller on large surfaces. You will also spend more time and energy to get perfect results. Use a small roller to paint corners and intersections.
Another important consideration is the type of roller. The roller you had in the last painting job will not give similar results if the paint and surface are different. The recommended rollers for oil-based paints are different from those of water-based and acrylic paints.
If the paint is dry, consult an experienced painter or hardware shop for the right roller to use to correct the streaks. Otherwise, you will introduce new marks or mistakes with the new coat.
4. Sand down and repaint
Large lap marks require a new painting job. In this case, you need to wait for the ceiling to dry completely. If the marks are spread across the ceiling, sand down all the paint and repaint the ceiling.
You may also sand down specific sections with lap marks. However, caution is advised to avoid messing up with the perfectly painted sections. Repainting is tiresome and costly, but also an opportunity to perfect your painting skills.
Additional Tips to Prevent Streaks When Painting
The following tips are essential if repainting is your only option for correcting lap marks. The tips will also help you avoid streaks in future painting jobs on ceilings, walls, floors, fences, and other surfaces.
1. Always paint on even surfaces
The rule goes for all painting jobs. Ugly streaks show when you paint over uneven surfaces, including cracks, gouges, and holes. Some imperfections on the surface are too small to notice until you paint the first layer of paint.
Fill the cracks or holes before adding a new coat. In addition, sand the filler first before painting.
2. Clean the surface thoroughly
The ceiling surface may be smooth, but dirt will lead to unwanted marks. Clean the surface with soapy water and allow it to dry before painting. In addition, wipe the surface with a dump cloth if you sand the surface.
A point to note when cleaning is to avoid bleach or strong detergents that may chip the ceiling or any other surface. Test cleaning products on a small section first. In addition, avoid tough scrubbing brushes that can scratch surfaces.
3. Apply more than one coat
Painting jobs require several coats for an even and lasting finish. Consider this requirement when budgeting for the project. Otherwise, you will spread your paint too thin. In addition, choose a quality paint that gives a smooth finish with two coats.
Cheap paint may require more than two coats. Do not compromise on quality. Instead, get the best paint, apply it in several coats, and allow it to dry completely. You will forget about painting the ceiling for several years.
4. Remove painter’s tape immediately
Some lap marks occur when you rip off painter’s tape from dry paint. If you must tape off some sections of the ceiling, remove the tape immediately before the paint dries. In addition, check the results after removing the tape and touch up any marks immediately.
5. Light up the room
Open the curtains and windows to bring in as much natural light as possible. Use overhead and flood lights to light the ceiling well. Do not rely on your natural sight and light to judge the illumination in the room.
Painting under enough light ensures that you spot mistakes quickly as you paint. You can correct them on the go with a touch-up. You can also adjust the amount of paint on the roller, painting speed, and pressure in time.
6. Sand down the first coat
We recommend more than one coat of paint before you can complain about streaks. However, you may notice some bubbles from the first coat, especially if the humidity is high. Do not paint over bubbles or any other imperfections.
Paint the second after the first coat is dry and even. Use fine-grit sandpaper or an alternative to level out the paint coat. Repeat the process if you need a third coat or finish.
7. Do not use a dry roller
You will achieve a smooth finish if you cover the ceiling in one session. The roller will dry and leave streaks if you take breaks. Allocate enough time for the project such that you can paint it all in a single section.
Here is another tip. Cover one section of the ceiling at a time instead of moving the roller from one corner to the other. Perfect each section as you move, and avoid taking breaks in-between sections.
8. Add paint extender
Lap marks may appear if the paint dries too fast. A paint extender will save you if you live in an extremely hot area or paint in summer. The paint will take a longer time to dry with an extender, giving it enough time to cure and set.
9. Ask for help
It is okay to ask for help even after successful DIY painting projects. Some ceiling designs require a professional painter for a flawless job. You will waste lots of money on painting products trying to achieve professional results.
Conclusion
Mistakes are inevitable in DIY projects. The best methods to fix lap marks on ceilings will depend on their magnitude. Painting touch-ups and adding a second paint layer can correct minor marks. However, large lap marks may require sanding and repainting the ceiling.
You can prevent streaks in your future painting projects by choosing the right paint and roller for ceilings. Avoid painting on uneven or dirty surfaces, and apply at least two coats. In addition, ensure the room is illuminated and add a paint extender to prolong the drying process.
- Can You Unmix Paint: Techniques, Consequences, Alternatives - February 23, 2024
- Does Primer Need to be Mixed? Effective Primer Application - February 22, 2024
- How to Make Old Paint Usable Again: Retrieving and Preserving Paint - February 21, 2024


