When painting your car yourself, several painting and buffing options exit. Multi-layer paints are popular, but single-stage paint also exists, which is simpler and faster. Is it possible to safely buff single-stage paint on your vehicle?
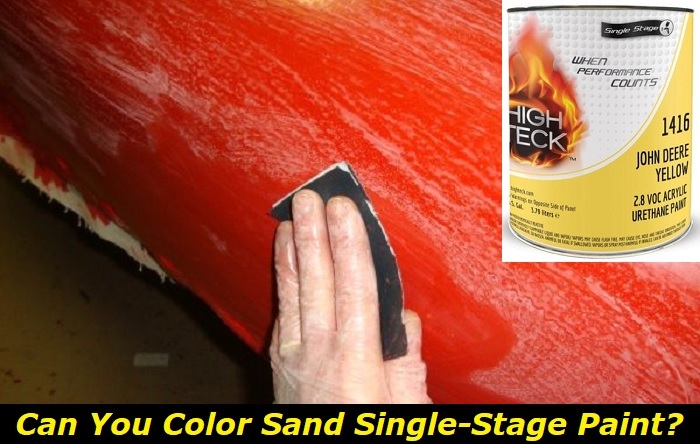
Yes, it is possible to correctly color sand single-stage paint. Using a 2000-3000 grade paper and an electric buffer will help your paint smooth down safely and reduce the risk of damage to your paint job. This buffing job can be done either wet or dry but works best wet.
Keep reading to learn more about the care of single-stage paint, and learn how to safely and carefully buff these kinds of vehicle paint jobs.
What is Single Stage Paint?
Single-stage paint is a type of vehicle paint that incorporates hardener and enamel into the paint itself, as well as pigmentation. This reduces the need for multiple layers of paint and allows vehicle owners to skip several steps in the painting process, as well as skip a clear coat if they wish.
Single-stage paint is often found on older vehicles and needs special care and consideration to apply and safely buff.
How Long After Application Can You Buff?
Single-stage paint tends to dry a bit faster than multi-layer paint. To be safe, wait 24 hours after application before you buff. This will ensure your paint is sufficiently dry and hardened before buffing. The added compounds in single-stage paint make for a faster drying time overall, too.
Can You Add Multiple Layers of Single Stage Paint?
Yes, you can absolutely add more than one layer of single-stage paint if you want to. While it’s not necessary, it does provide an added layer of fortification to your car’s body and lends even more strength and longevity to the paint job. There’s no need to buff between paint layers; save that for the final layer of paint on your vehicle for the best-looking results.
Removing Dirt and Dust
The first step in buffing single-stage paint is to carefully remove dust or particles from the surface of the paint job to cut down on impurities or scratches in the buffing job. Use a soft cloth and fallout remover to remove any dirt and rust.
Make sure you’re working in a clean and dust-free environment, and consider hosing down your work area and hosing down and squeegeeing your garage floor before buffing, to entrap dust particles in the moisture.
Use an Electric Buffer
When buffing the broader sections of your vehicle, you’re going to want to use a machine polisher, instead of going at it by hand. This is because a machine buffer can be more precise and give you a better overall effect than hand-buffing on large areas.
While some home car painters prefer to hand-buff their entire vehicle, using only your hands can result in uneven pressure across the entire buff job, and lead to less beautiful or less even results.
Imperfections are easier to fix with an electric buffer, and the quality of your buffing job will have more uniformity. You’ll save quite a bit of time as well, and can move through the job faster. This works great on large panels and wider areas, but be careful on panel edges.
Hand Buff Edges of Panels
The only parts of the car you’re not going to want to use an electric buffer on are the edges of panels and on curves, as the paint on these edges is often thin, and delicate. Use gentle hand buffing on these delicate sections of the vehicle. Electric buffing is great for large panels, but you need a lighter hand on tighter edges.
Use a 2000-3000 Grit as You Buff
The more delicate the grit, the best results you’re going to get. Buffing single-stage paint takes a bit more care than buffing multi-layer paints, and using a finer grit is going to give you the best and most precise results.
Some at-home painters will work from an 800 grit up and go finer with each buff, but we recommend starting fine and moving up from a 2000 grit to ensure careful and successful buffing over this uniquely thin paint type.
Clean Your Buffing Pad as You Go
As you make passes over your single-stage paint job with your buffing pad, made sure to clean it of any dirt and paint as you go. This will help reduce scratches and damage as you buff and help you to move quickly over the entirety of your car’s body.
Switch Out Buff Pads as Needed
You may notice some color transfer onto your buffing pad as you work. That’s completely normal for single-stage paint and shouldn’t alarm you. Check your buffing pads for wear as you work, and switch them out with fresh pads for the best results.
An average car job can use anywhere from 3-5 pads over the entire vehicle, but this depends on vehicle size and design.
Using Moisture is a Plus
While it’s not absolutely necessary to wet sand as you buff your single-stage paint, adding water into the equation can make for a smoother and more uniform final job. Wet sanding helps the grit stay on task while doing less potential damage to the vehicle.
The more moisture you use and the more careful you are the better of a result you’ll get.
Having a bucket of soapy water on hand as you buff can help you lubricate the panel as you go, and add to the smoothness of the final buff job.
Use a Squeegee if you Wet Sand
If you choose to wet sand your single-stage paint, the best tool to have in your arsenal is a squeegee blade. It’ll be faster and more precise than a cloth or a rag, and allows moisture removal over a wider section of the panel you’re working on. This will keep your sanding job more uniformly hydrated, and save you quite a bit of time.
Can You Dry Sand Single Stage Paint?
Yes, you can dry sand single-stage paint. Water isn’t an absolute necessity, though it often makes things much smoother. Be gentle and careful if you dry sand, and be aware that a dry grit can cause a bit of a rougher buff job overall.
If you’re dry buffing, keep your rotations gentle, and check your work often.
Use a Polishing Compound
You’re also going to want to use a polishing compound to finish up the job and give your car extra shine and beauty. Manufacturers should state on the bottle which compound works best with given grit levels. Make sure that the compound you use is matched to the paper grit you’re using, with a 2000 grit being a safe and workable choice here.
Also check to see that the buffed paint is clean of any dirt or grime, as this can swirl into the compound and create ugly discoloration as you polish. Hand polishing also works at this stage, and whether you hand-polish or use an electric buffer really just depends on preference.
Be sure to gently clean up any excess polish with a soft microfiber cloth.
Can You Add Clear Coat to Single Stage Paint?
Even though single-stage paint does have enamel properties mixed into it, you can definitely still add clear coat on top of single-stage paint. This will simply give your paint job added durability, protection, and make buffing a bit easier in the future.
Add a layer of clear coat onto your single-stage paint job if you’re looking for a better-protected surface and want some extra armor between your paint job and the elements. It won’t hurt your car or your paint job to do so and can add even more shine to the final project.
Can I Wax My Single Stage Paint?
Waxing should only be done once the paint job has fully cured. Curing is distinct from drying, and means that the entire dried paint job has fully settled into itself is protected, and can now be safely waxed. Wait at least a month until you wax your paint job, and make sure that your wax application tools match the product that you’re using.
Conclusion
Single-stage paint is a vehicle paint with enamels and hardeners mixed in, eliminating the need for multiple layers and for a clear coat. The best way to safely buff your single-stage paint job is to wet sand using 2000-3000 grit paper. Electric buffers are a must here, as they’ll ensure a uniform buffing job, and give you faster and better-looking results. Hand-buff more delicate areas like curves and panel edges.
Feel free to use multiple layers of single-stage paint, as well as clear coat if you so choose, for added durability and shine. Waxing should only be done at least a month after the initial paint job, to ensure that the dry paint has fully cured.
- Can You Unmix Paint: Techniques, Consequences, Alternatives - February 23, 2024
- Does Primer Need to be Mixed? Effective Primer Application - February 22, 2024
- How to Make Old Paint Usable Again: Retrieving and Preserving Paint - February 21, 2024


