Cold blackening is the easiest way to give your steel a sophisticated, striking look. This article will fill you in if you want to borrow from contemporary architecture’s use of chic blackened steel in commercial and residential buildings.
We will discuss everything you need to know about cold blackening steel, including:
- What is cold blackening?
- Why cold blackening is the best finish for you
- How to cold blacken steel
- Tips and things to consider when cold blackening steel
What is Cold Blackening?
Cold blackening is a finishing method that provides alternatives to other steel blackening methods, e.g., hot blackening and oil blackening. As the name implies, blackening processes lend steel a much darker shade than its original. The final color of blackened steel depends on personal preference and the method used to blacken it. The colors range from charcoal black, blue, and dull gray.
The blackening process does more than add a touch of class to your steel. It also offers minimal corrosion resistance, mild build-up, and minimizes light reflection. Blackened steel should be sealed after the blackening process to prevent the steel from rusting.
How Cold Blackening Works
Cold blackening involves the application of a chemical compound that adheres to all the nooks and crannies of your machined metal surface. The compound’s adherence will create a porous base that chemically bonds with your workpiece surface.
Cold blackening uses a chemical compound named copper selenium. This compound gives your steel a sleek finish and seals it from moisture and corrosion. The black oxide’s porous nature is essential in insulation against water because it allows the sealant to spread evenly over the metal substrate.
Why Cold Blackening is the Best Method For You
Cold blackening was a much-needed invention because it allowed DIYers to perform the process without exposure to toxic fume or extremely high temperatures. This process saved workshops from making the tough choice between spending a lot to outsource blackening or taking on the risk and doing it themselves.
Anyone can now finish their metals without taking on excessive risks by purchasing commercially available cold blackening solutions. These products are safe because they can be used at room temperature without producing toxic fumes. It gets better. These solutions are versatile enough for use on a wide range of low or high-pH surfaces, including stainless steel, nonferrous metals, and low-carbon steels.
Environmental regulations and safety hazards have made it difficult for anyone to run hot oxide lines. Cold blackening is the best choice for anyone that is not working on an industrial scale. The fact that cold blackening is much cheaper than other alternatives, e.g., plating or painting, has only served to increase its popularity.
Other advantages of cold blackening include the following:
- It forms a very thin layer, less than 0.75 microns which doe not affect how metal components fit together.
- It improves anti-galling properties – cold blackening increases lubrication between moving parts by reducing the coefficient of friction.
- It maintains the metal substrate’s durability by preventing hydrogen embrittlement, i.e., structural weaknesses caused by hydrogen diffusion.
How to Cold Blacken Steel
Even though cold blackening steel is not as dangerous as the other alternatives, caution must be taken. Follow this step-by-step procedure to ensure everything goes as planned when cold blackening your steel.
1. Prepare the steel
As with any other project, how well you prep the surface for your procedure will greatly impact the final results. Before beginning the cold blackening process, it is crucial to prepare your metal appropriately.
The most appropriate cleaning method amongst solvent degreasing, electro cleaning, and grit blasting depends on the type of dirt you want to remove. An alkaline detergent soak is perfect for eliminating cutting oils and water-soluble coolants.
Spray cleaners, electro cleaners, and agitated soak cleanest work best on insoluble dirt like machining fines and carbon soot. Try abrasive blasting if you need to remove the mill scale, heat treat scale, or rust. Often soapy water and a wire brush are more than enough to get the job done without unnecessarily driving up costs.
Remove any grime or dirt from the surface using soapy water and a wire brush. Cleaning away the dirt will ensure that your cold blackening solution has an even surface it can easily adhere to. If you do not have a wire brush, try using a degreaser and soft sponge to clean the surface.
2. Rinse, activate, and dry the steel.
Rinse the surface with clean water. Tap water should do the job just fine, though, for a large-scale process, you will need to monitor the water’s pH, flow rate, and conductivity. Experts recommend sourcing your water from a bottom-fed tank that has an overflow trough on top.
Next, use an acidic solution like vinegar to get rid of any rust or oxidation layer that may have formed on the surface. Removing rust and oxidation layers ensures that your cold blackening solution will achieve a silky smooth finish.
This step is called activation because it ensures your steel surface is in a reactive state. Activating your steel surface ensures the cold blackening solution can adhere efficiently and uniformly. The activation process does this by adjusting the surface pH and removing any oxide layers left in your surfaces pores after cleaning. Mild acids are the best activators because they neutralize the alkaline salts and wetting agents deposited on the metal during cleaning. The mild acids will also kickstart the blackening reaction.
The water you use to rinse the surface after activation must be as clean as possible to avoid recontaminating the surface you just activated. Keep your rinse tank as clean as can be to avoid contaminating the blackening bath and creating a poor-quality coat.
3. Treat the surface using cold blackening solution.
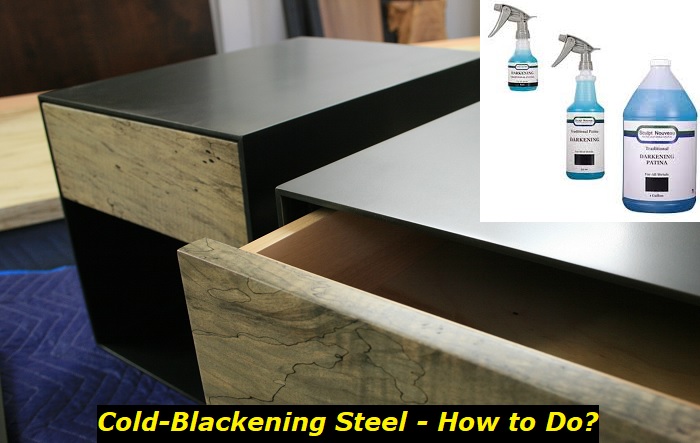
After prepping your surface, it is finally time to break out your cold blackening solution. Ensure you consult the staff at your hardware store or pay close attention to the label before purchasing a cold blackening solution. The right type of solution depends on the type of surface you are finishing and the effect you wish to achieve.
Your cold blackening solution will contain precise instructions on how to prepare and use the product. Some products are applied using paintbrushes, while others require spray bottles. Ensure you have gathered all the tools and equipment necessary to avoid a half-baked blackening process.
Most cold blackening solutions need less than ninety seconds to get the job done. Exposing your surface to the solution for longer or less than the recommended duration will have a serious effect on the final aesthetic. Cold blackening is less durable than other hot blacking, therefore. It is important to get every step right to avoid the trouble of an ineffective blackening process.
4. Rinse
Clean cold water rinse is next in line. This rinse removes all the excess blackening solution on your surface. Ion exchange is recommended to avoid discharging polluted water into the drainage system.
5. Sealing
After the surface has dried, you will need to seal it using a dry-to-touch sealant or oil. There is a wide range of sealing products in the market. Some sealants are water-based, and others solvent based.
Hydrophobic sealants are the latest technological break. They are praised for the VOC-free formula that makes them completely water-resistant after they dry on your metallic surface. Select the sealant that best displaces water and insulates against atmospheric humidity.
Things to Consider When Installing An In- House Cold Blackening System
- Select a supplier who provides all the chemical products, installation tank line, ion exchange system, troubleshooting services, and operator training.
- Supply the installer with samples of the types of metals you work on. It is also helpful to specify the type of finishes you desire. This information helps the supplier provide an accurate report and cost estimate.
- Request a design proposal that meets your requirements. The more information you provide to the supplier, the most customized your proposal shall be.
- Use the design proposal to analyze the operating costs by factoring in labor, utilities, chemical, and equipment maintenance.
- Once the installation is complete, invite the supplier to send a qualified technician to inspect the line and train you (or your staff). The technician should also create a maintenance schedule to make your work easier.
- Maintain a log of maintenance on your cold blackening line to help monitor costs and ease ISO documentation.
Controlling Pollution When Using Cold Blackening
Most local governments have strict regulations on the disposal of water that have been used in the cold blackening process. An Ion exchange system is the cheapest way of reducing the concentration of pollutants in your wastewater. The system is connected to your rinse tanks and removes all dissolved inorganic ions. If you wish, you can add a carbon chamber to remove emulsified oils and wetting agents.
Conclusion
Why bother sending your steel items for blackening elsewhere? Consider installing a cold blackening system in your shop. It is a cost-effective and simple method of giving your steel products a high-end look.
- Can You Unmix Paint: Techniques, Consequences, Alternatives - February 23, 2024
- Does Primer Need to be Mixed? Effective Primer Application - February 22, 2024
- How to Make Old Paint Usable Again: Retrieving and Preserving Paint - February 21, 2024


