If you use too many coats of paint too quickly, you can cause the paint to become tacky and stick together. This article discusses how to avoid paint that’s too thick.
Many people have had experience with this issue, mainly due to over-coating their work in an attempt to speed up the painting process. What they may not know is that too many coats effectively create a gummy coating on the surface which is impossible to remove without damaging your walls or causing further problems in your materials.
Clear coat paint is a synthetic resin that is designed to be applied as a top coat to various surfaces. This final layer will give the surface an incredibly appearance, but it’s really hard to remove.
The first mistake people make when using this kind of finish is applying too many coats. If you look at the back of the container, it usually recommends 2-3 coats. The problem is that people want their project finished as quickly as possible without giving the paint adequate time to dry in between coats. This leads to a tacky substance being created.
What do you do if your paint is sticky?
If you have a sticky paint finish, your first step should be to remove all of the old paint from the surface. Use a solvent such as acetone and continue to remove the older layers until you are left with just the clear coat. Then, allow a minimum of 2 hours for each coating and wait long enough between coats so that they can dry properly.
Having the proper amount of time between coats will help prevent your surface from becoming gummy by slowing down evaporation or by allowing existing layers to dry longer than usual. If you have existing paint layers which need to be removed, it may be necessary to use a chemical stripper. This is typically the best option when working with a clear coat. Once the clear coat has been removed, there’s no need for you to apply more layers. Instead, take your time and allow the material to properly cure before attempting any future coats.
How do you dry sticky paint?
The sticky finish will never completely dry out, but the material can become less malleable. This could be due to the thickness of your layers, the type of paint used, etc. While it’s not possible to completely remove a sticky finish, you can make it better by simply allowing additional time between each coat.
Will tacky paint eventually dry?
You can’t really dry tacky clear coats into a dry state. The best way to remove tacky coatings is to scrape them off and completely remove them. This will allow you to apply another layer without the sticky finish.
If you want to avoid getting a sticky coating on your clear coats, make sure that you allow adequate time for drying. This will prevent gummy areas from forming and keep your work looking the way that you want it to. It may take longer than you would like, but it’s worth the wait if you feel that it is necessary to fix any issues.
How Long Does It Take for Paint to Stop Being Sticky?
The amount of time that it takes for paint to stop being sticky is dependent upon the thickness, the type, and the number of coats. In most cases, it will take between 24 hours and a few weeks to completely cure.
Let the paint dry for a few hours and then use tack cloths or wet wipes to remove the sticky coatings that are still present.
If you are struggling to remove old layers, you may want to consider using solvents such as acetone or turpentine because they will dry quickly and cleanly.
However, if you continue to use painted material with an overly tacky finish, your paints will most likely continue to be sticky every time that you apply them in the future.
How to Fix Sticky Clear Coat
If you have a sticky coating on your clear coat, it’s likely because you used too many layers in a short amount of time. In addition, the type of paint that you’re using may affect the tackiness as well. For example, acrylic and latex paints will dry faster than oil paint or urethane materials.
Do not use thinner on your clear coats because they can cause the different layers to become blended and will ultimately lead to a more difficult removal process.
Tools and Materials:
- clean cloth
- Armor All (or another protectant)
- an index card
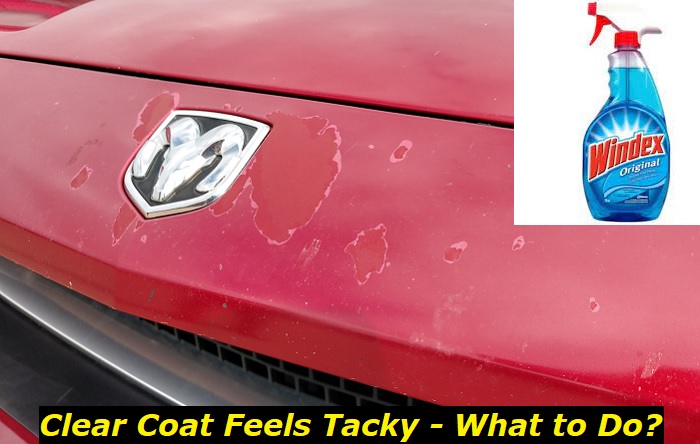
- Windex
- sponge
- water (in a spray bottle)
Step 1: Finding out if your clear coat is sticky
Your first goal is to determine whether your clear coat is in fact sticky. Apply a thin coat of Armor All or other protectants to the area that you’re working on.
Next, remove all of the paint with a clean cloth, sponge, or wet wipe. If your project is new and you haven’t painted anything recently, you may need to use removal solvent on the back side of your piece.
If the coating isn’t sticky, you will most likely have little to no problem removing it.
Step 2: Spray Windex onto an Index Card
Spray Windex onto an index card and then use it to wipe down your piece.
Wiping over the paint with a wet cloth and spray of Windex will remove all of the tacky bits. Then, you can use a clean cloth to wipe away the Windex once it has dried.
Step 3: Make sure you wipe your Surface
Apply a small amount of Armor All to your clear coat and then use a clean cloth to wipe it down. Be sure that you apply a new layer of Armor All after you finish.
Do not use any additional products on top of this.
Step 4: Apply Armor All (or Another Protectant) & Wipe Clean
You want to apply a new layer of Armor All or another protectant over your surface. This will further add an extra layer of protection to your car’s clear coat.
If you are unsure how to fix sticky clear coats, there are a handful of options for you to try. You may want to use an index card with Windex as a last resort, but the best way is going to be using one other on our list – the scratch remover from 3M.
Step 5: Put water in a Spray Bottle & Lightly Sticky Mist Areas
As a final step, grab your water in a spray bottle and lightly mist any sticky sections of your clear coat. If it’s new, you may need to use a separate solvent to remove the paint – such as acetone.
In our list of the top 5 best scratch removers from 3M, we chose the scratch remover because it can be used on both car paint and windows. The 3M brand is known for producing some of the best products on the market and this one is no different.
Step 6: Prevent This from Happening Again
If you have a project that’s currently in the process of being coated, be sure to take extra caution while working.
You never want to get more than one coat in one sitting and you also don’t want to use a mitt or wear other protection on your hands. This can make the entire process more dangerous.
Also, if this happens again, be sure to use the scratch remover on your next session because it will probably be necessary for you to remove any leftover sticky coating from your previous coating.
Tips and tricks
Application
For best results, use this product in an application booth, when possible. This will prevent overspray and reduce the risk of any airborne contaminants damaging your vehicle’s paint finish.
Use a clean, soft towel to remove any overspray from the surface before using the product on your vehicle’s paint finish.
Curing time
Allow at least six hours for this product to cure before washing your surface.
Precautions
For use on factory-finished paint only. For safety reasons, never spray this product on an unfinished surface or any other non-metallic surface. If a non-metallic object becomes contaminated with this product, it may become slippery and/or a safety hazard. The use of this product in its dry state (without adding fluid) on a non-metallic object should never be done under any circumstances.
Conclusion
Sticky or tacky coatings are an unwanted occurrence. Luckily, they’re not as difficult to avoid as they once were. By spending a little bit of time and money on different products, you can always make sure that you complete your project properly and without any unintended consequences. Follow the steps provided here and you’ll be able to avoid this problem from happening again.
- Can You Unmix Paint: Techniques, Consequences, Alternatives - February 23, 2024
- Does Primer Need to be Mixed? Effective Primer Application - February 22, 2024
- How to Make Old Paint Usable Again: Retrieving and Preserving Paint - February 21, 2024


