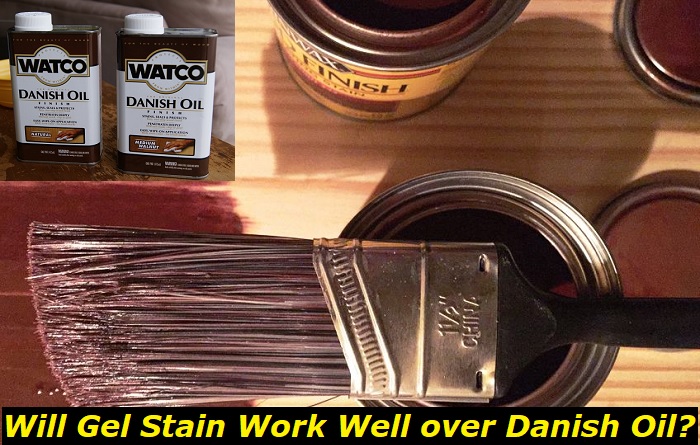
Should you decide that gel stain is your cup of tea, you’re in for a shabby-chic antique look. Not only does it allow the wood’s texture and markings to shine through, but it’s also effective over oil finishes such as Danish oil and leaves a darker finish look.
Not to mention that you don’t have to sand off all the existing finish before applying the stain. In this post, we’ll cover all you need to know about using gel stain over Danish Oil and tips to remember for the best results.
Why Oil-Based and Water-Based Stains Don’t Work Over Danish Oil
Typical traditional oil-based and water-based stains work by penetrating the wood surface upper layer and changing the natural color of the lumber. They do this by using the pores on the wood surface to penetrate.
On the other hand, an oil finish such as Danish oil functions by seeping deep into the wood, latching onto the grain, and hardening into a durable resin. The Danish oil thus prevents the oil-based and water-based stains from penetrating when the stains are applied over them. This is because the Danish oil fills the pores on the wooden surface, which the stains also use to penetrate.
A solution to getting the traditional stains to work would be to remove the Danish oil coat by chemical stripping or heavily sanding it down. This could give the stains a leeway to penetrate, but the surface would end up splotchy. So, which is the best stain to apply over Danish oil?
Why Gel Stain is the Best Stain to Apply Over Danish Oil
Gel stain is topical and has a creamy consistency. It doesn’t penetrate deep into the wood compared to oil-based and water-based stains. This is because it is heavy-bodied because of a thickening agent, which is an excellent inclusion during manufacturing. The thickening agent allows easy application and adds color concentration to the stain.
Gel stain sits on top of wood instead of sinking into it like other stains. This makes it suitable to use over Danish oil. It also contains Urethane; hence you can use it over existing top coats such as old paint and stains. Below are some other reasons why gel stain is important:
Pros of Gel Stain
- It enhances clarity and depth of color to existing finishes.
- It requires less preparation and is easy to use.
- It’s easy to apply vertically because its thick consistency avoids splatter and drips.
- It works well with woods such as maple, pine, cherry, and birth, prone to splotching with other stains.
- It’s durable and long-lasting.
- It produces a uniform look to uneven wood grain.
- It allows enough time to work on the stain and even change color before it dries.
- No need to strip paint or finish oil before application.
- Easy to clean up.
- No Volatile organic compounds (VOCs) are emitted; hence it’s environmentally friendly.
- Works well to hide the underlying color of previously painted or stained surfaces.
Cons of Gel Stain
- Not suitable for a workpiece with many corners.
- It has a long drying time.
- Gel stain doesn’t have the spraying option, so you have to paint it with a brush or cloth.
Why Use Danish Oil?
Danish oil is a wood oil finish applied to bare wood or an already stained surface. It’s a blend of natural oils such as linseed oil and tung oil with mineral spirits and varnish. The Danish oil offers protection against water, stain, and wear. It also increases the beauty of the wood grain by making it pop and leaving a lustrous satin finish.
Danish oil works by reacting with oxygen in the air to form a high polymerized strong layer. This is why it’s water resistant. You can apply it to kitchen cabinets, furniture, and interior woodwork. Due to its non-toxic nature, you can also apply it to food prep utensils, children’s furniture, and toys. Below are the pros and cons of using Danish oil.
Pros of Danish Oil
- It makes the wood durable by soaking and hardening it.
- It leaves a smooth finish and improves the sheen.
- It emboldens the grain of the wood.
- It’s available in different colors.
- It’s easy to apply.
- It protects the wood from scratches, chemicals, and water to prevent rotting.
- You can use it as a primer.
- It has a fast drying time of about 6 hours, depending on the temperature and humidity of the environment.
Cons of Danish Oil
- It requires regular maintenance.
- It doesn’t make the wood grain smooth.
- It mostly works only on bare wood.
How to Apply Danish Oil Over Wood
- Prepare the wood surface by sanding it with sandpaper of grit 120-220.
- Remove the dust on the workpiece using a shop vac and wipe the remaining dust using a micro-fiber tack cloth.
- Mix the Danish oil thoroughly before applying it.
- Apply the first coat using a micro-fiber or a sponge brush. Rub a thin coat over the wood surface and avoid paddles.
- Wait 20 minutes for the oil to soak into the wood and apply a second coat. You can apply extra coats to add shine and protection to the workpiece.
- After applying the extra coats, wait for another 20 minutes and wipe the surface with a clean rag. Ensure there are no drips and that the surface feels oily, dry, and smooth.
- Wait for 48 hours for the surface to cure before use.
How to Apply Gel Stain Over Danish Oil
- For preparation, clean the surface with a mixture of denatured alcohol and water (on a 50:50 ratio) using a sanding pad. This helps eliminate contaminants such as wax on the surface. Use a paper towel to wipe off excess liquid and let it dry.
- Light buff the surface with 400-grit sandpaper or flexible sanding pad to break the surface film and degloss the surface so that the stain adheres to the finish. Avoid burning through the finish.
- Use a towel to wipe the surface with a little mineral spirit if you’re working with an oil-based gel stain. The mineral spirit acts as a slip coat to help the stain glide on and enable you to quickly wipe it off.
- Use a vacuum and a clean, oil-free tack cloth to remove the dust on the workpiece.
- Apply the stain on the workpiece in a circular motion to work the stain into the grain using a cotton cloth, then wipe it out in the same direction as the grain for an aging effect.
- Spread the color evenly on the surface. You can use a foam roller on large surfaces and a foam brush to work on the corners of the workpiece.
- Add extra coats of stain to get more color depth or even out the color on the surface.
- Leave the stain to dry.
Tips to Remember When Using Gel Stain Over Danish Oil
- You can also use Gel stains on metals and fiberglass.
- It’s not suitable for use on a workpiece with many corners and detail since it tends to pool in those areas.
- You can use a brush, cotton cloth, and pad to apply the gel stain.
- Apply the gel stain in a well-ventilated area since its vapors are harmful and smelly.
- Wear gloves and a NIOSH-approved respirator for protection before the gel application.
- 100% denatured alcohol should not be used to clean the surface during prep since it’s a strong solvent and can dissolve all the existing finish.
- Rub petroleum jelly on your hands and other areas that can come into contact with the stain to allow easy removal.
- If you want to change the color of the stain, add artist oil.
- Make sure you properly stir the gel stain before you begin applying it to mix the color evenly.
- It’s better to apply several thin layers of gel stain instead of one thick layer.
- You can create an aged bronze effect over painted metal.
- The drying time for gel stain is about 48 hours and depends on the temperature and humidity of the surrounding area.
- For highly used areas such as kitchen cabinets, table tops, and bathroom vanities, it’s best to paint top coats such as lacquer, varnish, shellac, or conversion over the gel stain to enhance protection against scratches, spills, and water.
- If you’re not satisfied with the application or color of the gel stain, using a little elbow grease and mineral spirit to wipe it off comes in handy.
- If gel stain accidentally drops on a surface you don’t want; you can get it off with a flat scraper and dab it with mineral spirit.
- Don’t crumple and throw the rag you use on gel stain into a garbage bin, as this could cause it to self-ignite. Instead, hang it outside to dry before dumping it.
- Gel stain can get chunky if it’s stored for a long without use. To solve this, add mineral oil or linseed oil to it and mix to regain its consistency.
Bottomline
There you go. All you need to know about applying gel stain over Danish oil and tips to remember for best results. Depending on how dark you want your finish to be, you can use different gel stain colors or add a couple of coats of your gel stain. Test the gel stain on a small scrap of wood before applying it to the actual workpiece. This will ensure you get it right for the desired look.
- Can You Unmix Paint: Techniques, Consequences, Alternatives - February 23, 2024
- Does Primer Need to be Mixed? Effective Primer Application - February 22, 2024
- How to Make Old Paint Usable Again: Retrieving and Preserving Paint - February 21, 2024


