One day you wake up and decide that your kitchen cabinets need touching up. They appear flaked, chipped, and ruined. You buy paint and want to start working on them. But then you remember they have previously been finished with Osmo oil.
Is it possible for you to go ahead and paint over Osmo oil, and will the results be what you wanted? Or will the paint just not stick to the surface whatsoever?
These are the questions we will answer in this article.
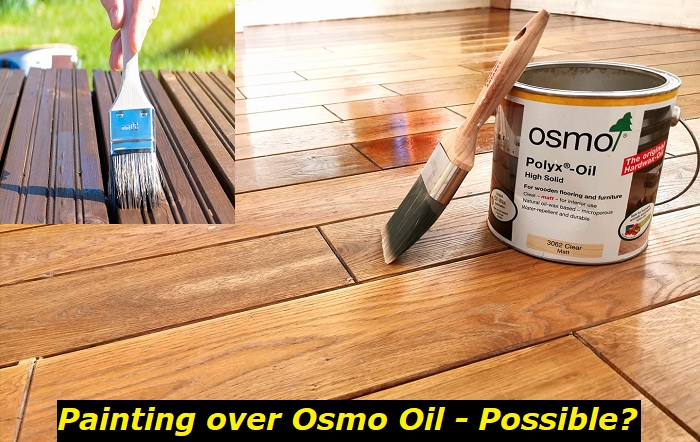
What Is Osmo Oil and Where Is It Used?
Osmo Oil also known as Osmo Polyx Oil is a hard wax oil. Hard wax oils are considered superior in protecting wooden flooring and furniture. It has a blend of tung oil and carnauba wax. Osmo Oil is compounded similarly, hence it is widely used for furnishings. This oil is very strong, as hard as varnish but its great quality is that it’s easier to repair.
Another quality of wax oils and Osmo as well, is that they are very stubborn with adhering to other finishes. This happens because wax oils fill any divots to create an even surface. The divots could also be microscopic holes that the human eye can’t see on the surface of the wood.
Those microscopic holes are needed for paint to stick on the wood, hence when wax fills them, paint loses the ability to stick rightfully on the wood. Therefore, in their natural form, wax oils can’t be painted over.
But there are other alternatives.
Alternatives For Painting over Hard Wax Osmo Oil
1. Remove the Osmo Oil
One solution is to simply try removing the Osmo Oil completely and then use paint to finish the surface. This method doesn’t always work on hard wax because of its ability to sustain any type of pressure from outside substances. This is apparent, especially in waxes that have been cured for a long time, but it’s worth a shot.
To do so you’ll need White Spirit or Mineral Spirit. This is a substance generally used as a solvent to clean and degrease materials. It contains naphtha and kerosene, components that can seep into Osmo Oil. Dampen a cloth in the substance and then wipe the area that has been coated in Osmo Oil. Try to wipe the area in the direction of the wood grain.
Be careful not to use too much white spirit because that will remove surplus oil from the wood which will ruin the surface of the wood by leaving white marks.
If this happened, you need to take extra steps to fix the issue. Begin by sanding the area that has white dots or blodges. Then take a pad soaked and dampened with water and apply it to that area. After the wood has soaked up the water from the pad you can stain that surface until you get the desired look on the wood. Wipe the stain away with a dry pad.
Once all that is done, with the Osmo Oil removed and no white spots, you can go ahead and paint the surface with your preferred colors.
2. Furniture Stripper
Furniture Strippers are components that strip the wood of any existing finishes they have. Be careful not to use chemical strippers that contain methylene chloride as it is dangerous for humans. You also should protect yourself from the stripping gel by using a face mask, goggles, and rubber gloves.
Onwards you’ll have to clean the area with a water-dampened cloth to remove any dirt or dust. Spray the stripper on the surface and then wrap it with saran wrap. The saran wrap will ensure that the chemicals stick to the surface and perform at their best. It’s good to leave it on overnight for maximum effect. Then get a scraper and scrape away all the Osmo Oil residue.
Be sure to throw away all cloths or gel residue after scraping as it is dangerous to leave around. If needed apply a second coat of the stripper gel and leave it overnight. Get a paper towel and coat it with mineral spirits solution to get everything off the surface.
After that, you could sand the area softly, with medium-grit sandpaper to give it a smooth touch. Once you’re done with that you can paint it over with the paint of your choice.
3. Sand The Osmo Oil.
The next option is to use a sanding machine and sand off the coat of Osmo Oil that was used to finish the wood.
Hard Waxoil, once it has cured for about two or three weeks, can be sanded and then coated on top with paint.
To sand, you can use simple sanding paper or get an electric hand sander. Hand-held sanders are quite cheap and safe. To use it, you have to get sandpaper for the machine as well. Depending on the type of surface, the sandpaper’s grit also changes.
For Osmo Oil, you’ll need 120-grit sandpaper. Once the paper is on the machine, gently place it on top of the surface and turn it on. Once it’s on it is fairly easy to control and move. You should just press the sander on the wood and move it back and forth. All the work is left to the machine, so you don’t need to worry about any hand cramps. You should be careful not to over sand, so as not to cause any damage to the natural wood.
Once you’re done with the sander, brush the dust off. In this method as well, it’s advised to clean the area with the mineral spirit after sanding to get off any remaining residue.
After all that is done, you can paint over the surface.
4. Use Bedec Multi Surface Paint
If you don’t have the means to remove the Osmo Oil, then this option should save the situation.
Bedec Multi Surface Paint, also known as Bedec MSP, is a water-based paint that goes on almost all surfaces, even Osmo Oil finishes. It’s famously advised because it doesn’t yellow over time and it could be cleaned with water. It resists flaking, cracking, and heat.
It is available in various colors, and also in matt, gloss, or satin finish. It can be used on wood surfaces interiorly or exteriorly.
This paint can be applied as a spray, with a roller or a brush. The method could vary from the surface that it’s being applied to. For kitchen counters or cabinets, it is best to apply it with a brush.
Bedec MPS has a good drying time of about 3 to 4 hours. What’s even better about this paint is that after having dried it could also be repainted with another brand of paint. So, if you want to change it after a few years, you could do so easily.
5. Use Chalk Paint
This paint is also ideal if you don’t want to remove Osmo Oil finishes. Chalk paint is a flat paint that sticks to most surfaces without any other procedure done beforehand like sanding or stripping.
The most important part of using chalk paint, like many other types of coats, is cleaning the surfaces well before you add anything to them. This is done because we need the paint to stick as strongly to the surface as it possibly can. With residue left, like dust or grime, the layer of paint could flake later.
To clean the surface, you can use a degreasing detergent and a pad and scrub it back and forth. It’s important to remove any grease because if left, it’ll show itself in little dots after the paint layer.
After scrubbing, rinse and dry the wood, and then start applying the chalk paint over it. You’ll notice that the chalk paint is thick and will quickly dry. Once you finish your first coat, it’ll be ready for the second. Once you’ve covered the item with a few coats of paint, you may notice that the brush could leave a few lines of texture, but they are easily removed with 600-grit sanding paper.
Following the light sanding, you could use a finish over the paint for a silky-smooth surface.
For the sealer, use a water-based Polycrylic because it doesn’t have any urethane. Urethane is infamous for yellowing surfaces. You can brush the substance or spray it on.
With this, your objects should look perfect and you’d get your desired effect.
Final Thoughts
In normal conditions, you can’t paint over Osmo Oil, as it contains wax elements to it and wax won’t allow normal paints to stick on it. But you could try to remove the Osmo Oil finish first, by chemical stripping or sanding, and then apply the paint. If that doesn’t suit you, you could use Bedec MSP or chalk paint to paint over the Osmo Oil finish.
- Can You Unmix Paint: Techniques, Consequences, Alternatives - February 23, 2024
- Does Primer Need to be Mixed? Effective Primer Application - February 22, 2024
- How to Make Old Paint Usable Again: Retrieving and Preserving Paint - February 21, 2024


