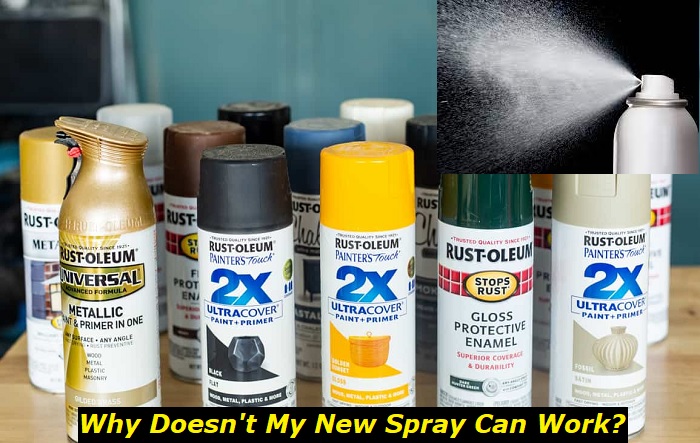
It can be a frustrating experience purchasing a brand-new spray paint only to find it’s not working. You can also use it briefly, and it stops working. It then feels like a waste of time and money trying to figure out what’s wrong.
This article will cover possible reasons why your brand-new spray paint can is not working to help you narrow down to the problem. But first, let’s look at how spray paint can work.
How Does a Spray Paint Can Work?
Spray painting is an alternative to using a brush, pad, or roller to paint. A spray paint can usually consist of the product to be sprayed (paint) and highly pressurized propellant (gas above the paint). The can has components such as a nozzle, valve, and dip tube. When you press the nozzle, the valve opens, making the gas push down on the paint, forcing it to rise through the dip tube and come out as a spray.
The paint and the liquified gas(propellant) in the can exist as a mixture. When the liquid combination is expelled from the spray can, evaporation of the liquid propellant can help disperse the product into a fine mist. You can also find the liquid-gas mixture in products like mousse and aftershave. Now that you know some components of spray paint can and how it works, let’s look at some of the reasons it won’t work.
Reasons Why a Spray Paint Can Won’t Spray
1) Clogged Spray Nozzle
Some types of spraying caps or nozzles include an outline, male, female, calligraphy, stencil, and needle caps. The basic anatomy of a spray nozzle consists of a simple pump system with a gasket, spring, spring cup, and actuator.
The spray nozzle comes in many different shapes and designs. It works by the spring cup dropping below the gasket when you press the actuator, allowing the pressured fluid to fill the space with the air. The liquid then emerges through the tiny aperture at the front of the sprayer, after it rises a narrow tube.
The spray nozzle can clog due to paint drying up in the narrow tubing or a small hole in front of the sprayer and not properly shaking the spray can before you use it. A buildup of contaminants or dirt may also block the spray nozzle preventing the liquid paint from passing through, leading to the spray can failing to function correctly. The glass beads inside the spray can also break and block the spray nozzle, making it fail to spray the paint.
2) Insufficient Pressure
Another reason why your paint can may not spray is inadequate pressure. The spray can is designed to transform a liquid– which in this case is paint– into a finely dispersed mist using pressure. It does this by pushing the fluid out of the can under a highly pressurized propellant. Spray can producers use a pump or compressor to force the propellant into the can to release it evenly. The contents are typically kept between 2 and 8 times the atmospheric pressure.
Spray cans combine a liquid product with a pressurized gas propellant. This combination enables the product to escape the can and form an aerosol cloud when the spray can is pressed. The manufacturer first pours the liquid substance into the can. After the can has been sealed, the high-pressure propellant is pushed in, pushing down on the product.
When there’s not enough propellant, the pressure needed to spray reduces. This may affect the spray pattern, nozzle flow rate, and spray quality. The spray can also lose its dispersing power, reducing or even stopping the spraying. A high altitude or extreme cold or heat may also negatively affect the spraying performance of the spray can.
3) A Malfunctioned Valve
The valve in the spray can is usually connected to the spray nozzle. Like other valves, the valve regulates the amount of paint exiting the spray paint can. The valve opens when you press the button, releasing the pressure at the can’s top.
This results in a significant pressure difference between the inside of the can and the outside air. The product is then pushed via the dip tube and out of the actuator because the system seeks to move toward equilibrium. The liquid is atomized, or broken up into tiny drops, by the nozzle’s small hole at the spray can’s top, creating a fine visible mist.
When the valve becomes faulty, it cannot open and create differential pressure between the inside and outside of the can. The valve can also block, which prevents the paint from exiting with the help of the compressed propellant.
4) Wrong Handling of a Spray Paint Can
Improper handling of spray paint can also lead to it not functioning correctly. This can occur when you hold the paint spray can at an incorrect angle which can lead to loss of pressure. Incorrect handling means holding the spray can completely upside down while performing the spraying motion or tilting the can at an angle of more than 45 degrees, affecting the flow of paint.
In both scenarios, the dip tube will allow the propellant gas to exit the container instead of the paint. This leads to pressure inside the can becoming insufficient to force the paint out during routine use when the gas is released in substantial amounts. It also happens when you hold the can in such a way that the direction the nozzle hole faces is opposite to the bending direction of the dip tube inside.
5) Storage of a Spray Can in a Cold Area and Low Levels of Spray Paint
Many liquids, including oil, syrup, and honey, become more viscous when exposed to cold This also happens to spray paint as it’ll thicken in a cold environment and may even solidify depending on how cold it is. As a result, the spray can will not spray paint effectively. This leads to uneven coverage, and the overall painting job will take up much more of your time.
The spray paint may even refuse to exit the spray can after completely solidifying in freezing temperatures.
A low paint level in the spray can is an often disregarded problem that can reduce the performance of the spray paint can. The propellant-to-paint ratio changes as the paint volume decreases, impacting the spray’s quality and consistency.
How to Fix a Brand-New Spray Can Not Spraying Issue
To fix an issue where the brand-new spray can isn’t spraying, you’ll need to properly inspect the spray paint to find out where the problem occurs. You’ll then try to fix the issue depending on the specific problem. Here are some ways to fix a spray can that won’t spray:
- Give it a shake
To prevent the spray nozzle from clogging, always use spray paint after giving the paint and propellant mixture in the can a good shake. Keep an eye on the strength of the shaking to prevent the glass beads inside of the spray can from shattering when they hit the can during the shaking.
If you need to spray more than once, turn the can upside-down for three seconds to help clear the nozzle of any leftover substance. Next, turn it upside down for use. Don’t position the spray can horizontally or upside down if you want to store or transport it.
To clear the clog, remove the spray nozzle and soak it in warm, soapy water. Other options would be to soak the nozzle cap in a thinner, use a soft brush to clean the parts or use a needle or pin to clear the dried-up paint in the nozzle.
- Contact the manufacturer
Restoring the correct pressure in the spray can is practically only possible if done by the manufacturer. This is because it’s hard to determine which liquified gas the manufacturer used as a propellant when loading the product into the spray can.
Manufacturers often use an inert gas that doesn’t react with the paint as a propellant. Compressing normal air into the can would add oxygen or water vapor, which oxidizes or changes the consistency of the paint.
If you encounter a paint spray can with insufficient pressure, it’s best to contact the manufacturer to get a replacement. You also have the option of using a reusable or refillable spray can. If you are operating the spray can at a high altitude, seek a specific high-altitude paint.
- Look at the nozzle
To diagnose an issue with a faulty valve, try giving the can a vigorous shake to check that the inside ingredients are appropriately blended. The next step is to examine if the spray nozzle is clogged. This rules out an issue with clogging the spray cap and a problem with the propellant and paint mixture.
Try gently pressing down on the nozzle. If the paint doesn’t start to flow, the valve might have a problem. The best course of action is to get a replacement can because there isn’t a quick remedy for a broken valve. This is because it’s hard to access the components inside the spray can without destroying it.
Another option to consider is to transfer the paint into other types of sprayers, such as pneumatic, airless, or high volume/low pressure (HVLP) sprayers.
- Spray correctly
When spraying, avoid inverting the spray paint can. Also, ensure the spray can is not tilted at an angle of more than 45° when spraying paint. This is because that angle prevents submerging the dip tube under the liquid surface to allow spraying.
If you notice that the spray paint is thin in consistency and has become lighter after some use, the propellant gas could be the liquid material that was sprayed out. This requires turning the nozzle to 180 degrees before spraying the paint. You can also try to finish spraying the liquid all at once as the product pressure drops.
Bottom Line
There you go–reasons why a brand-new spray paint won’t work and how to fix them. Properly inspecting spray paint can might help avoid some of these problems before you buy it.
- Can You Unmix Paint: Techniques, Consequences, Alternatives - February 23, 2024
- Does Primer Need to be Mixed? Effective Primer Application - February 22, 2024
- How to Make Old Paint Usable Again: Retrieving and Preserving Paint - February 21, 2024


