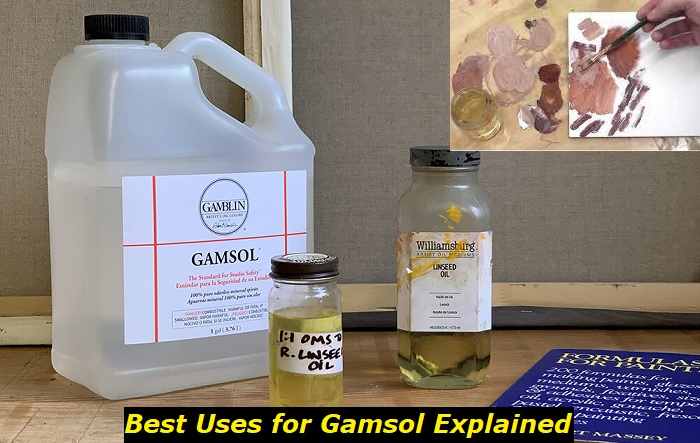
Creativity requires resourcefulness. Hence, various materials are used in the creation of the aesthetic artworks we love to see. One such materials are mineral solvents like Gamsol – a brand name for an odorless liquid that you would commonly find in a painter’s box.
Gamsol is used for:
- Thinning paints
- Cleaning brushes
- Conditioning brushes
- Blending colored pencil lines
- Removing varnishes
Unlike other mineral solvents, Gamsol is less toxic and it has minimal odor. Hence, it is suitable for use in indoor studio settings. It also mitigates the potential health implications associated with alternative mineral solvents.
In the subsequent sections of this article, we will embark on a comprehensive exploration of the diverse uses of Gamsol. Furthermore, our discourse will encompass detailed instructions on the safe and effective usage of this mineral solvent.
Thinning paints
Paints come in a concentrated and very thick consistency right out of their container and they get even more hardened over time. Therefore, artists need to dilute the paints before using them.
Gamsol is commonly mixed with oil paints to get the right consistency and make them easy to work with. Doing so makes it possible to achieve smoother brush strokes, better color blending, and controlled layering for the tiniest of details.
In addition to thinning oil paints, Gamsol can also be used for acrylic paints. Although it can also be used to thin acrylic paints, other liquids can be used to achieve the same purpose like water and acrylic mediums.
Here is the step-by-step instruction on how to thin oil paints with Gamsol:
- Gather the materials needed
- Prepare the palette
- Determine the required consistency
- Add Gamsol
- Mix
- Test the consistency
- Adjust the consistency as required
Here are the materials needed for thinning paints with Gamsol:
- Gamsol
- Paint
- Palette
- Brush
1) Preparing the palette
Add the paints to your color palette and arrange them in a way that they can be easily mixed and accessed.
2) Determining the required consistency
Adding Gamsol to paint will make it more fluid and spreadable but you need to think about the consistency you wish to achieve before doing so. Meanwhile, the consistency required to get great results out of your paintings is dependent on factors like the paint, paint color, painting style, technique, and personal preference.
3) Adding Gamsol
Incorporate a little amount of Gamsol on your brush by dipping it into the container. Begin by dripping just a little of this mineral solvent into the paint on your palette.
It is particularly important to add Gamsol in little doses at a time to avoid over-thinning. You can always add more if necessary.
4) Mixing
With the brush, mix Gamsol into the paint and blend the two ingredients thoroughly until it becomes more fluid and smooth. As you mix, pay attention to the changes in consistency.
5) Testing the consistency
Test the consistency of the diluted paint on a scrap of canvas or paper before using it on your main artwork. By doing this, you can determine whether you’ve attained the required thinness and have a feel for how the thinned paint performs.
6) Adjusting the consistency
If the consistency of the paint is still thicker than you need, it is easier to add more solvent until the right texture is reached rather than salvaging an over-thinned paint.
Cleaning Brushes
Artists must clean their brushes regularly to maintain their quality, avoid cross-contamination, and help achieve the desired result. Hence, artists use mineral solvents like Gamsol to clean their brushes before painting, in between applications, and after painting.
Here is the step-by-step instruction on how to clean paint brushes with Gamsol:
- Gather the tools needed
- Clean the brush with Gamsol
- Wipe the brush
- Clean the brush with soap and water
- Reshape the brush
- Store the brush
Here are the materials needed for cleaning brushes with Gamsol:
- Brush
- Gamsol
- Container
- Paper towels
- Soap and water
- Cleaning brush
1) Cleaning the brush with Gamsol
Pour some quantity of Gamsol into an empty container, then put the brush inside it and swirl it around. Check the brush to see if all the paints have been dissolved in the solvent. If not, you might need to repeat the process at intervals until the brush is clean.
One caveat to this procedure however is to avoid leaving the paintbrush in Gamsol for a long period as doing this can damage the brush. Instead, use a cleaning brush to gently remove stubborn paint stuck to the paintbrush.
2) Wiping the brush
After cleaning the brush in Gamsol, dab it gently using a paper towel to get rid of the excess solvent. However, if you notice a significant amount of paint color on the paper towel then the brush is not completely clean yet and you need to repeat the Gamsol cleaning process.
3) Cleaning the brush with soap and water
After cleaning with Gamsol, you can follow up with soap and water to achieve a thorough result. Work the bristles with your fingertips while you gently wash the brush in warm water and mild soap. Then, completely rinse the brush until the water is clear.
4) Reshaping the brush
Brush bristles can easily get deformed during the process of cleaning. Therefore, it is recommended to reshape them to keep them looking their best. Gently use your thumb and index fingers to return the bristles to their original shape.
5) Drying the brush
If the brushes are not to be used immediately, they should be dried properly before storing. Let the brushes air dry by laying them flat on a paper towel.
It is important to position the brushes flat on a surface and not vertically. Doing this will prevent water and mineral solvent from getting trapped in the metal part of the brush known as ferrule which can damage the brush over time.
6) Storing the brush
After the brushes have dried completely, keep them upright in a brush holder with the bristles up.
Conditioning brushes
If paint brushes are left unattended for an extended period, they can become stiff, brittle, and susceptible to breakage. However, it is possible to avoid damaging your brushes by regularly conditioning them even when they are not used. Mineral solvents like Gamsol can be used to condition brushes to keep them soft and flexible.
Here is the step-by-step instruction on how to condition paint brushes with Gamsol:
- Gather the materials
- Dip brushes in Gamsol
- Wipe clean
- Reshape brush bristles
- Let dry
- Store them
Here are the materials needed for conditioning brushes with Gamsol:
- Cleaned brush
- Gamsol
- Container
- Paper towels
1) Dipping the brush in Gamsol
Conditioning the brush bristles requires dipping them in Gamsol for a short while. Just like I mentioned earlier, do not leave the brushes in Gamsol for too long.
2) Wipe clean
The next step is to remove the brush and gently wipe off the bristles with paper towels.
3) Reshape brush bristles
Use your fingers to gently reshape the bristles to their original form.
4) Let dry
Lay the brushes flat on a paper towel and give them time to air dry.
5) Store the brushes
Gently arrange the brushes in a brush holder positioning them with their bristles up until the next time you will use or recondition them.
Blending colored pencil lines
Gamsol can be used to melt colored pencil wax to erase their graininess and create a smooth transition. Here is the step-by-step instruction on how to blend colored pencil lines using Gamsol:
- Paint your colored pencil artwork
- Put a little amount of Gamsol on a blending stump and use it to smoothen the colored pencil lines gently.
- Let the artwork dry to allow the colored pencil pigment sets properly
Here are the materials needed for blending colored pencil lines with Gamsol:
- Gamsol
- Colored pencils
- Blending stumps
Removing varnishes
Varnishing is an effective way to preserve and enhance the appearance of finished paintings. However, varnishes can deteriorate or turn discolored over time. Therefore, necessitating the removal of varnishes and revarnishing.
Gamsol is a mild yet efficient solvent for removing varnish layers without harming the underlying paint layers.
Here is the step-by-step instruction on how to remove varnishes with Gamsol:
- Gathering the required materials
- Assess the varnish
- Test a little area
- Apply Gamsol
- Wipe the surface
- Scrape the surface
- Clean the paint surface
- Let it dry
Here are the materials needed for removing varnishes with Gamsol:
- Gamsol
- Lint-free clothes or cotton pads
- Scraper
- Varnished painting
1) Assessing the varnish
The first step is to assess the painting to determine the type of varnish used. Varnishes like Gamvar can be easily removed using Gamsol.
2) Testing a little area
Before removing the varnish on the entire paint surface. You need to test the varnish removal on a small inconspicuous area of the paint.
Apply Gamsol on a lint-free cloth or cotton pad and gently dab it on the area. Doing this will enable you to see how the solvent reacts to the paint.
3) Applying Gamsol
Having tested a small area to ascertain that the solvent will not damage the paint coat, proceed to remove the entire varnish. Start by wetting a cotton pad or lint-free cloth with Gamsol. Then, gently dab on the varnished surface one area at a time.
Let the solvent sit on the varnish for one or two minutes to penetrate the varnish and soften it in preparation for removal.
4) Wiping the surface
After the varnish has softened, carefully wipe it off the paint surface with a cloth or cotton pad dampened with Gamsol. Do not scrub or rub forcefully to avoid damaging the underlying paint coat, so use minimal pressure.
5) Scraping the paint surface
To remove varnishes from stubborn areas or thicker varnish coats, gently use a scraper. Once again, take care not to scratch the paint coat.
6) Cleaning the surface
Once all the varnishes have been removed, wipe any residue with a clean cloth or cotton pad wet with Gamsol. Use soft, controlled motions at all times.
7) Letting it dry
Finally, let the artwork completely air dry before re-varnishing or applying any additional treatments.
- Can You Unmix Paint: Techniques, Consequences, Alternatives - February 23, 2024
- Does Primer Need to be Mixed? Effective Primer Application - February 22, 2024
- How to Make Old Paint Usable Again: Retrieving and Preserving Paint - February 21, 2024


