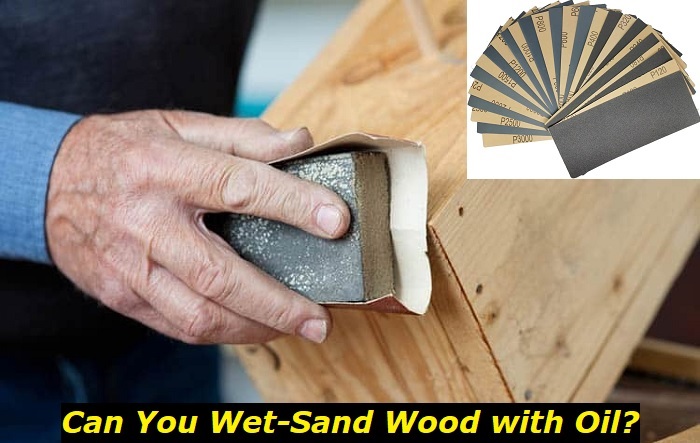
Sanding wood is a necessary step in creating a smooth and beautiful finished wood piece. Wet sanding with oil is another tool that woodworkers can use, and you may be wondering what benefit, if any, wet sanding with oil can give to your finished wood. What good does wet sanding with oil do?
Wet sanding wood with furniture oil will create a slurry of fine wood dust and oil that fills in the pores of the wood grain and creates a smooth, satin finish on the sanded piece. Wet sanding wood also serves to hydrate and protect the wood, and brings out an especially rich depth of color.
Keep reading to learn more about how to wet sand wood with oil, the benefits it offers, and what to avoid as you wet sand with oil.
Benefits of Wood Oil
To successfully wet sand wood, you’ll need to start with the appropriate wood oil. Commercial wood oils incorporate both oil and varnish and are specially formulated to nourish and protect the timber.
Wood oil does several things to your finished piece:
- It helps protect the wood from drying out and cracking throughout its life
- Seeps into and cures within the pores of the wood to provide a beautiful finish and a protective layer
- Brings out a richer and more beautiful color than dry sanding alone
- Enhances and compliments the natural beauty of the wood grain via intense hydration and polish
Just as moisturizers can benefit your skin and protect you from the drying and aging effects of harsh weather, wood oil protects furniture from aridity, and gives the wood a rich, healthy glow. It’s not a stain but can add some depth and intensity to the color of the woodwork, which many carpenters and furniture owners find beautiful and well worth the time it takes to wet sand the oil in.
How to Wet Sand Wood with Oil
Before starting, make sure to sand down your surface with 280 grit and wipe away any dust with a clean rag. This will help get your surface prepped for wet sanding, and remove any invisible sawdust.
Hydrate the area you’re looking to work on with a healthy amount of wood oil. Slick the surface of the wood that you’re working on by brushing on the wood oil, using a brush size appropriate for the size and breadth of the surface you’re wet sanding. Allow the wood oil to seep into the wood for a few minutes before reaching for your sandpaper. This gives the wood some time to drink in a bit of the wood oil and benefits from its hydrating and preservative qualities.
Once your wood section is completely slicked with oil and has had a few minutes to rest and soak in, begin to sand the oil into the surface of the wood. Sand with the grain; not against, and not in circles. Start with a sandpaper grit of 350 for the first application of wood oil, and simply rub the product into the grain. Be especially attentive to the edges of the piece, which will absorb more rapidly.
Make sure that the entirety of the surface you’re handling has had the oil worked into the surface by sanding. Take your time, and go section by section.
Next, wipe away any excess surface oil with a dry, soft cotton cloth and allow the wood oil to dry before adding subsequent layers. This will help the oil cure properly, and prevent your wood oil layers from becoming excessively thick or gummy.
Let Your Wood Set between Sanding
Allow your wood piece to dry out and set for 48 hours in between oil layers. Work up with finer grain sandpaper for each subsequent layer of oil for the best results. This will improve the aesthetics of your finished project, as well as provide the finest and smoothest layer of protection possible.
Don’t skip this step. The more of the oil the wood is allowed to drink, and the more the wet sanding job settles in, the smoother each layer will be, and the better your wooden item will look.
What Does Wet Sanding with Furniture Oil Accomplish?
Wet sanding wood with furniture oil can give you a beautiful, rich finish, a deeper and more striking coloration, and added protection against aridity, external moisture, and damage.
The natural grain and color variation of the wood will truly stand out, and look even more amazing. Wet sanding with oil will give the grain a slightly wet, deeper appearance, and allow the natural beauty of the material to truly shine.
This technique also helps really seal the finish, and hydrate the wood without warping it. The combination of very fine sawdust and wood oil that you’re working into the wooden item as you sand is going to fill in the tiny pores and imperfections in grain, leaving you with an incredibly smooth finish that’ll feel great.
So, you wind up with a beautifully rich appearance, protected wood, and a polished surface that feels wonderful and looks both natural and eye-catching.
Can You Wet Sand a Painted Piece?
If you’re wet sanding a painted and non-varnished piece, the technique can even out color, and allow the pigmentation to smooth, glow, and truly stand out. The finished surface will feel wonderfully soft, and the entire piece will look professional and lovely.
You’ll want to use natural oil to wet-sand painted pieces, but the effect will be just as beautiful. Simply liberally apply the natural oil over the dried paint, and sand it in with the fine-grit sandpaper. You’ll get a deeper and better-blended color and a brighter tone to the entire painted item.
Can Any Oil Be Used?
Some oils work better than others, and it’s important to choose the oil that’s safe for wood and is going to look beautiful.
Commercial wood oil is a common choice and is specially formulated to coat and protect the wood with a combination of natural oil and resin. If you want to use pure, natural oil hemp works well, and tung oil is perhaps the best-loved option, known for its depth and shine. In its pure form, tung oil is very durable, and it adds a light amber hue.
Pure natural oil, however, is very thick and dries very slowly. It also soaks into wood gradually and requires more time to dry between coats, about 48-36 hours. If using tung oil, you’ll also need at least four coats, so be patient.
You’re going to want to use either professional wood oil blends or natural and wood-safe oils like hemp and tung. Avoid using anything like cooking oils, or other oils not meant to be used on woodwork.
What To Avoid When Wet Sanding with Oil
Don’t sand your wooden item in direct sunlight. Keep the piece out of the sun, and wet sand in a shaded place with moderate light. It needn’t be dark, but shouldn’t be in direct bright sunlight, either.
Avoiding direct sunlight will help the oil cure and dry more slowly, and avoid the discoloration that intense sunlight can sometimes cause.
You’ll also want to avoid combining oil types or brands and stick with a single type of natural oil or a single brand and subtype of commercial oil. This will give your finished wood a consistent final appearance, and allow the wood to fully absorb the single oil type. Different brands and types of oils absorb at, unlike rates, so keep it simple and don’t combine oils.
Sand with the grain, not against the grain, and not in circles, either. Going with the grain will allow the wood to absorb the oil in a natural and less effortful way, and can bring out more of the innate beauty of the wood grain.
Conclusion
Wet sanding wood with oil is a simple and effective way to protect the wood from drying out, as well as from exterior moisture. Wet sanding with oil also adds a beautiful glow and smoothness to the wood which looks lovely and feels great.
Wet sand using either commercial wood oils or natural oils like tung and hemp. As you wet sand with oil, the mix of oil and very fine sawdust works its way into the pores and tiny imperfections of the wood, smoothing them out and adding sheen and polish to the wood yet with a more natural look.
Wet sanding with hemp oil and very fine-grain paper can also be done on a painted surface to add smoothness and depth to the finished paint job. When wet sanding a wooden piece, make sure to keep it out of direct sunlight, sand with the grain, and use the same type or brand of wood oil throughout the entire process.
Wait 48 hours between coats, and work up to a finer grain paper which each new coat. Enjoy a beautiful, smooth finish with this simple yet effective technique!
- Can You Unmix Paint: Techniques, Consequences, Alternatives - February 23, 2024
- Does Primer Need to be Mixed? Effective Primer Application - February 22, 2024
- How to Make Old Paint Usable Again: Retrieving and Preserving Paint - February 21, 2024


