Since you’ve been working on woodwork projects for a while now, you decided to create an artistic bird. Perhaps it’s a new birdhouse for your backyard. Or maybe it’s a neat new planter. In either case, your project is more delicate than your average woodwork. Understand that nails would ruin your delicate piece, you turn to the Titebond 2 glue. But is it a good option?
In this article, you’ll learn the following about the Titebond 2 glue:
- What it is
- What it’s clamp time is
- 2 tips for using it
- Whether it’s toxic or not
- How to apply it
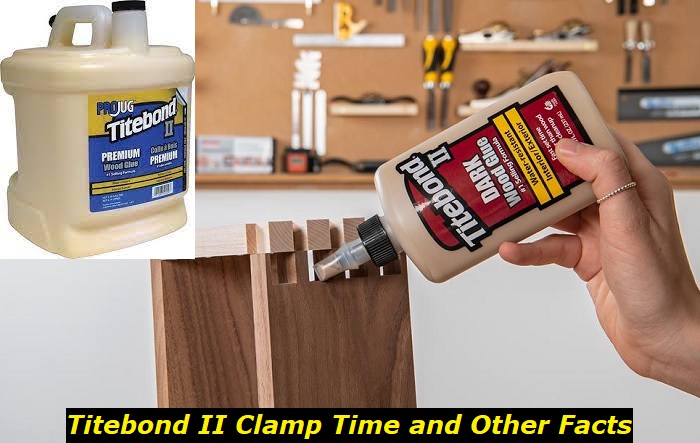
What is Titebond 2?
Titebond 2 is a popular type of wood glue. It’s based on cross-linking polyvinyl acetate, which is a type of water-resistant polymer. It’s non-toxic and thus great for making wooden equipment such as cutting boards.
Since it is wood glue, it doesn’t offer the stability of traditional screws and anchors. This makes it unsuitable for cupboards and other furniture designed to hold heavy items.
However, it’s one of the best options for building decorative pieces such as a planter or a chest.
Here are some important specs of Titebond 2:
- Based on: PVA (polyvinyl acetate)
- Viscosity: 4,000 cps
- pH: 3 (acidic)
- Recommended application temperature: 55°F or higher.
- Recommended storage temperature: 75°F or higher.
What is Titebond 2’s clamp time?
The clamp time is one of the most important parameters for wood glue. It refers to the time required for the glue to harden before removing the clamps. In the meantime, the clamps apply pressure on the two joints. Without them, the glue won’t set properly.
Each wood glue’s clamp time differs; you can find it in the manufacturer’s manual. For Titebond 2, this time is 30 minutes. Remember that this is the minimum time necessary for the glue to dry. You may have to leave the clamps longer to get the best results.
So how long should you leave them on? It depends on several factors. Titebond 2 has physical and chemical properties that affect its setting time. The most important ones are temperature and relative humidity.
Titebond 2 glue sets faster in warmer conditions. In general, it usually hardens after just 45 minutes in summer. This can take twice as long in winter. We don’t recommend using it under 50°F, however. If you do, it likely won’t set at all.
Humidity is just as important as temperature. High humidity levels mean more moisture condenses as water droplets. When it mixes with the glue, it will cause it to harden longer. You generally want to apply this glue under 50% relative humidity. It takes much longer to set in at higher levels, sometimes even hours.
Consider ventilating your room or using a dehumidifier instead.
The type of wood you’re gluing also plays a part. Softwoods such as pine or cedar have a much lower clamp time than hardwoods like oak or maple. The trickier wood to apply Titebond 2 on is oily, exotic wood such as teak. In this case, you’re better off using more traditional methods to hold two joints together.
2 tips for handling Titebond 2
The clamp time is just one factor to consider when you’re dealing with Titebond 2. You’ll also need to understand what you can and can’t use it for. The glue also has some very specific storage requirements.
Here are 2 tips for handling Titebond 2:
1) Understand what you can use it for
The Titebond 2 will serve you well for most of your woodwork projects. But even this glue has its limits.
While it is water-resistance, it can’t handle constant exposure to water. Consider joining your woodwork through other means if water is a concern for you.
Another thing you must consider is pH. Water has a neutral pH of 7. However, the Titebond 2 glue has a very low pH of 3. This means it’s a highly corrosive substance. Although it doesn’t affect wood, it can destroy materials such as metals. Make sure there are any such materials near the joints you’re trying to glue. You might want to test it out on a sample area first before you tackle your project.
And finally, it’s not meant to shoulder heavy loads. If you’re making a cupboard or a bookshelf, you’re better off sticking with traditional methods. The glue isn’t strong enough to shoulder such a heavy weight, especially if you apply it to a side.
2) Learn how to store it properly
At the end of the day, Titebond 2 is still a chemical. While it’s not volatile, it can still go bad when you don’t store it properly.
Make sure you store it at room temperature, which is about 75°F. If it’s over this mark, the glue may start degrading. And if it’s below, it may thicken. If this happens, shake it a little to return to its original viscosity. Avoid direct sunlight as well.
The room should be dry as well to prevent moisture from condensing inside the bottle. Always keep the lid tightly shut to prevent air from entering.
Is Titebond 2 toxic?
Titebond 2 is non-toxic wood glue. It’s based on PVA, which stands for polyvinyl acetate. This substance is used in many household products, making it a safe option. It’s free from both volatile organic compounds and toxic solvents.
However, the general rules still apply. Always keep your Titebond 2 out of reach of children and pets. Don’t ingest it. If someone accidentally does, don’t induce vomiting; seek medical attention immediately.
Avoid eye contact and prolong skin contact. If it gets into your eyes, rinse them with water for at least 15 minutes. Use soap and water to remove it from your skin.
Always wear protective gear when you use it to prevent these issues from happening.
How to use Titebond 2? 5 simple steps
Using Titebond 2 is very simple once you know the steps. While nothing beats the label instructions, we prepared this quick guide to teach you the basics of the application process. This should give you some idea of what to expect if you’re a beginner.
All you need to do is follow these five steps:
1. Clean the surface
First, you must clean the surface of dust and grime. After all, you’re gluing the wood and not the debris. Skipping this step will result in poorer adhesion. As a result, your piece will be either wobbly or fall apart altogether.
2. Apply the Titebond 2 glue
Once you’ve polished the surface, it’s time to apply the glue itself. We suggest applying it in a thin coat and steady pattern. This will help you avoid excess glue, which would otherwise lower its effectiveness.
You can apply it with a plastic bottle if you’re dealing with fine, small pieces. But for larger ones, you may want to use a spreader or a brush to speed up the process.
Maintain consistent pressure during the whole process. Make sure it’s steady and balanced. If you press it too hard, the glue will pop out of the joint. Conversely, it will not hold the joints together well if you use too little.
3. Clean the excess glue
Clean the excess glue to improve its strength. You can do this with a damp cloth. Do this right after you apply the Titebond 2.
4. Let it dry
Let the Titebond 2 glue dry completely. Make sure you keep it clamped during this time to improve adhesion. Keep it clamped for at least an hour if you work in hot conditions. In colder ones, you may want to keep them on for at least several hours.
5. Scrape off the excess glue
Once the glue dries, you can finesse your piece by scraping off the excess glue.
Our final thoughts on Titebond 2
The Titebond 2 is a wood glue based on polyvinyl acetate. This makes it a solid non-toxic, and water-proof option for many DIY enthusiasts.
Just like any glue, it’s designed for light-load projects like small coffee tables or decorative pieces. If you’re building a storage unit, you may want to stick to more traditional methods of joining two boards.
You’ll need to understand clamp time if you plan on using Titebond 2. This refers to how long you must leave the clamps on before the glue sets in. It will not hold as well if you remove them too soon.
Titebond 2 comes with a minimum of 30 minutes clamp time. However, you’ll always want to leave the clamps on for longer than this, especially in cold conditions. The glue sets much slower the colder it is. The minimum recommended application temperature is 55° F. If you’re dealing with conditions below this threshold, you may want to bring the entire project inside.
The humidity levels also affect the setting time – the higher the humidity, the longer it’ll take for the glue to set in.
You’ll want to leave the clamps on for 1-2 hours to ensure smooth adhesion.
- Can You Unmix Paint: Techniques, Consequences, Alternatives - February 23, 2024
- Does Primer Need to be Mixed? Effective Primer Application - February 22, 2024
- How to Make Old Paint Usable Again: Retrieving and Preserving Paint - February 21, 2024


