If you are planning to seal around your window internals, a silicone sealant is what you need to get the job done. Silicone has excellent resistance against temperature changes, water, mold, and mildew making it perfect for the job. To achieve a clean and effective seal, applying silicone to window internals requires precision and attention to detail.
Here is how to apply silicone around window internals:
- Gather your tools
- Prepare the window area
- Choose the right silicone sealant
- Insert silicone into the caulking gun
- Apply the silicone sealant
- Smoothen the silicone application
- Remove excess silicone
- Let the silicone dry
- Test for air leaks
Small gaps and cracks around a window can be the genesis of severe structural damage and create a passageway for uninvited insects to escape into the house. Additionally, they can create an avenue for water leaks on rainy days.
Moreover, they can make the house too cold for comfort on a chilly night or during winter making you spend a lot on heating energy. However, creating an impenetrable, waterproof, and weathertight window is an easy project and can be easily carried out irrespective of your level of expertise.
In the rest of this article, we will delve deeper into the method of applying silicone to window internals. We will also share with you secrets and tips that will help you achieve an effective and long-lasting result.
Gathering your tools
The first thing to do is to gather your tools. These are the tools needed for applying silicone to window internals:
- Window cleaner
- Brush
- Cement filler
- Caulking gun
- Silicone caulk
- Smoothing tool
- Putty knife
- Hairdryer or heat gun
Preparing the window area
The window area is one of the places in the house that easily accumulates dust and debris. Hence, in preparing your window area for silicone application, you have to clean it first.
Use a brush and suitable cleaner to wipe the area clean.
After that, allow the area to dry before proceeding. Then, you want to access the areas with gaps around the window. You should never add new caulks over old ones so you need to remove the old caulking.
To do this effectively, apply a caulk remover and leave it for some minutes. The caulk remover will soften the old caulk and make them come off easily. You can also use a heat gun or hair dryer to heat the old caulks to facilitate easy removal.
Then, use a putty knife to remove the old caulk. Also, if there are cracks in the wall around the window, you should fill them with specialized concrete fillers.
Choosing the right silicone
To get the best result, it is crucial to choose the right silicone sealant for the job. Choose a good quality silicone caulk specifically suitable for window internals. It should be waterproof and also resistant to mold and mildew.
Some silicone caulks cannot be painted. Therefore, to achieve a neat finish that blends nicely with the rest of the window area, it is recommended to choose a sealant that matches the color scheme.
If you cannot get a silicone caulk that matches your color scheme then, choose a transparent caulk to help you achieve a uniform result.
Inserting silicone into the caulking gun
Silicone caulks come in squeeze tubes or cartridges that are inserted into the caulking gun. After inserting the tube or loading the cartridge, cut the nozzle at a 45-degree angle. This angle gives you control over the amount of silicone you apply and allows for precision.
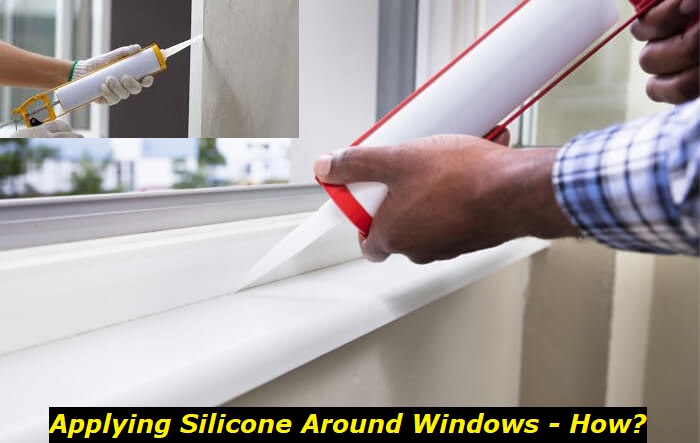
Applying silicone
Hold the caulking gun at a convenient angle and apply consistent pressure. Apply the silicone caulk in one continuous steady movement until all the gaps are covered, do not allow breaks in between applications. To reduce the amount of mess you make during the application, you can conceal the surrounding areas with masking tape.
Smoothing the application
When you are satisfied with the silicone coverage, it is time to smoothen it before it starts to dry. For this purpose, you need a smoothing tool or a putty knife. Keep the tool at a slight angle to enable the silicone to adhere better.
Then, run the tool along the window edges where silicone has been applied in one continuous motion. As an alternative to using a putty knife or a smoothing tool, using your wet finger will also suffice. It is important to wet your fingers to prevent the sealant from sticking to your skin.
After smoothing the silicone, check for air bubbles. If you find any, reapply the silicone caulk to the area and smoothen it again.
Cleaning excess silicone
Next up is to clean the excess silicone from the area and you need to do this before the silicone dries. To do this, use a putty knife to trim the unwanted silicone out. If you masked off the surrounding areas before applying the silicone, now is the time to strip it off.
Letting the silicone dry
Check the manufacturer’s instructions about the drying time recommended for the silicone product you used and adhere strictly. You might need to wait for at least 24 hours for the silicone to completely set. During this period, do not touch the area so you can achieve a neat and professional finish.
Testing for air leaks
The final step to ensuring that your window is now completely impenetrable is to test it for air leaks. To do this, you need a can of compressed air. It is also recommended to do this on a windy day when the outdoor air pressure is higher than the indoor air pressure.
Start by closing all windows, doors, vents, and ducts then stopping ventilation systems like fans and air conditioners. You need someone to stand outside the window with a can of compressed air and direct it to the areas where you applied the sealant. Then, from indoors, run your hands along the areas to feel for air movement.
You can also detect air movement if curtains or other light materials move. If you notice air movements at the area, you will need to apply more silicone to that area.
Secrets and tips for applying silicone to window internals
Here are some secrets and tips that will make your silicone application seamless, effective, and durable:
- Leave the windows shut
- Use backer rod for wide gaps
- Watch the weather
1) Leaving the windows shut
When applying silicone to window internals, it is advisable to shut all open windows. The movement of an opened window might cause the silicone to shift. So, closing the window will ensure the silicone stays perfectly still.
In addition to that, an opened window will also allow in more air which might make the silicone dry too fast before you can smoothen it to perfection or clean the excess. Also, if the window is left open, you risk the interference of the application process by dust, dirt, wind, or even insects which can affect the final result.
Another caveat to ensuring that the sealant adheres properly is to leave the windows shut and undisturbed until the sealant cures completely.
2) Using backer rods for wide gaps
For wide gaps around windows, you can use backer rods before applying silicone. To do this, insert the right-sized backer rods into the gaps, and let it fit below the surface. Then, apply the silicone over the backer rod to level the gaps with the rest of the surface.
3) Watching the weather
Another secret to achieving an excellent result with your window sealing is to ensure the weather condition is right for silicone application. An optimal weather condition for silicone application isn’t too hot or too cold.
Also, it is important to fix your window caulking project on a reasonably dry day. If the weather forecast calls for rain or snow within the following few days, you should postpone caulking your windows. Wet weather will not be in your favor because it will make it difficult for the caulk to adhere properly.
Conclusion
A proper application of silicone seal around window internals is key to energy efficiency and keeping the home at optimum temperature. It also helps insulate the windows and keep the outside elements out.
To crown it all, a silicone seal can add an aesthetic touch to your window design if you adhere to the techniques and tips discussed in this article. So, gather your supplies and get to work for that completely impenetrable window that will last you for years.
- Can You Unmix Paint: Techniques, Consequences, Alternatives - February 23, 2024
- Does Primer Need to be Mixed? Effective Primer Application - February 22, 2024
- How to Make Old Paint Usable Again: Retrieving and Preserving Paint - February 21, 2024


