Using acrylic enamel paint can be tricky, especially for someone new to paints. But this paint has many positive characteristics that make it suitable for adding color on small and large surfaces including automobiles. When dry, acrylic enamel paint provides a reflective and glossy finish.
However, you can give this finish a more beautiful luster, or what some people describe as velvet appearance, by sanding it. Of course, you have to follow some rules, otherwise, you can destroy your work easily.
Many people have asked us how long one should wait before sanding. We’ve decided that it’s fair we answer this question here for everyone to see. We’ll also offer some useful tips to help you go through the sanding process like a pro.
So, let’s get right into it.
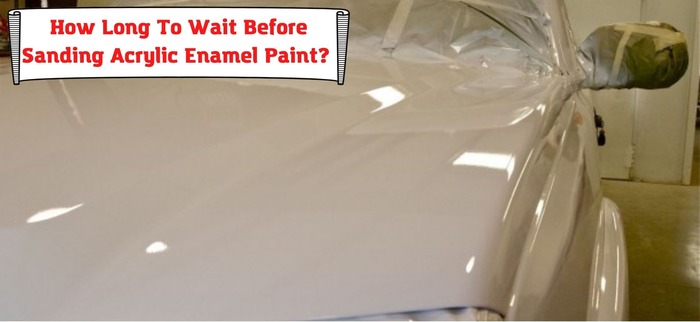
How Long To Wait Before Sanding Acrylic Enamel Paint?
We recommend that you wait for 12 to 24 hours for the paint to dry before sanding. This paint takes anywhere between 8 and 24 hours to cure completely. You have to allow more time during cold weather.
You can use a catalyst if you don’t want to wait that long for some reason. Catalyzed acrylic enamel paint should be dry and ready for sanding in a few hours. Without the catalyst, the paint may remain soft for days depending on the weather. Sanding at this condition will likely damage the finish.
You have to be very careful even after waiting for 24 hours for the paint to dry. With that in mind, below are a few tips to go about the sanding process.
How To Sand Acrylic Enamel Paint?
We’ve mentioned that acrylic enamel paint will still be soft days after application if the weather is cool. The best way to sand this paint is by using a method referred to as wet sanding. The technique requires using water and high-grade sandpaper. We advise that you choose 1000-grit and even finer option. Some people prefer using a 600-grit for acrylic enamel paint. But you’ll be much safer with higher-grade sandpaper.
You also need to use sandpaper at slow speeds with a lot of water. Wet sanding allows you to achieve a more detailed finish without compromising the integrity of the surface. This kind of sanding will create a glazed finished and gleaming appearance.
A hard block will help you in blocking out runs as you wet sand. We insist that you ensure the runs disappear completely if you don’t want them to show in your new paint. Using wet sanding technique will help eliminate any tracks that can spoil the appearance of your fresh paint.
To put all these into a clearer perspective, let’s present this whole thing using a simple step-by-step guide. Take a closer look.
Step #1: Inspection
Inspect your acrylic enamel paint job carefully to see if you find any thick spots, scratches, or any form of imperfections. You’ll need a strong source of light. You’ll probably discover other trouble areas as you wet sand but you should ensure a thorough inspection at first.
The sanding process can take hours to complete. During all this time, your hands will be touching the water. As a result, you may realize that the hands are getting chapped or sore. If you don’t do something, this can turn into big trouble and you certainly don’t want that.
Therefore, apply an appropriate skincare cream to protect your hands. Alternatively, you can find and wear gloves to keep your hands dry.
Step #2: Wet Sanding
You need some tap water in a bucket. Next, attach your wet sander onto the sanding block and dip it into the bucket.
You don’t want to damage the surface and for that, you need to apply light and slow strokes. Avoid sanding in circular motions. Sand the surface in straight lines instead. Wet your sanding block constantly. At the same time, ensure you’re sprinkling water separately into the surface.
We’ve met people who prefer using electric sander as it’s easy to use and time-saving. However, we don’t recommend using it in this case. It’s not easy to control the abrasiveness and power of an electric sander. Thus, you should stick to hand sanding. Using a sanding block is your best bet when it comes to acrylic enamel paint, especially for a textured surface.
If you’re sanding a car, you can mix the water with soap to facilitate a smooth sanding process by lubricating the surface. However, not all types of soaps are good as some can dry out rubber surfaces on your vehicle.
Repeat the process using 1000-grit sandpaper to obtain a more refined acrylic enamel paint job. You can then finish the sanding exercise with even finer sandpaper.
Continue rubbing the sandpaper along your acrylic enamel paint job in a back-and-forth motion. As explained above, don’t rub in circles or any other motion other than straight lines. Dip the sandpaper into the water frequently and make sure the surface is as wet as possible.
The process is time-consuming and can also be tedious. But you have to be patient. Wet sand everywhere, including curves or corners. Remove the wet sandpaper from the sanding block to effectively sand along any contours manually. During the sanding, keep rinsing the sandpaper in the water to rid excess enamel flecks. Work on the surface until it gets as smooth as possible and then rinse with clean water.
Step #3: Rinsing and Re-Inspection
It’s now time to rinse. You should pour the dirty water and fill the bucket with clean water for rinsing. First, dry the surface with a clean cotton cloth or allow it to air-dry. Once the surface has dried, re-inspect it to find any fresh problem spots. Again, be patient and allow yourself enough time so that you can achieve perfection.
Refine your acrylic enamel paint by wet-sanding further if you notice any problem areas. At this point, you can continue using the finer grit sandpaper. Your goal is to achieve the best results and this means leaving no stone unturned. After that, you can buff it with a suitable buffing compound at a slow speed.
Step #4: Buffing
You need to finish the process successfully. So, buffing will help you polish the finish for that lustrous appearance you want. Utilize a suitable rubbing compound and rub the surface using a clean cotton cloth. Work this compound on the surface by scrubbing in small concentric circles. Ensure you cover the entire surface, including corners or edges.
That will help you get rid of any imperfections in the finish and prepare the surface for waxing. Polish the surface with wax once you’re through with the application of the buffing compound. Apply the wax the same way you just did with the buffing compound. Polishing your surface with wax will bring out an outstanding shine in your new acrylic enamel paint job.
Step #5: Cleaning Up
You need to clean up the mess now that you’ve successfully sanded your acrylic enamel paint. Generally, wet sanding was such a lengthy process and you must have created a lot of mess. Grit from the sandpaper and water will be all over the area. Ensure you don’t get tempted to sweep because that will just make things worse considering the huge amount of debris you’ve created.
The best thing to use would be a drop cloth or plastic sheeting. These will collect the debris and water effectively. Your clean-up will be much easier and the results will be better once you’ve finished.
Final Words
Painting is an art. With patience and dedication, anyone can learn and become an expert. Acrylic enamel paint is popular among professional painters for several reasons. First, it’s water-based. When it is on a surface, it gives it a bright and glossy finish that other paints may not offer.
Second, it comes cheap and serves painters on a budget well. That aside, how long to wait before sanding the paint is a puzzle to many people. We hope that our answer has cleared your doubts. We’ve explained that the paint may take from hours to a day or more to dry depending on the weather. Also, we’ve mentioned that catalyzed acrylic enamel paint dries faster. You can use it if you don’t want to wait for so long.
Once it’s dry, you’re good to do the sanding. Wet sanding with high-grade sandpaper is better. Still, you have to ensure you give your surface light sanding with short strokes to avoid destroying any underlay. That’s especially important if you’re sanding the surface of a car. Follow the above-mentioned simple steps to ensure you have a successful wet sanding process.
- How Long To Wait Before Sanding Acrylic Enamel Paint? Quick Tips - January 31, 2022
- Lacquer Over Boiled Linseed Oil. Things You Should Know - January 30, 2022
- Shellac vs Danish Oil. We’ve Found Out Which One Is Better - January 25, 2022