Painting directly over a surface has never been the best thing. Paint over bare wood and natural fibers causes the wood to absorb the paint, creating an uneven finish. Painting over a darker color can make it end up showing through the new coat. Painting over fresh drywall can cause the wall to soak it up like a cotton rag on a water spill.
There are multiple reasons why painting directly over a surface is a bad idea, but the solution to all of them is simple; primer. A primer is a sticky, flat paint that seals porous surfaces so that paint adheres to them well.
It’s a consistent base for topcoats of paint, and it leaves you with the cleanest, most even finish you could possibly get. Better adhesion of paint to primer also makes for a longer-lasting paint job. For wood surfaces, metal, and masonry, primer is highly essential for paint to stay on the surface of whatever is being painted.
So, what happens when the paint isn’t sticking to the primer? You get left with all the problems you bought primer to avoid. If your paint isn’t sticking to your primer and you’re not sure what you’re doing wrong, don’t fret! Below are ten reasons why you may be having this problem.
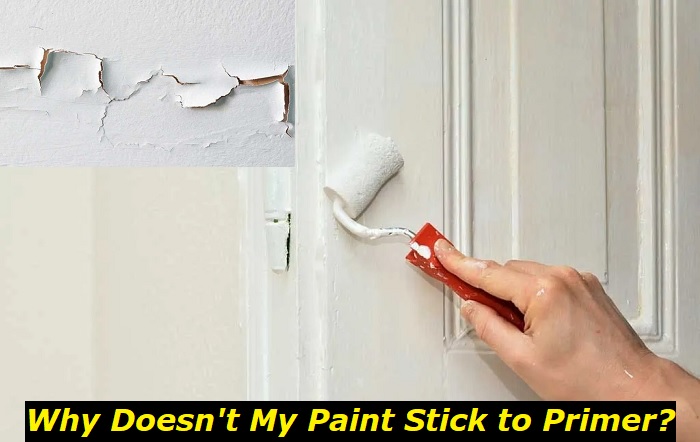
Paint Not Sticking to Primer? Here’s Why.
- Surface not properly primed: If your paint isn’t sticking to a primed surface, you might want to check if you’ve missed a few spots. Coating the surface with primer doesn’t have to be a perfect job, but the surface should be covered totally. Leaving no bare spots when priming and painting over it should be no hassle. Primer is applied the same way paint is, with a roller or a brush. If it’s a spray primer, you can spray it on.
- Using too much primer: Primer is for paint what glue is for paper; if you use too much glue on a piece of paper, you end up with thick clumps of glue that don’t look attractive. In the same vein, applying primer on the wall in thick coats causes issues when painting. A light coat of primer would do, and there isn’t any need to run your roller over the same area multiple times. Overdoing the primer would result in the primer balling up or clumping. This not only leaves you with visible blotchy unevenness that isn’t nice to look at, but it also dries into a slick surface, giving your paint very little texture to adhere to.
- Apply primer with quality tools: This point may seem like a no-brainer, but when it comes to painting, especially DIY painting, it’s easy to think that anything goes. If you’re aiming for the best results, then use the best tools and products.
- Humidity and temperature: Paint and paint primer react differently to moisture in the air and the temperature of the environment you’re working in. In high humidity, paint struggles to dry, and you’ll end up with an inconsistent, undulating surface when the humidity falls. If you’re painting wood under the same conditions, the wood could start to swell after it has been coated. As a result of this, the paint will begin to crack and peel. The key to preventing this is to find a balance in temperature. Painting in a relatively moist environment is good as you wouldn’t want your paint to dry too fast. However, painting in humidity levels of over 85 percent is not advisable. It’s best to paint in moderate temperatures.
- Using the wrong type of primer for the wrong surface: A primer isn’t a one-size-fits-all kind of product. If your paint isn’t sticking to the primer, it’s likely that you used the wrong type of primer on the surface. There are many types of primer, each with its own uses. Water-based and oil-based primers are the most common, but it’s best that you first establish what surface you’re going to paint and look for the best primer for it.
- Mixing primer and paint bases: Do you remember the rule “oil and water don’t mix”? Well, that applies to paint too. There are different types of primers, with oil-based and water-based primers being two of the most popular. Those primers are two different things, as are oil-based and water-based paint. Mixing oil-based paint over water-based primer is possible but not advisable. If you do so, you’re most likely to end up with cracked or peeling paint or paint that pulls apart as it dries. If you want to use water-based primer over an existing oil-based paint job, the best thing to do is to strip the paint and start over by cleaning out the old paint and sanding the surface. Once that is done, use an oil-based primer for oil-based paint and a water-based primer for water-based paint.
- Dirty surface: If your paint isn’t sticking to the primer, the cause may be that your primer isn’t sticking to the surface; after all, the root cause of primer-paint adhesion problems is often a primer that won’t stick to walls. Painting over dirty surfaces and walls with excess moisture can affect the way paint sticks to primer and cause it to start flaking off. Improper prepping ends up being a huge problem when you’re done painting, and you may end up having to spend money you didn’t plan on spending on fresh buckets of primer and paint, as solving the problem requires you to remove the peeling areas and start again. To avoid this, you’ll need to wipe the surface of the walls to clean off dust and dirt. If it’s oily or you need to get rid of wax stains, lightly dampen the surface with water and use a mild detergent and a sponge to go over it. After this, you’ll want to rinse the surface with clean water and give it a while to dry. It’s also advisable to run a dehumidifier in the room for several hours before painting.
- Painting without stirring the primer: even though it doesn’t say so on the can, it’s best to stir your primer before applying. Like paint, the ingredients of primer separate in time the container when it’s not in use so stirring your primer evens it out and leaves you with a clean finish.
- Using a low-quality primer: If you’re going to spend money on a primer, then you might as well buy one that won’t disappoint you. Using a low-quality primer may leave you with reasons, and if you’re aware of its importance, you know to use it before you paint. Primer seals the surface of materials, preventing them from soaking up paint like sponges. It also makes cleaning the surface easier months after the paint has dried; no one wants to end up wiping off paint. Priming also eliminates the risk of peeling paint, especially when the environment is susceptible to humidity.
What Else Will You Want to Check?
However, if you’re painting and the paint isn’t sticking to the primer, then a variety of reasons may be the cause. Did you spread the primer on all areas of the surface? Are you sure you didn’t end up using too much primer in one spot? Are you working with high-quality tools, or did you just grab any old brush?
What about the primer? Is it cheap or high quality? Is it the perfect fit for the surface you plan on painting? Did you mix primer and paint with different bases? Is your surface dirty or did you give it a good wipe before beginning your painting journey? Is the humidity just right or are you planning on painting when everywhere is damp enough to be a second bath?
If you’ve asked yourself these questions before you began working and you’re confident that you’re in the green, then there’s no need to keep you. Painting is a fun, fulfilling process, but when done wrong, it could lead to a lot of frustration and become a waste of time, effort, and money.
So don’t skimp on the primer. Take your time to choose the right materials, prep well, and you’ll be fine.
- Can You Unmix Paint: Techniques, Consequences, Alternatives - February 23, 2024
- Does Primer Need to be Mixed? Effective Primer Application - February 22, 2024
- How to Make Old Paint Usable Again: Retrieving and Preserving Paint - February 21, 2024


