If you are recently working on a tile installation project, whether on walls or floor, you will surely use Hardie boards as an underlayment beneath the tiles. In between Hardie board panels are gaps that may let water seep through and infiltrate your framework. You need to seal them for a continuous and effective barrier against moisture.
But how do you seal them? Aren’t cement boards waterproof?
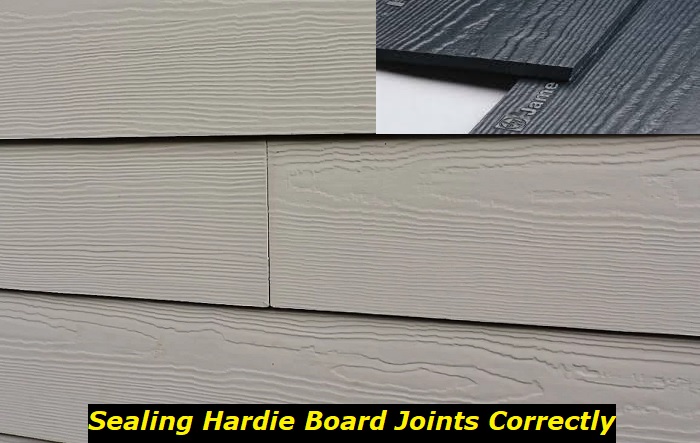
In this write-up, we’ll answer your questions and provide you with easy-to-follow steps on how you can seal Hardie board joints properly.
Are cement boards waterproof?
Hardie board, or fiber cement backer board, is a popular building material for walls and floors. Tile installers widely use cement boards behind the bathroom, kitchen, or shower tiles because of their moisture resistance capabilities. Builders use it in moisture-prone areas such as exterior siding and basement wall panels.
The material is made of cement, aggregates, reinforcing fibers, and additives. This composition makes the material extra water-resistant.
But even with its water resistance capabilities, Hardie boards still need waterproofing, especially if you use it under bathroom tiles. They are not waterproof.
Before installing tiles, you must ensure that the screws, seams, or joints become sealed or waterproof properly. Water can seep into these weak parts of the cement board, build up, and eventually cause the board to expand and
Why Seal Hardie Board Joints?
Aside from moisture protection, there are other reasons to seal cement boards.
- To avoid water penetration
- Prolong the lifespan of Hardie boards
- To contribute to overall instructional integrity
- To reduce maintenance
Method 1– Using Thinset
Thinset is an adhesive type of mortar manufactured for bonding and attaching various materials in construction, such as tiles, mosaics, stones, and such. This material is excellent for sealing Hardie cement boards because of its durability, bonding properties, and moisture resistance.
When applied to seal joints correctly, it creates a strong and reliable bond and waterproofing that protects the integrity of the cement board. It joins the panels filling the gaps efficiently and making a protective barrier against moisture.
What we love about the Thinset is that the material is not complicated to work with. Moreover, Thinset is cost-effective, making it a practical sealing method for DIY tile installation.
What Do You Need?
- Cement board mesh tape
- Drywall knife or trowel
- Thinset
- Installed cement board
- Clean water and bucket
- Drill and mixing
How to Seal Hardie Board Joints with Thinset?
Before we start sealing cement board joints, ensure to install them properly. Maintain clearances for windows, corners, and doors, and allow proper stud spacing.
- Tape all the joints or anywhere the board panels meet. That is in-between panels and in the corners. Be sure to complete this step because many cement boards cracked, tiles popped, and water infiltration happened because of skipping this step.
- Mix the mortar with clean water according to the manufacturer’s instructions. You can use a bucket, a mixing attachment, and a drill for this process. Measure according to instructions, adding the mortar and water gradually. Mix them until it reaches a butter-like or drywall mud consistency, like a cream. You also want it to be free from lumps.
- Let the mixture rest for a while.
- Test one joint. Using a trowel or drywall knife, apply a small amount of Thinset to the joints. Press and compact the gap with mud. Spread to a level so it adheres properly. You are looking for consistency where the material does not slide down the board.
- If the mixture passed the mud test, start applying it to all joints. Press and compact the mixture. Spread them evenly outwards using the flat side of the drywall knife or trowel. Inspect the mud for bumps. Spread if there are bumps.
- Let the mud dry. Thinset sets within two hours when it becomes firm and hardens. Thinset fully cures within seven days.
Method 2– Caulking
A waterproofing sealant caulk is another compound you can use to fill in the gaps of Hardie board joints. What makes it different from Thinset is it is more flexible. This flexible and durable material creates a watertight and airtight seal for joints, gaps, cracks, and holes. It forms an impermeable barrier when applied to the fiber cement backer board.
As the sealant cures, it turns the liquid or paste sealant into a solid rubbery material that bonds tightly to the substrate. This type of seal effectively protects and blocks any passage of air, water, moisture, and even dust.
What we love about this sealant is its flexibility provides an allowance for contractions and expansion brought by weather changes or structural movements.
If you are caulking Hardie board joints, the best formulation is silicone and elastomeric formulations with exterior grade. Choose one with kitchen and bathroom labels. It does not only protect the cement board from moisture but also from harsh weather conditions and temperature fluctuations. These properties make it ideal for exterior Hardie sidings and kitchen and bathroom.
What do you need?
- High-quality silicone or elastomeric caulk (Read the labels for tubs, kitchen, or tiles)
- Caulk tape
- Caulk gun
- Caulk smoothing tool or scraper
- Clean rag or sponge
How to Seal Hardie Board Joints with Caulk?
If you have installed the Hardie board correctly, you can start sealing the joints with caulk. Check for proper spacing, clearances, or alignment. Inspect the fasteners as well.
- Ensure the surface and clean. If there’s an old caulk or sealant, remove and clean them. If necessary, smoothen the edges.
- Load the caulk gun by inserting the cartridge.
- Cut the tip of the caulk gun by 45°. The opening must match the size of the joint gaps.
- Hold the caulk gun at 45° with a steady pressure and consistent bead. Fill the entire gap line in one pass as much as possible.
- Use the caulking smoothing tool or scraper to smoothen the caulk. Press the caulk to adhere properly.
- Wipe away excess caulk.
- Let it dry and cure. It takes about 48 hours for the caulk to harden completely.
- Once dried, inspect the joints and apply more caulk if there are still gaps.
Method 3– Liquid Waterproofing Membrane
Liquid waterproofing sealants are paintable materials applied as a liquid and cured to create a uniform protective barrier against water and moisture. Even as a liquid waterproofer, you can apply it to horizontal and vertical surfaces like cement board joints. When used with a fiber mesh roll, it reinforces the joints in a reliable and durable seal that prevents water infiltration. Aside from sealing the joints, it is also an excellent repair material for wall cracks.
A liquid waterproofing membrane is formulated by combining polymers, elastomers, fillers, solvents, and reinforcing fibers to form a flexible, water-resistant, and adhesive waterproofing seal.
What do you Need?
- A liquid waterproofing membrane (for cementitious surfaces)
- Fiber membrane mesh roll
- Paintbrush
- Utility knife or scissors
- Clean cloth or sponge
- Drywall knife
How to Use a Liquid Waterproofing Membrane?
If your joint surfaces are clean and free from debris, you may proceed with taping. However, you need to remove old caulk. The presence of old caulk before taping will create weak adhesion and future waterproofing failure.
- Cut the fiber tape according to the length of the joint.
- Apply the mesh tape on the joints and corners of the cement boards. Ensure they adhere well and cover the entire joint. Once all joints have been covered with mesh tape, apply the liquid membrane.
- Stir the liquid waterproofing membrane thoroughly before applying it with a brush. Apply a generous amount of liquid waterproof until fully covered.
- To cover the entire mesh with the membrane, press it with a roller, brush, or drywall knife. Doing this will help the membrane settle smoothly into the tape.
- If you must apply more coats, follow the manufacturer’s instructions when it comes to drying. Each product may have a different formulation. Follow the recommended drying time before applying a new coat.
- Let the membrane fully cure.
Hardie Board Installation Tips
- Maintain adequate clearances.
- Maintain about ⅛ inch gap between each board.
- Use a carbide-tipped wood cutting blade for fiber cement backer board.
- Use corrosion-resistant fasteners.
- Avoid over-fastening screws.
- Ensure there are no particles loose before waterproofing.
- Also, look for visible cracks or damage and fill them.
- Apply primer suitable for fiber cement backer board before waterproofing to improve adhesion.
Joint Sealing Tips
- If the fiber cement board becomes wet before waterproofing, let it dry completely before waterproofing.
- Smoothen the sealant for a neat seal.
- Do not let the sealant bumps dry. Spread them while wet. Or else, the tile will not adhere properly.
- Consider using backer joints for wider gaps.
- Apply a consistent and even bead through the entire joint.
- Avoid overfilling.
Final Thoughts
Anyone can seal cement board joints successfully. Most sealant products are already available. You just need to understand how it works, get a few tools from your tool shed or toolbox, and learn how to apply them. The key to successful application is proper surface preparation, quality sealant, proper tooling and smoothening, following the manufacturer’s instructions, and attention to detail.
When performed precisely, you can create a durable water barrier that lasts for years. You can protect the underlying framework beneath the walls. Moreover, it protects them from molds and mildews that may grow in time and maintains their structural integrity.
Indeed, your choice of sealing your Hardie board joints contributes to the resiliency of moisture-prone walls.
- Can You Unmix Paint: Techniques, Consequences, Alternatives - February 23, 2024
- Does Primer Need to be Mixed? Effective Primer Application - February 22, 2024
- How to Make Old Paint Usable Again: Retrieving and Preserving Paint - February 21, 2024


