Not all damages in wood finish need total restoration, stripping, or refinishing. Sometimes, all it needs are a few touches, and you can return that glory to your furniture, table, cabinet, or woodcraft.
See, re-stripping and reapplication of the coat could be messy and exhausting. And it will surely test your patience. But did you know that some restoration hacks require minimal cost and effort to bring back that natural warmth of your furniture? Yes. And you only have to assess the level of damage on the polished surface and apply the necessary procedure.
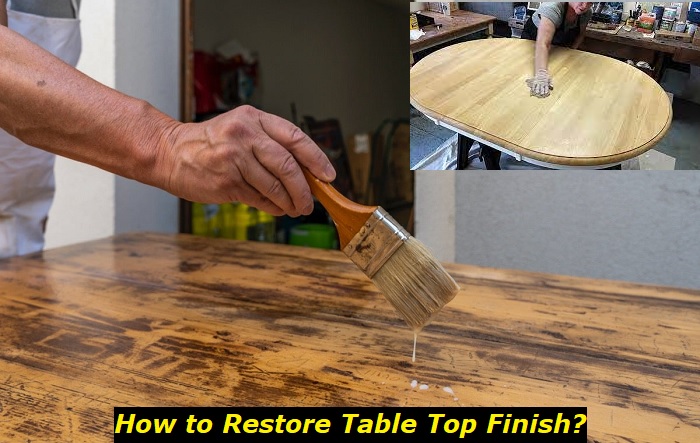
If you are ready, here’s how you can restore the tabletop finish with little budget and minimal effort.
Scratches, Stains, Fades, Nicks, & Marks
If your furniture has minor scratches and marks, you can use some home remedies that can restore its natural glow. Let’s start with solutions you can find at home.
1) Natural Oil
Aside from having minimal costs, natural oils nourish your wood naturally by penetrating deep into its fibers and preventing it from drying out. Some natural oils can have protective and preservative properties that help the wood last longer. If there’s any problem with natural oils, you may have to touch up the wood finish more frequently or as needed.
There are many natural oils you can use.
- Coconut oil- It enhances your wood’s natural color and rehydrates the wood surface. However, you may need to reapply frequently. It’s a good choice for lighter wood.
- Walnut oil- Walnut oil works best on darker woods and provides natural protection against insects, bugs, and water damage. It has a fragrant aroma too.
- Linseed oil- A popular choice for many, linseed oil also enhances wood color and protects wood from moisture, pests, and UV rays. A little warning, linseed oil can have a strong odor.
- Olive oil- Alternatively, you can use olive oil to enhance the beauty of your wood. It also nourishes the wood and is a cost-effective option for restoring a wood surface.
How to Use Natural Oil to Restore Wood Finish?
- Prepare tools and materials: a clean rag, your choice of natural oil, an orbital sander, sandpaper (80-grit and 150-grit), and a brush.
- Sand the wood to the direction of the wood grain, removing imperfections like fades and minor scratches and nicks. Start with 80-grit sandpaper, then finish with 150-grit sandpaper.
- Wipe the surface with a clean rag or cloth to remove excess dust.
- Apply natural oil with a brush until even and let it sink through the wood fibers. If there’s any excess oil, wipe it off with another clean cloth.
- Let it cure overnight to see a big difference.
2) Natural Stain
Stains purchased from hardware could have strong chemicals. But there are cost-effective ways you can naturally stain your wood.
- Tea or coffee- You only have to brew stronger coffee or tea to create a natural stain. Coffee would have a light muted brown shade, which is naturally darker than tea.
- Onion skin- Onion skin will give off a warm amber or pale yellow shade. Soak onion skins in warm water until you are satisfied with the color. Be prepared for the smell.
- Berries or cherries- Cherries and berries will give off a pale pink shade to deep red color. These fruits have natural tannins that eventually darken the stain. You only have to crush the fruit, extract the juice, and maybe, dilute it in water, depending on the strength of shade you prefer.
- Steel wool and balsamic or apple cider vinegar- The steel wool/vinegar solution is a popular natural stain for restoring wood finishes. Pour about a cup of vinegar into a jar and soak the steel wool there for 24 hours. Make sure the jar is closed. You can also use different kinds of vinegar to stain wood. A higher acidity will give off a darker stain.
How to Use Natural Stain to Restore Wood Finish?
- Get your tools and materials ready: your choice of natural stain, a clean cloth, an orbital sander or sanding block, 80-grit and 150-grit sandpaper, and a paintbrush.
- Sand the imperfections in the wood surface. Start sanding with 80-grit sandpaper, then finish it off with 150-grit sandpaper.
- Wipe off excess dust and dirt. Make sure the surface is thoroughly smooth and clean.
- Apply the natural stain you prepared with your paintbrush. Apply it evenly and let it penetrate the wood. If you don’t have a paintbrush, use a soft clean cloth.
- Wipe off the excess stain after the wood has gone deeply into the wood.
- Leave it overnight.
If you think you need more coats, do so. But make sure to let the first coat cure. Another trick is to try the shades on a wood piece to see the difference and achieve your preferred shade.
3) Wood polish
Wood polish works great at reviving the lost gloss or shine of the wood. Although it may not repair deep scratches, it will cover or hide minor ones.
- Clean the surface thoroughly with a dry clean rag or cloth.
- Shake the polish and apply a generous amount on the surface or cloth.
- Rub the cloth onto the surface with the polisher in a circular motion. Do this in small sections of the surface.
- Now that you have spread the polisher across the surface, buff it with a separate clean and dry rag. Buff it in a circular motion until the surface starts to create a shine and make light reflections on the surface.
You may reapply the polisher, depending on the level of polish you desire. Also, provide enough time for the polisher to dry. In the meantime, do not use the surface until the compound has dried.
Home-made solutions
There are popular home remedies that restore the wood finish. You can find most of these solutions at home.
- Half-cut lemon
- ¼ cup of vinegar
- ¾ cup of vegetable oil, olive oil, or canola oil
- Clean cloth
- Sander
- Sandpaper of 80 grit and 150 grit
Here’s how to use this solution:
- Clean the surface thoroughly.
- Sand the surface with 80-grit coarse sandpaper and then finish it with 150-grit sandpaper.
- If there is a stubborn stain on the wood surface, cut a lemon in half and use one cut part to bleach the surface with the stain.
- Apply your vinegar/oil solution with a clean cloth evenly. Let it sit on the surface and penetrate the wood.
- Wipe off the excess solution.
- Leave it overnight to dry
Another solution you can use for this method is the baking soda-water mix. Or, you can use mayonnaise to restore that beauty in your wood.
Water damages
If someone accidentally spilled water on the wood surface, you can wipe it immediately with a clean cloth. But if it has penetrated sometimes, you can try using the vinegar-oil mix or mayonnaise to restore its beauty.
1) Mayonnaise
Rejuvenate a wood’s surface with mayonnaise. This home ingredient contains oils and acids that help restore a wood’s natural beauty. Mayonnaise helps lift off the watermarks on a wood surface.
To use it, get some paper towels, a bottle of mayonnaise, a spoon, and a clean cloth. Clean the surface first. Drop or scoop a spoonful of mayo on the affected area and spread it evenly on the surface. Let it sit there overnight before wiping it off.
2) Baking Soda
Baking soda is a must-have all-purpose ingredient for the home. With all its many functions at home, it is one of the best solutions for removing watermarks and restoring their natural glow.
Mix equal parts of water and soda until they form a paste. You can do this by gradually adding water to the baking soda and start mixing them. Put a portion of the baking soda paste on a microfiber cloth and rub it against the waterstained surface. Rub it following the grain direction. Do this until the watermarks lift off from the wood surface. Wipe off excess paste until clean.
Follow the previous step with a polishing wax or a polisher. Buff it the way you do with a polisher compound until you have restored its natural glow.
Severe Damage & Holes
If the holes are small, you can simply fill them with a toothpick or a skewer and then sand them. But if the wood has a huge uneven damaged surface, sanding alone may not do the trick.
Use a wood filler
A wood filler or a wood putty is a product used for filling up cracks, holes, or gaps in wood surfaces. It’s cheap, and you need minimal effort to use it to restore the wood finish.
Prepare the following:
- Putty knife
- Sander
- Wood filler
- Clean cloth or rags
- Sandpaper from (150 to 220-grit)
- Mineral spirits
- Tack cloth
- Stain
Here’s how to use wood filler to fill in gaps and holes to restore your wood finish.
- Clean the surface thoroughly with a clean rag.
- Mix the filler or get a premixed wood filler. Ensure that the filler matches your wood’s surface and texture.
- Apply the wood filler using a putty knife on the affected area.
- Press the filler even more and wipe off the excess compound.
- Let the filler dry. Depending on the product, it may dry within hours or even days.
- Start sanding with medium-grit sandpaper, then finish with fine 220-grit sandpaper.
- Use a tack cloth to clean the surface. The filler may mix with the wood dust and create rough surfaces.
- When the surface is clean, stain the wood like in the procedures above. This step will help balance the color between the surface and the wood surface.
Final Words
There are different types of damage to the wood surface. And not all procedures fit into all types. For this reason, we listed all your possible solutions. If the materials listed above are available at home, you can restore your furniture surface in no time. You don’t have to spend too much on restoring a wood finish. You also do not have to strip off the old finish. All you need are clean rags and a few things around the home.
- Can You Unmix Paint: Techniques, Consequences, Alternatives - February 23, 2024
- Does Primer Need to be Mixed? Effective Primer Application - February 22, 2024
- How to Make Old Paint Usable Again: Retrieving and Preserving Paint - February 21, 2024


