Restaining a fence protects it from pest infestation, warping, weathering, and rotting. The new coat seals open pores, preventing moisture from penetrating deep into the wood. Restaining also enhances your outdoors. Stain lasts longer than paint, especially when you stain the fence correctly.
You may hire a service for a quick process or restain the fence yourself to save money. Here is a systematic guide to help you achieve a smooth and long-lasting coat.
1. Prepare For Restaining
- Check the weather
The preparation stage includes choosing the right time to restain your fence. You may not like how the fence looks, but staining it in the wrong season is costly. Avoid staining the fence in a rainy or scorching season.
An immediate outpour after restaining will ruin the results. In addition, cold temperatures prolong the drying process, while hot temperatures dry the stain before the wood absorbs it.
Wait for the right season and check the weather forecast for 24 to 48 hours after you apply the new coat. The temperatures should be right for the stain to dry naturally for a smooth tidy finish.
- Pick the necessary tools and materials
The next step in the preparation period is to gather the tools and supplies. You need a stain brush, roller, or paint sprayer to apply the stain. A moisture meter is optional to check the wood’s moisture content.
The process also requires drop cloths or sheets, paint try, stain, tape, sandpaper, and a ladder for a tall fence.
- Choose the right stain
The proper stain depends on the type of wood used on your fence and your preferred finish. Oil-based wood stains are suitable for softwoods, while water-based stains suit hardwoods.
The next step is to choose the opacity of the wood stains. Solid or opaque stains provide the best UV protection for your fence. The stains give a thick paint-like coat that covers the wood grains.
Solid stains are harder and more expensive to maintain in perfect condition because they are prone to chipping. Transparent wood stains offer no UV protection but reveal beautiful wood grains.
Semi-solid or semi-transparent stains fall between opaque and transparent stains. You can see the wood grains through semi-transparent stains, but they are prone to fading.
Semi-solid stains show fewer wood grains because of their deeper color but offer longer protection. Choose the opacity that suits your type of fence, needs, and budget.
2. Prepare the Fence for Restaining
- Stripping
Use a stain or paint stripper to remove the old coat. Wear protective gloves, goggles, and a respiratory mask for protection against the side effects of stain strippers. Scrape off the old stain with a soft-bristle brush or plastic scraper. Wipe the fence with a damp cloth.
- Removing Stains
Stripper the old stain may reveal some stains, including mold and mildew stains. Bleach the affected areas until the stains are clean, and power wash the bleach. Allow the fence to dry.
- Sanding
Sanding is necessary to ensure that the fence absorbs the new stain well. Test the fence by spraying a small section with a garden hose. Sand the fence down if the water bounces off instead of soaking into the wood.
- Power washing
Power wash the fence to remove all the stain peelings, stripper residue, bleach residues, and dirt. Apply enough pressure to remove all the dirt without weakening the fence. You may add wood cleaner or diluted bleach for a cleaner outcome.
Each step in the preparation stage is important. The finished look will show if you skipped steps like removing stains or sanding uneven parts. The preparation process also determines the longevity of the new coat and the fence’s durability.
3. Allow the Fence to Dry
The new stain will only adhere and last long if the fence is completely dry. The fence may take up to 48 hours to dry after power washing. The duration will depend on the temperatures in your area.
A moisture meter can help you assess the wood’s moisture content before reapplying the stain. The recommended level is below 15%. If you do not have a moisture meter, sprinkle some water on the wood.
Wait longer if the water drops bounce off. The moisture content is still high. Dry wood absorbs moisture immediately.
4. Protect the Surroundings with Drop Cloths or Sheets
The next step is to cover the surroundings to avoid stains. Cover nearby outdoor furniture and plants with drop cloths. You may also cover the strip of grass and flowers along the fence to prevent ugly marks after restaining.
A painter’s tape is recommended for covering fencing hardware to achieve a clean finish. Wipe stains immediately in case of an accidental stain spill.
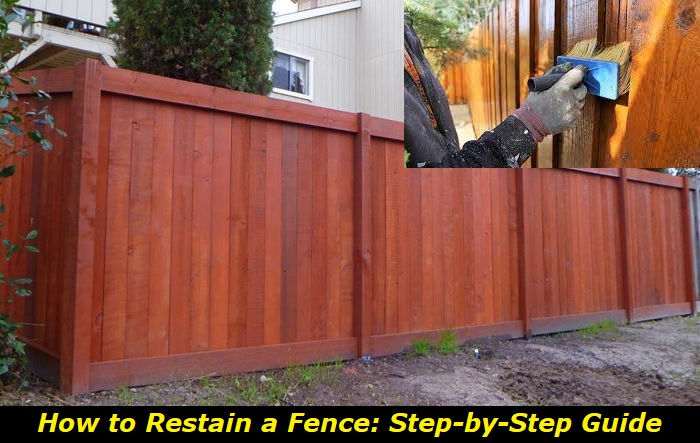
5. Apply the New Stain
Dilute or mix the stain according to the manufacturer’s instructions. You can apply the stain with a brush, paint sprayer, or roller. The outcome depends on your level of skill and experience.
A paintbrush is ideal and practical for beginners. The method is slow but gives you more control over the process. Choose a 4-inch stain brush for general application and a 2-inch brush for final touches, especially near fencing hardware.
Pick a natural bristle brush when applying an oil-based stain. It holds less stain but gives a smooth finish for oil-based stains. A synthetic brush suits water-based stains and rough fences. Synthetic brushes are harder and hold more stain.
Follow the same pattern when applying the coat with a brush and avoid breaks before completing one slat. Apply the stain from top to bottom for vertical slats and left to right for horizontal slats. The back-brushing technique is recommended for even coverage.
The ladder is necessary to reach to top edges, especially on long fences. A roller is a better choice for rough fences. A roller pole is required in this case to reach the top. Choose the correct roller width for the texture and width of your fence slats.
A paint or stain sprayer offers a faster application technique. However, you need the skills to handle it to avoid a mess. You also need to check the winds before using a sprayer. Practice with a hidden section of the fence if you are using a new sprayer or spray staining for the first time.
Hold the nozzle vertically when spraying horizontal bars and horizontally when spraying vertical bars. Spray from top to bottom following the wood grains and maintain a spray distance of 20 to 30cm.
Adjust the nozzle to reach hidden areas with denser steam. In addition, it is essential to even out any drips, overlap marks, and inconsistencies before moving on to a new section. Back brushing helps to minimize inconsistencies.
Most wood stains require two coats to achieve a smooth finish. Ensure that the first coat is dry before applying the second coat. The inconsistencies are visible when the first coat is dry.
6. Allow the New Stain to dry
Give the stain even time to dry after applying the second coat. The stain may take up to 12 hours to dry. However, it is advisable to wait for 2 to 3 days for it to cure. A tidy finish requires enough time to dry and cure.
7. Apply a Sealer Coat for Protection
Regular restaining prolongs the life of a wooden fence. The new coat will protect your fence for up to 5 years if you pick a high-quality stain and use the proper technique. A sealer offers additional protection.
Ensure the stain coat is dry before applying the sealer. Use the same technique to apply the sealer with a brush, roller, or sprayer. Allow the sealer to dry before touching the fence.
Tips for Maintaining a Newly Stained Fence
You can prolong the life of the new stain with proper care and maintenance. Remember the following tips after restaining your fence.
- Clean the fence regularly with a pressure washer for the best results.
- Use a high-quality stain with maximum UV protection to prevent discoloration. Restain the fence every five years and apply a new sealer coat every 2-3 years.
- Fix any cracks, mold, or mildew immediately to prevent further damage. Quick repairs keep the fence stable for a longer period.
- Inspect the fencing hardware regularly, including hinges, nails, and screws, to ensure the fence is tight.
- Trim unnecessary flowers, vines, shrubs, or trees that put extra weight on the fence. The plants also increase the moisture around the fence, which may lead to rotting.
- Keep sprinklers far from the fence when watering the surroundings. Excessive water keeps the fence wet, especially when some plants lean on the fence.
Conclusion
Restaining a wooden fence enhances its aesthetics and protects it from discoloration, pests, and rot. Remember to prepare the fence properly before applying a new stain coat for a smooth tidy finish. Cover the surrounding surfaces and objects before staining. Clean the fence with a pressure washer after removing the old stain and any mold or mildew stains.
Apply the new stain evenly with a paintbrush, roller, or sprayer and avoid overlapping. Let the first coat dry before applying the second layer. Regular restaining, cleaning, and maintenance are necessary to maintain a tidy finish. In addition, avoid excessive weight and water on the fence to enhance longevity.
- Can You Unmix Paint: Techniques, Consequences, Alternatives - February 23, 2024
- Does Primer Need to be Mixed? Effective Primer Application - February 22, 2024
- How to Make Old Paint Usable Again: Retrieving and Preserving Paint - February 21, 2024


