The secret to amazing results from DIY painting projects is getting the right instructions, especially mixing ratios. You need the right products and mixing ratios for different surfaces. Most primers have mixing ratios on the box or package. However, some brands lack mixing ratios.
Another challenge for DIY painters is determining the right mixing ratios when using products from different brands. A wrong ratio will show in the outcome of the painting job, which will be too late to fix because you will have used all the products.
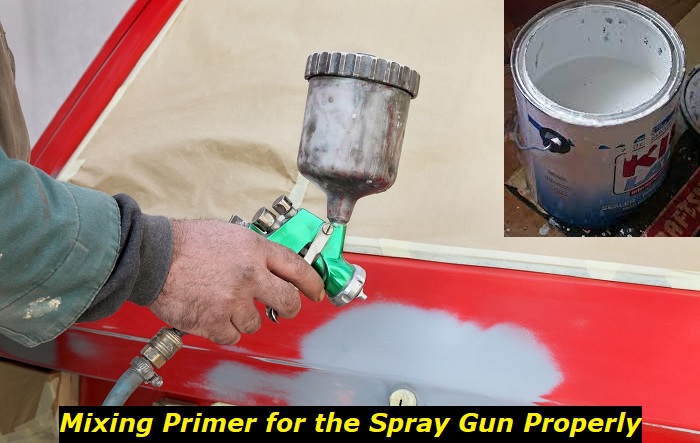
Read on to discover the best methods to mix primer for a smooth flow through the spray gun and long-lasting painting results.
How to Mix Any Primer Brand for Spray Gun
The greatest concern for DIY painters is getting the right consistency of the primer that gives an even finish. Achieving a smooth finish requires an easy and consistent flow of the primer through the spray gun.
The primer is too thick to flow easily through a small tip size of a spray gun without a reducer. A small tip is recommended for small DIY painting projects. It is also advisable to start with a small tip size in your first DIY painting project.
Experts recommend reducing or thinning the primer by 10%. However, a 5% reduction is necessary for thinner primers. Let us explain the process, each step at a time.
1. Mix the primer thoroughly
Get an empty can or mixing container and pour the primer. We recommend that you pour a half or quarter of the gallon to test the process, especially when working with a new primer. Mark the measurement of the primer when pouring it into the mixing container.
Stir the primer thoroughly with a clean stirring stick until you get a uniform consistency.
2. Measure the thinner or reducer
The first place to start with the measurements is the manufacturer’s instructions. Read the safety guidelines label for mixing ratios. For instance, the manufacturer may indicate a 4 to 1 ratio on the label.
It is advisable to buy the primer and thinner from the same supplier or manufacturer to get the mixing ratios right. However, if you already have a primer and thinner without mixing ratios, we have a guide for you.
The advisable ratio for automotive primers is to reduce the primer by 5%. Reduce the primer by 10% for large home and construction projects. Reducing the primer by 10% means that you add 13 oz. of the reducer or thinner to a gallon of primer (128 oz.).
A simpler calculation is multiplying the amount of the primer by 5% or 10% to determine the measure of reducer needed. You may not need the full gallon of primer for the project. Mix the primer and thinner thoroughly before testing.
3. Test the mixture
Pour the reduced primer into your spray through a sieve to avoid pouring any lumps or contaminants. Test the mixture on a small surface and inspect the results. In addition, check the ease of flow from the spray gun and the finished look.
Reduce the primer further if you have a challenge spraying the reduced primer or notice any lumps on the sprayed surface. The purpose of thinning is to achieve a smooth finish with each new layer.
Reduce the mixture again by 5% and test the results. Empty the spray gun and refill it to get accurate results in the second test. If the mixture is easy to spread with an even finish, mix the rest of the primer in the ratio you have determined.
How to Mix Two-Pack Automotive Primers
Most automotive primers come in two packs. Mechanics recommend two-pack primers for an even and durable coat on metallic surfaces. In addition, two-pack primers provide a moisture and rust-resistant finish.
The mixing process is similar to thinning other primers, except that you will mix the primer and hardener first before thinning.
1. Stir the primer and hardener
The first step when dealing with any type of paint or primer is to mix the contents of the can thoroughly. The solid matter settles at the bottom when a can is stored for a long time. The colors may also separate. Hence, you need to stir until the contents of the primer and hardener have an even consistency.
A metal or wooden stirring stick is suitable to mix. Wipe the product with a paper towel or piece of cloth after mixing before dipping the stick into another product.
2. Mix the primer and hardener
Most two-pack primers have mixing instructions. The ratio is either 3 to 1 or 4 to 1, depending on the brand. The higher content is always the primer. You can also tell the ratio by the size of the primer and hardener.
For instance, a gallon of primer may come with one or two cans of hardener. One can of the hardener means that you need to add all of it to the primer. Two cans mean that one can goes into half of the primer.
We recommend that you start with half of the primer to test the results. In addition, consider the amount necessary for the painting job to avoid waste. For instance, a quarter of the primer may be enough for repainting a small spot on your car.
Mix the primer and hardener in a clean container or bucket. Dirt or contamination will interfere with the consistency and adhesion. The primer will also take longer to dry and may show lumps if the container is dirty.
Some packs come with a labeled stirring stick to help you with measurements. If not, use a measuring cup to scoop the products in the required ratios. Stir the mixture thoroughly before adding a thinner.
3. Reduce the mixture
The primer and hardener mixture requires a thinner for a smooth application with a spray gun. We recommend a 5% reduction with a quality thinner. The measurement, in this case, is with the amount of the mixture and not the primer alone.
4. Test the mixture with a spray gun
Fill your spray gun with the mixture for a painting test. A quarter of the spray gun is enough to tell you if you have the right consistency. Reduce the mixture by an additional 5% with the thinner and test the results again.
Most painters end up with a 10% reduction for automotive primers. However, it is advisable to go step by step from a 5% reduction to a 10% reduction. Primer brands differ in their consistency. In addition, the function and tip size of spray guns are different.
How to Thin Paint Primer with Water
Water-based primers allow you to use water for dilution. Read the label carefully to ensure that the manufacturer allows thinning with water. The label should also show the thinning ratios.
A test is necessary if you cannot find any dilution ratios. Some experts recommend a one-to-one ratio, while others recommend half a cup of water for a gallon of primer. We recommend that you mix and test the consistency with a stirring stick.
Pour half a gallon of the water-based primer into a clean empty can. Stir the primer thoroughly with a stick or electric mixer to a uniform consistency. Add water in equal measurements and stir as you test the consistency with the stirring stick.
The test is simple. Observe how the mixture runs when you raise the stirring stick above the mixture. If the mixture is too thick or too thin, the thin primer will run in drops. The goal is to achieve a smooth run from the tip of the stick into the can.
Add water as you note the measurements and stir until you achieve the right consistency. You will need the measurements to mix the other half of the primer if the painting project requires a full gallon or more.
Pour the mixture into the spray gun and test on a small section of the surface. Allow the primer to settle for a few minutes and observe the results. Proceed with the rest of the surface when the mixture gives a smooth finish.
Remember that most painting jobs require more than one coat of primer or paint for a smooth finish. Hence, your observation at this point is how the mixture flows through the spray gun and settles on the surface.
Any clumping on the surface means that the mixture is too thick or unevenly mixed. Outstanding results from DIY painting projects require patience. Try different mixtures with small amounts of primer until you get the right ratio for your type of primer.
Conclusion
Primers require thinning or dilution before painting because of their thick consistency. Most manufacturers indicate the mixing ratios of the primer with the hardener and the reducer. If the package lacks such instructions, start with a 5% reduction of the primer mixture and test the results.
Mix the primer and hardener first for two-pack automotive primers before thinning. Always stir the primer well before mixing it with the hardener and thinner. In addition, test the reduced primer on a small section. If the consistency is still too thick for a smooth flow and finish, reduce the primer mixture further by an additional 5%.
- Can You Unmix Paint: Techniques, Consequences, Alternatives - February 23, 2024
- Does Primer Need to be Mixed? Effective Primer Application - February 22, 2024
- How to Make Old Paint Usable Again: Retrieving and Preserving Paint - February 21, 2024