Whether you are new to working with wood or have been doing it for years, one thing is certain – you will not always get your first coat of primer right. There are a few things that can go wrong, such as not getting enough coverage, or leaving streaks. But don’t worry – this guide will show you how to fix the most common problems so that you can get a perfect first coat of primer every time.
How to choose the first coat of primer for your project?
The easiest way to avoid problems with your first coat of primer is to choose exactly the right type of primer for the project and the surface you are working with. For example, if you are working with wood, you will need a primer that is specifically designed for wood. These types of primers feature components such as shellac, which help to ‘seal’ the wood and prevent the primer from being absorbed too quickly.
Now, if you are working with a material like metal, you will need to use a completely different type of primer. Primers that are suitable for metal commonly contain zinc, which helps to protect the metal from corrosion.
The aforementioned examples should show you why choosing the right primer is key to your success. You will avoid most of the problems associated with the first coat just by choosing the right product for the materials you are working with. So, never be afraid to consult with a professional before purchasing a primer.
That said, accidents happen. Even if you did end up choosing the correct product, things may go wrong. In the following, we will look at some of the most common problems associated with the first coat of primer.
Common Problems with the First Coat of Primer
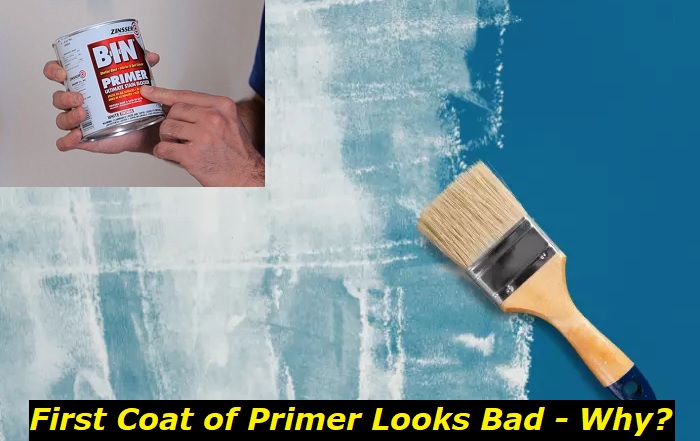
- The first coat of primer is uneven – Probably the most common problem, an uneven first coat of primer can be caused by many things. However, the most common reason for an uneven coat is an unprepared surface. To get the first coat right, make sure that the surfaces you work with are COMPLETELY clean and even.
- The first coat of primer is too thin– This is often caused by not using enough primer or by painting over oil-based paint without a proper bonding agent. If you are positive that a bonding agent is not needed and you chose the right products, then simply use a thicker layer of primer.
- The first coat of primer does not adhere to the surface– This can be caused by several factors, but the most common one is not using the proper type of primer for the surface you are painting. Remember that the products you use are as important as the technique you use.
- The first coat of primer is too thick – If your first coat of primer is too thick you probably went a little too heavy with the product. This is quite common if you do not know how much primer to use. The best way to avoid this is by following the directions on the can or reading up on how to correctly apply primer before starting your project.
All of the aforementioned problems are associated with the application of the first coat. But, you should also be aware that your working conditions are just as important as the application process. You will want to avoid working in environments that are too hot or too cold, as this can affect the drying time and result in an uneven coat.
Moreover, you should always make sure that you have adequate ventilation when working with primer (or any other type of paint for that matter). The fumes from the primer can be quite harmful if inhaled for extended periods of time. So, open some windows and doors or work in a well-ventilated area to avoid any health problems.
Now, if you still ended up with a less-than-perfect first coat, then it is time to look at some actionable solutions. In the following, we will look at some of the most effective ways to fix a bad first coat of primer.
How to fix an uneven first coat of primer
If your first coat of primer is uneven, the best thing to do is to sand it down completely and start over. This may seem like a lot of work, but it is actually quite easy to do. Start by sanding the entire surface with medium-grit sandpaper until it is completely smooth. Make sure to use strokes that are parallel to the grain of the wood. Be sure to check the surface by running your hand over it – if you can feel any bumps or imperfections, keep sanding until it is smooth.
Once the surface is completely smooth, apply a new coat of primer using even strokes. Be sure to apply enough pressure and move slowly enough so that the primer is evenly applied. If you find that you are still having trouble getting an even coat, you may want to try using a smaller brush.
How to fix a thin first coat of primer
If your first coat of primer is too thin, the solution is quite simple – just apply a second coat! When it comes to applying the second coat of primer, there are some things to keep in mind. First, be sure to apply enough primer so that the second coat is as thick as the first. Second, make sure to allow the first coat of primer to dry completely before applying the second. Finally, be sure to use even strokes when applying the second coat so that it is evenly applied.
How to fix the first coat of primer that does not adhere properly
If your first coat of primer does not adhere to the surface, there are a few things you can try. First, make sure to use the proper type of primer for the surface you are painting. For example, if you are working with wood such as pine, you will need to use an oil-based primer.
Second, be sure to properly prepare the surface before painting. This means cleaning it with a degreaser and sanding it down so that the primer has something to adhere to. If you are still having trouble getting the primer to stick, try using a bonding agent.
This is especially helpful when working with surfaces that are difficult to prime such as melamine.
How to fix the first coat of primer that is too thick
So, you got all excited about your project and accidentally went overboard with the primer. No worries, the solution to this is quite simple – let the primer dry completely and then sand it down until it is the thickness you desire. Be sure to use fine-grit sandpaper so that you do not damage the surface you are working on. Be especially careful when you are working with wood – you do not want to sand too deeply and damage the grain.
Final words
And there you have it! These are some simple solutions to common problems that can occur when applying the first coat of primer. By following these tips, you can ensure that your project turns out looking just the way you want it to.
- Can You Unmix Paint: Techniques, Consequences, Alternatives - February 23, 2024
- Does Primer Need to be Mixed? Effective Primer Application - February 22, 2024
- How to Make Old Paint Usable Again: Retrieving and Preserving Paint - February 21, 2024


