Many woodworkers often use green wood for projects that require excessive handling and bending. It is easier to bend and work with than seasoned wood. But finishing green wood can be a problem.
Unlike dry wood, the rules that apply to green wood are slightly different. Your choice of wood finishing product and a few other tricks can make or mar your green wood project.
Here is an article that discusses how you can do your green wood finishing to get the best result. It discusses what you should know before starting a green wood finish project.
Read on to find out.
What Is Green Wood?
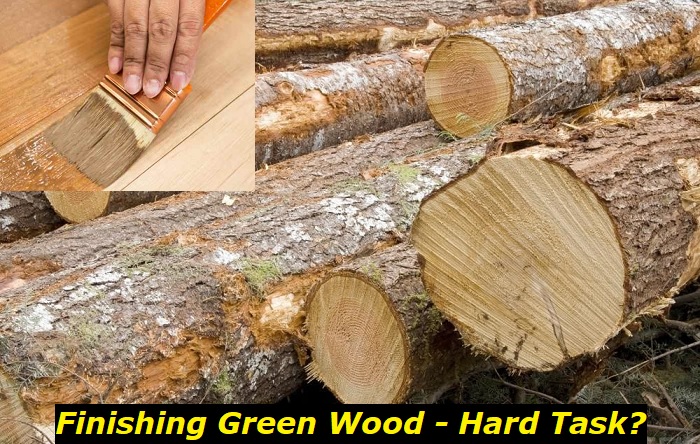
There is no magic to understanding what green wood is. Green wood is the direct opposite of seasoned wood. It is freshly cut wood that has not been seasoned.
Normally, dry or seasoned wood is wood from cut trees that are allowed to dry over time. Sometimes, they are also forced to dry in kilns.
Green wood is freshly cut wood that has not been allowed to dry either by time or dried with a kiln. It normally contains more moisture than dry wood- about 100% moisture, unlike dry wood, which loses about 80% from the drying process.
Essentially, there are limitations to what you can do with green wood. One of such limitations is making kitchen utensils. The reason is that over time the wood will dry by the passage of time and shrink.
Notwithstanding, green wood is used for many things. One very pleasing aspect of green wood is that it is pretty easier to cut through because it is softer than seasoned wood.
However, finishing green wood is not as easy as finishing dry wood. Green wood is more difficult to finish and requires some skills for the best results.
What You Should Know Before About Finishing Green Wood
Here are a few things to know before starting out on your green wood project.
Turn the Green Wood Thin Enough to Dry in Time
Many woodworkers have had bad experiences with finishing oils on green wood. The reason is a timeless fact: water and oil do not mix.
Green wood still contains a lot of moisture, so coating it with a finishing oil like you were coating dry wood will usually result in molds and rot over time.
This is common for woodworkers who use walnut oil, but it is not limited to finishing with walnut oil. Typically, the finish will become blotchy, and some finish oils will mold because of the high moisture content of the green wood.
The first and perhaps most important step to follow if you want to avoid this problem is to turn thin the green wood. The ideal thickness will depend on whatever you are carving.
But if you are turning a live edge bowl, a wall of about 3/16″ thickness will usually take three days to dry considerably for finishing.
Sand After Drying
Sanding is almost always necessary for a good finish. But sanding green wood can be bad because of the high moisture content. It does not matter what type of sanding you employ; there will be no difference with green wood.
You will notice that the sandpaper distorts the wood grain as you try to smooth it.
So, the best way to prep green wood for a smooth and lasting finish is to dry it first before sanding it. You do not necessarily have to wait for half a year to prepare it for sanding. Curing the green woodwork in a ventilated area for about three days to a week or two is what you must do.
But how much drying time your green woodwork needs depends on how thick the walls of the wooden bowl are or how thick the spatula is. As mentioned above, a thickness of about 3/16″ takes about three days to dry.
But a thicker wall will definitely need more time to dry. For instance, a 1/2″ thickness will typically need no less than 5-6 days.
Many woodworkers speed the drying process by using a kitchen oven to bake the green woodwork. You can get the most out of your green woodwork by reducing the moisture level with a kitchen oven.
Choose The Right Oil
The oil to use is a very important part of the project after drying your green wood when you want to finish your green woodwork.
The oil to use depends on the type of finished woodwork you want to finish. For green wood bowls and spatulas, it would be best to use a food-safe and environmentally friendly oil.
Some of the natural and food-safe oils to use are tung oil and raw linseed oil. Safety and durability are the main reasons for using these food-safe finish oils.
Using a food-safe oil is a great way to finish green woodwork pieces such as butcher blocks, wooden spoons, and many other carved pieces.
Many DIYers use mineral spirits instead of drying oils and complain about how their green wood project turned into a disaster.
It is important to understand that mineral oil is not the same as mineral spirits.
Mineral spirits are paint thinners also used as a cleaning agent. It is also used to thin paint.
But mineral oil is different because it is not used as a cleaning agent. It is also not used to thin paints and other drying oil. Mineral oil is a by-product of refined petroleum that can be used as a wood finish.
If you confuse one for the other, you will likely end up with a failed project.
One last thing to remember is to let the finish oil cure completely before using the woodwork. The drying time will depend on the specific drying oil you are using.
Some natural oils may take about a week or more to cure completely. It is advised that you let the green woodwork cure completely.
Can You Use Boiled Linseed Oil on Green Wood
Yes, you can cure the green wood with boiled linseed oil. Boiled linseed oil differs from raw linseed oil because it is treated to cure faster than raw linseed oil.
But if you choose to finish your green woodwork with boiled linseed oil, you must let it cure completely, especially if the green woodwork is a kitchen utensil like a bowl or a spatula. This is important because boiled linseed oil is only food-safe after being completely cured.
Can You Dry the Green Woodwork Under Sunlight?
Drying green woodwork under direct sunlight would be a mistake. Although sunlight will help with the drying process, placing your green woodwork piece under direct can lead to warping as the sunlight could get too hot for the woodwork piece you are working with.
It would be best to leave it in a well-ventilated place, away from direct sunlight. This way, the drying process is not sped up, and the gradual drying process limits the chances of warping.
You also want to rotate your project piece so that the indirect light can reach all sides of your project piece.
Can You Paint Green Wood?
This is a very important question, especially for DIYers who want a paint finish. Preparing green wood for a paint finish is crucial to get the best results.
You may need to sand the rough spots. Although sanding will not remove the visible imperfections, it will prepare the surface of the green wood finish for a great paint finish. You can use 150-grit sandpaper for this process.
After sanding, it would be best to first seal the green wood’s cut ends with a green wood sealer. You must ensure that the sealant you are using for the project is a green wood sealer, not just any sealer.
Although you can cover the entire piece with the sealant, the wood’s cut ends are the crucial application points. You want to ensure that you apply the green wood sealant to the cut ends to prevent splitting as the green wood seasons.
You must let the green wood dry before proceeding to the next stage.
After the sealer cures properly, priming is the next step. Priming is important because as the green wood ages, it will release some natural oils that can negatively affect the paint.
Hence the need to prime the green wood with a good stain-blocking primer.
You also want to give the primer enough time to dry. You can refer to the tech sheet or the product’s instruction manual to know how much time you need to leave it to dry.
After the primer has fully settled in, you can paint the green wood with any oil-based paint. You can paint as much as 2-3 coats, but you must let each coat dry before applying the next.
Remember that although oil paint dries in a few hours, it takes longer than a day to cure fully. So give it enough time to cure.
- Can You Unmix Paint: Techniques, Consequences, Alternatives - February 23, 2024
- Does Primer Need to be Mixed? Effective Primer Application - February 22, 2024
- How to Make Old Paint Usable Again: Retrieving and Preserving Paint - February 21, 2024


