The expectation of every painter when working with drywall compound or mud (including first-timers) is a flawless finish. Hence, bubbling after skimming is a concern, especially if you have followed every instruction you could get from experts. The challenge of drywall bubbles is not unique to novice painters.
Refined skills and experience are essential for flawless results after applying drywall compound. However, some of the reasons for bubbling after skim coat, as you will soon find out, are external. The causes have nothing to do with your skill level.
This article covers the possible causes of drywall bubbling. It helps to know about the causes before you start working with drywall mud so that you can avoid the mistakes. However, if you are already dealing with bubbles, we have the solutions for you as well.
Causes of Drywall Bubbles after Skim Coat
You may experience drywall bubbling for one or more of the following reasons:
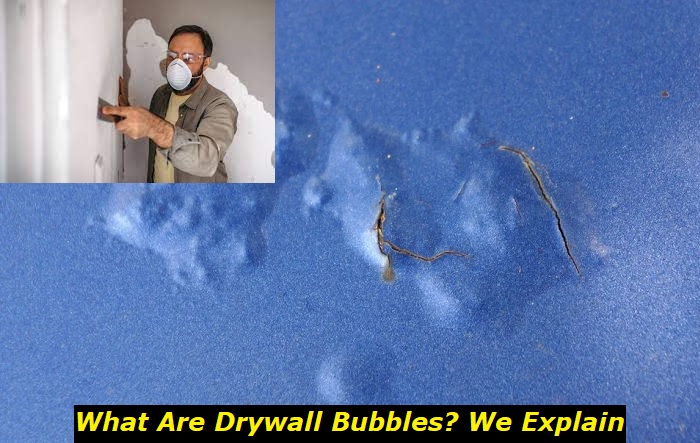
1) Cracks or holes in the wall
Some reasons, as mentioned earlier, have little to do with application skills. Cracks, fissures, or holes in wall panels will lead to bubbles or blisters after skim coating. The air trapped in the cracks or holes will need a way of escape.
Drywall bubbles will form as the air escapes from the cracks. Hence, if you fail to notice and fix the cracks before applying drywall mud and skim coat, you will have to deal with a blistering or bubbling problem.
The challenge with trapped air is that you do not notice it until you finish coating the wall. Sometimes, the air causes tiny cracks that leave the surface with a web-like design. It may be invisible from afar, but you want excellent and lasting results as a painter.
2) Too little drywall mud under the tape
The first coat of drywall compound should provide proper adhesion for the tape. You need to smoothen it out with your knife to avoid lumps or uneven finish. However, if you press the knife too hard, you will leave only a thin layer of drywall mud under the tape.
The tape will move out of position as you continue to work on the wall. By the time you apply the skim coat, the mud under the tape will be too little to absorb all the air bubbles, seal any cracks, and hold the tape in one place.
It is advisable to start with one section of a wall or just one wall of a room before applying your technique to a full house. Testing allows you to determine the right knife to use, the amount of mud to leave under the tape, and the time required for each to coat to dry.
3) Excess skimming force
We have talked about leaving enough mud under the drywall tape. You also need to avoid too much mud under the tape because the excess mud will affect the outcome. Caution is advisable at this stage to remove excess mud without moving the tape.
If you apply too much pressure on the knife and push the tape out of place, the tape will break. It will absorb moisture as you apply the second coat, leading to bubbles. In addition, the continuous water absorption will cause the tape to expand and lose its adhesion.
4) Expired or frozen drywall compound
You may be doing everything else right but working with old or expired drywall compound. The need to save a coin by saving unused drywall mud is understandable. However, the trick may cost you more.
A better approach is to order drywall compound based on your project needs and apply it immediately. If you store it for a long time, it may lose its viscosity by either hardening or softening, depending on the storage method and weather.
The change is likely to occur if you open the can and use or stir the mud. Check the expiration date before applying the mud. In addition, the drywall compound should be at room temperature for at least 24 hours before use.
A drywall compound with partly frozen lumps will give you an uneven finish. It may form bubbles as the lumps melt. Avoid storing drywall mud in extremely cold temperatures. If you cannot prevent freezing because of the weather, warm the compound in time before using it.
The drywall mud should flow smoothly out of the can from the top to the bottom. If not, you need to buy a new can of mud to avoid bubbles and other issues.
5) Failure to mix drywall compound properly
Another reason for drywall bubbling is failing to mix the drywall compound properly. The problem applies to both pre-mixed and powder or dry mud. The latter requires you to add water to form a paste.
Bubbling issues will occur if you do not mix the dry mud and water in the right proportions. Premixed mud requires a thorough stir before use, especially if it is frozen. Stirring helps to break any lumps.
Most painters report that premixed drywall compound tends to be too thick to apply in thin layers. If your preferred brand has a similar issue, you may need to add some water for easy spread.
A thick coat of drywall mud, whether premixed or dry compound, will lead to bubbles. The greatest challenge is that the bubbles do not appear until you finish the project. We will discuss the solution in a short while.
6) Applying drywall compound over painted walls
The ideal situation when working with drywall mud is applying it on a clean, even, and unpainted wall. However, some drywall projects involve touch-ups and repairs, such as filling cracks or screw holes.
Such projects may require you to apply drywall compound on a painted surface, which, in most cases, leads to bubbling. The paint acts as a seal that prevents the underlying drywall from absorbing the compound.
The air bubbles in the drywall mud are pushed outward when working on a painted wall. An unpainted wall, on the other hand, is porous, which allows any excess water and air to escape as you apply the drywall compound.
How to Fix Drywall Bubbles
The mistake has already occurred. You are now staring at unsightly bubbles on what was supposed to be a clean skim coat. How do you clear the drywall bubbles and achieve the smooth coat you envisioned?
1. Mark and cut out the areas with bubbles
As much as you would want to move on and ignore the bubbles, leaving them unfixed will lead to worse imperfections. The blisters may break out as the compound dries and leave ugly cracks.
Examine the wall to determine the areas that need a retouch cut from the middle of the bubbles. It helps to fix a whole section from top to bottom so that you can reinstall the tape properly. However, you can cut the tape from the damaged sections if they are small and place new tape according to the required size.
2. Mix the drywall mud thoroughly
Check the expiration date and mix the drywall compound well this time. If you have a problem applying it without diluting it, add some water to achieve a paste that flows smoothly without dripping. Ensure that the consistency is even by stirring to the bottom of the can.
3. Fix any imperfections on the wall
You cannot overlook any holes, fissures, or uneven joints on the wall and avoid bubbles at the same time. Apply one coat of drywall mud and skim it tightly to fill in any cracks or holes. Keep the knife at 45 degrees when skimming to ensure that the layer fixes all imperfections and leaves a smooth surface.
4. Apply a second coat and skim
The first coat fills all the holes and cracks. However, the joints will still be visible through the thin layer. Apply a second coat to cover the joint. Skim lightly to avoid spreading the coat too thin, and allow it to settle.
The second coat should give the wall a smooth finish. However, you need to wait for a while to be sure that you have corrected all imperfections in the wall and squeezed all the air bubbles out of the mud.
5. Apply the final coat and sand
If bubbles do not reappear after the second coat, apply the third coat and smoothen it out lightly. If you follow the procedure well, bubbles cannot form after the third coat, even if you are applying drywall compound on painted walls. Allow the compound to dry before sanding and painting.
The trick is to ensure that no air is trapped in holes or cracks and in one layer of mud before applying a new one. Trapped air must find a way to escape to the surface, which takes a while if the mud layers are thick. Pay attention to any imperfections on the walls and apply just enough pressure to spread the compound without leaving any bubbles inside.
Conclusion
Drywall bubbles may form after skimming because of underlying imperfections in the walls. Air trapped in unfilled cracks or holes will escape the drywall compound and skim coat, forming blisters or bubbles on the surfaces. Other causes of drywall bubbles are applying drywall mud on painted walls, failing to mix the compound well, and using old drywall mud.
Leaving too little mud under the tape when skimming may also cause bubbles and cracks. Fixing drywall bubbles requires at least three coats of mud and tight skimming to fill any cracks or holes and push out any trapped air bubbles.
- Can You Unmix Paint: Techniques, Consequences, Alternatives - February 23, 2024
- Does Primer Need to be Mixed? Effective Primer Application - February 22, 2024
- How to Make Old Paint Usable Again: Retrieving and Preserving Paint - February 21, 2024


