Kilz primer is a very versatile product that can be used in many different ways. It’s also pretty easy to use and can make your paint jobs look great. However, if you’re not careful, it can be hard to mix the primer properly. This can lead to some frustrating results when trying to apply your paint! Luckily, there are a few simple steps you can take to ensure that your primer is ready for use whenever you need it.
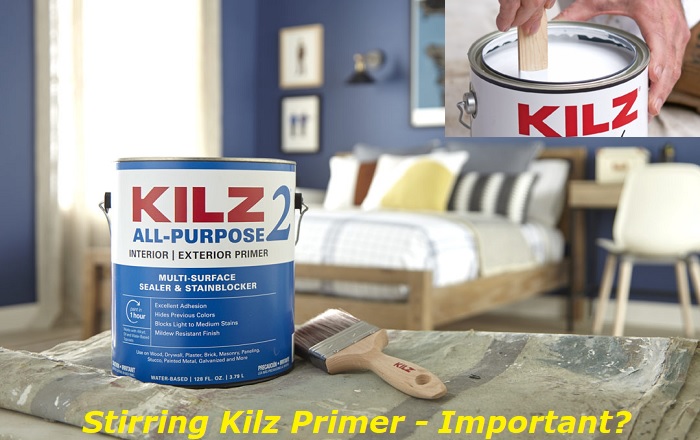
Do you Have to Stir Kilz Primer?
The short answer is: you don’t have to stir primer, but it’s still good practice. In fact, if you stir your primer before using it on your walls, you’ll find that it helps the paint stick better.
When you shake up your gallon of Kilz Primer, you’re mixing about 50% air with 50% liquid. The air gets mixed into your primer as it dries out and creates tiny bubbles on its surface—this makes for a smoother finish for your walls! But sometimes we don’t want smooth walls. We want rough ones! So, here’s what happens when you don’t stir the primer: The air bubbles become trapped underneath layers of paint and can result in uneven surfaces or streaks down the side of our walls.
You don’t have to stir Kilz Primer. But let us tell you why you should. When you do stir Kilz Primer, it creates a thick, glossy finish on your walls. It’s like putting a coat of paint on your walls, except that it goes on thicker and lasts longer.
So, what should we do? Stir your primer! if you don’t stir it, then it won’t give us the best possible result—and that means wasted time and money.
Kilz primer is an easy-to-use paint-and-primer that helps paint stick to walls and other surfaces. It is also available in aerosol cans, if you’re using it on a small or medium size project, you may not need the thick consistency. In fact, if you’re just looking to cover the surface with Kilz primer, it’s best to use an aerosol can so that the paint doesn’t dry out too quickly and become unusable.
If you don’t want to use aerosol cans though, or if you have large projects that require more coverage than one can provide (like a large area wall or ceiling), then mixing your own primer can be helpful. Just remember: keep mixing until it looks like the consistency of milk.
8 Tricks to Consider when using Kilz Primer.
If you want to make sure your paint job looks its best, you might want to consider Kilz Primer. It’s a great way to get rid of the grime and dirt that accumulates on surfaces over time, and it can help make your home look like it was newly painted. But how do you know if this product is right for you? Here are five tricks to consider when using Kilz Primer:
- Do You Have a Flat Surface? If you’re painting a wall or ceiling, Kilz Primer will work better than other primers if there’s a flat surface. Otherwise, you’ll need to apply multiple coats of primer before the paint goes on top of it.
- Is Your Paint Job Easy to Apply? Some paints require more effort than others—especially with using brushes or roller covers—while others are more forgiving and easier to apply by hand or machine without too much hassle involved (like sprayers). Make sure you know what kind of paint job you have before buying Kilz Primer so that it’ll work best for your situation.
- Once your primer has dried completely, apply another coat over top and let it dry again before moving on to your next step (if required).
- Use a paintbrush to apply Kilz Primer over the wall, door, or any other section that needs a fresh coat of paint. The brush will allow you to get into hard-to-reach areas and ensure that you cover as much of your wall as possible without having to use more primer than necessary.
- The primer will dry in 30 minutes, so it’s important that you wait until this point before proceeding with your next step—which is painting your surface with the color of your choice.
- If you want to make sure that there are no bald spots when you’re done, use a damp cloth or paper towel and wipe down the walls where you applied Kilz Primer (this will help seal in any imperfections).
- Apply the primer in small sections at a time. This will ensure that you get an even coat of paint in every area and prevent drips or runs down the wall.
- Use an inexpensive brush tip applicator instead of a roller if possible so that you don’t have to pay more money upfront for something that will be used only once or twice per year.
Whether you’re new to Kilz or have been using it for years, there are a few things you should know before you start painting. Before you begin painting, make sure your surface is clean and dry. This will help prevent streaking and the paint from bleeding through the surface. If your surface is dirty or oily, use a clean rag to remove any excess oil or dust. If you are painting over wood, treat the wood with a sealant before painting. A sealant will prevent moisture from penetrating into the wood and causing damage during the application of your primer coat.
If you’re using Kilz Primer on exterior walls, make sure that they are properly sealed before painting them with Kilz Acrylic Latex Enamel. Exterior walls shouldn’t be sealed with Kilz primers because they can cause cracks when exposed to water vapor in the air (such as from windows).
Stirring primers is a seemingly simple task, but it can be tricky. To make sure your primer is mixed properly, you need to follow a few simple steps:
- Mix the paint and the primer in separate containers until they are well combined.
- Then mix them together with an empty paint cup or stir stick.
- The best way to mix paint and primer is by using a stir stick or an empty plastic paint cup. If you use plastic cups, make sure they are clean before using them for mixing purposes.
- If you use a stir stick, make sure it’s at least three inches long so that you have enough room for your body and arm to move around when stirring the paint and primer together.
Following these tricks will help ensure that your primer goes on smoothly and evenly without bubbling or cracking.
Why is Kilz Primer a Better Choice?
Kilz primer is a long-standing product that has been used for years to give your home a new coat of paint. It’s easy to use, comes in a variety of colors, and is made by a company with a reputation for quality. Here are some reasons why you should take your time and consider Kilz primer over other options:
- It’s easier than you think to use. Kilz primer is not only easy to apply, but it also dries quickly—so you can get back to whatever it was you were doing before your project took on a life of its own (like cleaning).
- The color options are endless. You can choose from an array of colors, including white, gray, tan, brown, green, and blue—so there’s something for everyone in your family (or at least someone who likes the color blue).
- It’s made by professionals—and they know what they’re doing! The people behind Kilz have been making paint products since 1974 and have perfected the art of creating quality products that work properly without causing any harm or damage to anyone who uses them (or their home).
- Kilz doesn’t contain any volatile organic compounds (VOCs), so it won’t give off harmful VOCs when you spray it on.
- It’s got great reviews and its price is pretty good
Kilz primer is a great choice for your home improvement projects. It’s easy to apply and has a smooth finish that’s perfect for making repairs and refinishing.
There are many reasons why Kilz primer is one of the best choices available on the market, it gives you a smooth finish with no dusting or streaking. This makes it easier to paint over existing colors or paint colors in different rooms of your house. It also helps you save money because you won’t have to repaint as often!
Because Kilz primer dries quickly, you can get back to work sooner than with other primers. Plus, its low odor makes it less likely that you’ll wake up covered in paint fumes during the day. Kilz primer can be used on just about any surface including wood, metal, brick, and even plastic surfaces!
How Many Coats of Kilz Primer Should I use?
If you’re just starting out with Kilz, it can be a little confusing. You’re probably already thinking about how much paint to get for your first project, and that’s something we’ve all been there before. How many coats should you apply?
A primer is an important step in the painting process, but it’s not always clear what number of coats of primer to use. There are two main factors to consider: how thick you want your paint to be and how much surface area you need to cover.
If your goal is to have a thick coat on the wall, then it’s best to apply multiple coats—up to six or seven—of primer before applying any paint. If you’re trying to cover a large area with paint, like a kitchen wall or a whole room (like a bedroom), then you’ll want only one or two coats of primer because the more layers there are between the actual paint and bare surface of the wall or ceiling, the easier it will be for that paint to settle into cracks and crevices where there are no pores in order for it to stick properly.
When it comes to Kilz Primer, there is no one-size-fits-all answer. You can go with a higher number of coats if you want a more premium paint job, but if you’re looking for an affordable option, then using fewer coats is the way to go.
If you’re dealing with older wood that hasn’t been painted in a while (or if you’re just trying to keep costs down), then using fewer coats is often the best option. That’s because older wood is less porous than new wood and will absorb less primer, so using more than one coat of primer may not be necessary.
It all comes down to what kind of look you want: If your goal is to cover up any imperfections on your wood without making it look like it was painted too long ago, then using fewer coats is definitely the way to go!
The best way to determine how many coats of Kilz primer you need is to have a look at the type of base coat and top coat your painting will be using. If it’s going to be a glossy finish, then choose a primer with greater sealing power (and therefore more resistance to chipping). However, if your painting will be a matte or satin finish (or somewhere in between), then go with a primer with lower sealing power so that it can still adhere well enough for proper adhesion on top.
The good news is that it’s not as complicated as you think. Your primer will only look like a finished product if you apply enough coats! The more coats, the more durable your wall will be. So, while it’s tempting to skip over the primer step altogether and just paint right away, remember: no matter how much time or effort it takes, don’t skip on the primer!
Can You Mix Kilz Primer with Regular Paint?
Kilz primer is a great way to get your house ready for painting. It’s easy to use, and once you’ve done a few coats of it on your walls and ceilings, you’ll be amazed at the difference it makes. But did you know that you can use Kilz primer on regular paint?
It’s true! You can use Kilz primer on regular paint—and it’s even better when you do! When you use regular paint along with Kilz primer, your house will look brand new all over again. And the best part? It only takes one coat of Kilz primer and two coats of regular paint to make such an incredible difference in your home.
If you’re looking for a way to give your home a fresh new look without spending hours on tedious prep work, mixing Kilz with regular paint is a great option. You’ll get the same great results as if you applied it by itself—and since it’s already mixed for you, there’s no need for additional preparation or cleanup.
How to Use Kilz Primer?
The secret to using Kilz Primer? It’s all about the details.
Kilz primer is one of the most effective ways to protect your home from water damage, but it also comes with a lot of caveats and potential downsides. If you’re not careful, you could end up with a mess on your hands or worse—your walls! In this article, we’ll take a look at how to use Kilz primer: step by step.
- Begin with a clean surface, free of any dust or dirt.
- Pour the primer into a small container and mix it with a roller brush or paintbrush until it is completely mixed. You can also use an old toothbrush if you want to get into those hard-to-reach places!
- Apply the primer by painting it onto your surface in thin layers. You may want to wait until each layer dries before applying another one on top of it so that you don’t end up with any runny lines where two different colors meet (this is especially important for areas like corners where two walls meet).
- Let your paint dry thoroughly. It’s best not to add another coat of primer until after all other coats have dried completely—this will help prevent bumps in the finish caused by excess moisture on top of your paint job! If there are still some streaks left over after waiting for hours, try using a damp paper towel instead of water when wiping away any excess moisture from previous coats (but make sure not to apply too much pressure).
- And there you have it.
Final Words
Kilz primer is a great way to get your paint job off to a good start. Utilizing Kilz Primer can help protect your paint job from the elements while giving it a smoother finish by preventing peeling or cracking. It also helps prevent stains from forming on your walls, keeping them looking clean and shiny. And lastly, it helps restore color back into faded paint, which can be an issue with some paints today due to their unique formulas being more susceptible to fading over time than others.
- Can You Unmix Paint: Techniques, Consequences, Alternatives - February 23, 2024
- Does Primer Need to be Mixed? Effective Primer Application - February 22, 2024
- How to Make Old Paint Usable Again: Retrieving and Preserving Paint - February 21, 2024


