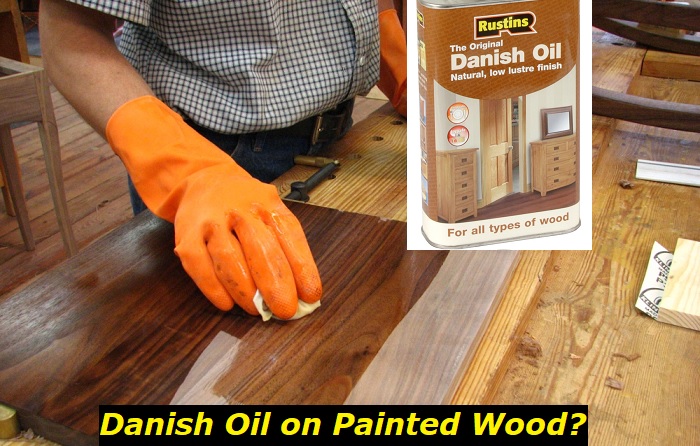
Danish oil is a popular finish for woodworking projects, as it can provide both protection and an enhanced appearance to the material. When applied to painted wood, Danish oil can help keep the paint from chipping or flaking off, as well as provide a bit of sheen to the surface.
In this guide, we will be taking a step-by-step look at how to apply Danish oil to painted wood so that the finish lasts for a long time and also looks great.
Before we get started, let’s take a look at the supplies that you will need:
- Danish oil
- A clean rag
- Paintbrush
Now that we have all of the supplies that we need, let’s also take a minute to quickly learn about some of the key advantages and disadvantages of using Danish oil on painted wood. In addition, let’s also look at what kind of projects Danish oil is best suited for.
Advantages of Danish oil
Completely non-toxic
Danish oil is plant-based and does not contain any harsh chemicals. This makes it a very safe option to use, particularly if you have young children or pets in the home. That said, the fumes can still be dangerous during the application process, so make sure that the area you work in is well-ventilated. If this is not possible, wear a respiration mask.
Breathable
When Danish oil is applied to painted wood, it does not form a thick, airtight barrier like some other finishes (such as varnish). This means that the wood can still “breathe,” which helps to prevent problems such as mildew and mold.
Protects against UV damage
When applied to painted wood, Danish oil can help protect the underlying material from UV damage. This is because Danish oil contains natural ingredients that act as a barrier against the sun’s rays.
Easy to apply
Due to its liquid consistency, Danish oil is very easy to apply. You can simply use a clean rag or paintbrush to apply it to the surface of the wood.
Protects against water damage
Danish oil will create a protective barrier on top of the paint, which can help to prevent water from seeping in and causing damage. This is especially important if the painted wood is going to be used in an area where it may be frequently exposed to moisture (such as in a bathroom).
Enhances appearance
In addition to its protective properties, Danish oil can also enhance the appearance of painted wood. It will add a bit of sheen to the surface and can also help to bring out the color of the paint.
Protects against deterioration
Danish oil helps to prevent the paint from chipping or flaking off over time. This is because the oil will seep into the pores of the wood and create a barrier that will protect the paint from damage.
Disadvantages of Danish oil
Can darken paint color
One potential downside of using Danish oil is that it can darken the color of some paints. This is not an issue with all colors, but it is something to be aware of if you are planning to use Danish oil on painted wood. You should be especially careful when you are dealing with light-colored paints, as they are more likely to be affected by the oil.
Can be difficult to remove
If you decide that you do not like the look of Danish oil on your painted wood, it can be quite difficult to remove. In most cases, you will need to sand down the entire surface to get rid of the oil.
Chipping or flaking
If the Danish oil is not applied correctly, it can cause the paint to chip or flake off. This is more likely to happen if you are using a very thin coat of oil. To avoid this, be sure to apply a generous amount of Danish oil so that it seeps into the pores of the wood.
Regular maintenance required
When compared to some common alternatives like varnish, Danish oil will require more regular maintenance. This is something to keep in mind before you choose Danish oil for your painted wood project.
Projects That Are Best Suited For Danish Oil Finish
Looking at the pros and cons of Danish oil, you probably already understood that Danish oil is best suited for specific types of projects. Here are some of the examples of projects that are best suited for Danish oil:
- Outdoor furniture– The UV protection and water-resistant properties of Danish oil make it a great choice for outdoor furniture. Just be sure to apply a generous amount so that the paint does not chip or flake off.
- Kitchen cabinets– Danish oil can help to enhance the appearance of kitchen cabinets while also protecting them from water damage. Just be aware that the oil can darken some paint colors, so test it out on a small area first.
- Bathroom vanities– The moisture-resistant properties of Danish oil make it a good option for bathroom vanities. Just be sure to apply a thick coat so that the paint does not chip or flake off over time.
- Wood flooring– If applied correctly, Danish oil can leave a beautiful shine on wood flooring. Just be aware that you will need to do regular maintenance to keep the oil looking its best.
Step 1: Prepare the Surface
Before applying Danish oil (or any other type of finish for that matter), it is important to properly prepare the surface. This means sanding down the wood so that it is smooth and free of any debris or imperfections. In addition, you will also want to make sure that the wood is completely clean and free of any grease or dirt.
If you are working with newly painted wood, you will first need to wait for the paint to fully cure (usually around 2 weeks). Once cured, lightly sand the surface with fine-grit sandpaper (around 220 grit) to create a smooth base for the oil finish. Be sure to remove all dust from the sanding before proceeding to the next step.
Step 2: Apply the Danish Oil
Now that the surface is prepared, it is time to apply the Danish oil. For best results, use a natural bristle brush. For best results, it is recommended to use a brush that is specifically designed for oil-based finishes.
Start by applying a generous amount of Danish oil to the brush and then working it into the wood in long, even strokes. You will want to keep the strokes long and even because Danish oil can pool in low areas and create an uneven finish.
Once you have applied the Danish oil to the entire surface, allow it to soak in for a few minutes before wiping off any excess with a clean, dry cloth. The cloth you use should ideally be lint-free so that it does not leave behind any fibers on the wood.
Step 3: Allow the Danish Oil to Cure
After applying Danish oil and wiping away any excess, it is important to allow the finish to cure properly. This can take anywhere from 24 hours to a week, depending on the type of Danish oil used and the conditions in your workspace.
During this curing period, it is important to keep the area well-ventilated so that the fumes from the oil do not become overwhelming. In addition, avoid using water or cleaners near the surface as they can cause the oil to become sticky or gummy.
Optional Step: Apply a Topcoat
If you want an extra layer of protection for your painted wood, you can apply a topcoat of polyurethane or varnish. This is not necessary, but it will help to extend the life of the finish.
To apply a topcoat, simply follow the instructions on the product label. In most cases, you will need to wait for the Danish oil to cure completely before applying the topcoat. Once applied, allow the topcoat to dry completely before using the furniture.
Optional Step: Wax the Surface
Another optional step that you can take is to wax the surface after the Danish oil has cured. This will help to create a smooth, shiny finish and will also extend the life of the finish.
To wax the surface, simply apply a small amount of wax to a clean, dry cloth and then rub it into the wood in a circular motion. Allow the wax to dry for a few minutes before buffing it out with a clean cloth.
Conclusion
There you have it! These are the steps that you need to follow to apply Danish oil on painted wood. Working with Danish oil is generally an easy process that yields great results, but be sure to take your time and follow the steps carefully to ensure a beautiful, long-lasting finish.
Hopefully, this article has been helpful and you now feel confident enough to tackle this project on your own.
- Can You Unmix Paint: Techniques, Consequences, Alternatives - February 23, 2024
- Does Primer Need to be Mixed? Effective Primer Application - February 22, 2024
- How to Make Old Paint Usable Again: Retrieving and Preserving Paint - February 21, 2024


