Our guess is that you mistakenly purchased latex to stain your deck and now you are wondering whether to go over the existing oil-based stain with the latex stain.
If you had asked the question a few years back, most professionals would have had a simple opinion: No, oil never mixes well with water. But is this the case?
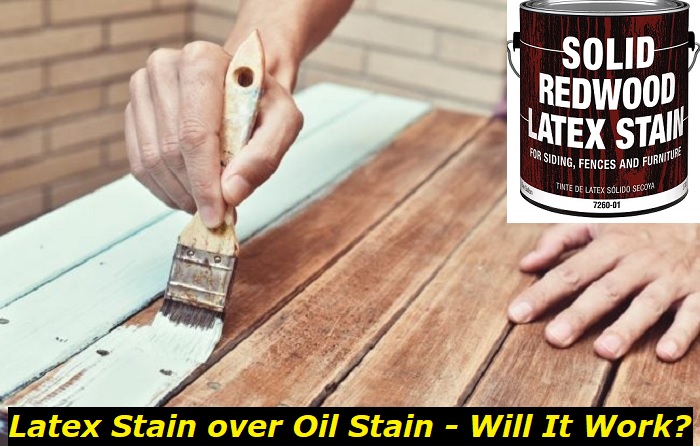
As more people continue in DIY practice and testing a variety of finishes on different surfaces, they come about interesting findings. One of such is that you can indeed put latex stain over oil stain and still have a perfect finish.
Latex stain should hold properly when applied over oil stain provided you follow correct procedures. Oil stain generally penetrates deeply into woods which leaves little to no stain on the surface. This means oil stains leave a good surface for latex to adhere to, resulting in a smooth top.
Applying oil stains over latex produces a different result. Latex stains are water-based and cannot go deep into the wood as an oil stain would. The new stain simply sits on the surface rather than penetrating the wood.
Should You Use Latex Stain Over Oil Stain?
To determine whether or not there are any benefits to using latex over oil stain, you must first understand how both stains differ and how this can impact mixing.
Latex-based stains and oil-based stains are both great choices for staining external wood like a fence or deck. Oil-based stains have a stronger odor and can be messy. The wood may appear more vibrant or opaque depending on the kind of stain. Here are a few ways latex and oil stains differ:
● Appearance
Latex stains appear more vibrant and are similar to what you can expect from paints. They are easy to apply and provide an even tone.
The wood grain often remains visible after you apply an oil stain. The resulting color is lighter and some areas may appear shiny due to incorrect application. Oil stains appear more natural.
● Level of Penetration
Oil stains penetrate the wood’s structure, soaking it up and preventing water from going in. Latex stains adhere to the wood surface, allowing water to penetrate since the wood cells are open.
● Application
Latex stains are easier to apply. A nylon brush or sprayer should do the job well enough. A natural bristle brush or pad applicator will be more suitable for applying oil stains. Working outdoors with oil stains may provide less difficulty but they are generally harder to apply and require expertise especially if you have to use an airless sprayer.
● Curing time
Wood surfaces stained with latex should be ready in less than 3 hours. Since oil stains need time to penetrate the material, the curing time can take up to 5 hours.
● Lifespan
Latex stains can last up to 8 years before needing refinishing. Some people prefer to touch it up every year to deter fading. Oil stains appear more transparent with age so a deck might need refinishing after 2 years.
● Cleaning
As with application, latex stains come off easily. You can use water alone and a paint comb for the brush. Oil-based stains require mineral spirit to clean them off.
What is the Correct Way to Apply Latex Stain Over Oil Stain?
Applying the stains correctly will be easier since you now understand the characteristics of latex and oil stains. Knowing how both stains differ will guide you against making certain basic mistakes during application but there is more to know.
One important step to remember is to make sure the oil-stained surface is completely dry. For the best outcome, leave the stain to dry for up to 3 days before applying the latex stain. Applying oil-based stains over water-based products will require a shorter time. But with latex as the topcoat, 72 hours should be enough time for the oil stain to fully penetrate the wood.
Are there other factors to consider to get the best results when putting latex over oil stain?
Yes, several mistakes can ruin your staining job and the following are common ones to pay attention to.
1. Clean the surface before staining
Cleaning and preparing the existing stain is a crucial first step. You may want to skip this step if the stain isn’t peeled but remember stained wood often houses so much dirt.
The grime is even worse if the wood texture is uneven so cleaning is necessary. What is the right way to clean oil-based stains from wood?
- Wiping the stain with a microfiber cloth might be enough if you have mistakenly applied the oil stain and can remove it immediately. If the stain has been on the surface for a long time, wiping will not be enough. You will need a degreaser in this case. Degreasing sprays contain chemicals that dissolve the fats in oil stains.
- The next step is to thoroughly clean the wood with mild soap. Whether you are working indoors or outdoors, use a neutral pH soap. The best soaps clean the wood surface, even out the color, and protect it from insects. If the available soap is too concentrated, dilute it in water.
- Sanding is an optional step if you are convinced the wood is clean enough and ready to take the latex stain. This process removes the oil stain completely from the wood. Sand gently and on a low grit to avoid ruining the material. You may also decide to clean again with soap afterward.
- Make Sure the Weather is Right. Choose a day when the temperature is mild, especially when applying the oil stain. 50% of humidity is ideal weather. Extreme conditions like rainfall or direct sunlight can damage the wood. The discoloration is a common effect of staining when the temperature is too hot.
Working under comfortable conditions is just as important as choosing the right weather. Ensure the area is well-ventilated and spacious enough.
2. Fewer Coats Work Best
Applying too many coats of latex stain can increase the drying time and result in a rough texture. Not cleaning the wood properly can also make the surface rough. Avoid too many coats of stain or remove the excess coat by wiping it off with a cloth.
3. Consider Sealing the Latex Stain
Sealing can help the new coat last longer before fading sets in. Going in with a sealer also slows down degradation. If the wood is in an area where it will be exposed to scratches and touch, sealing it can protect it from discoloration.
Do the Same Considerations Apply When Painting Latex Over Oil Stains?
The steps to follow when using latex paint over oil stains are similar to those described above. You want the paint to adhere well to the surface so you must remove the agents in the oil stain that can prevent this. The cleaning procedures and solutions to use here are slightly different.
You are likely to face common issues like tannins bleeding onto the new paint if you skip the preparation process.
- Mix the appropriate amount of water and trisodium, following the instructions on the label. Apply the mixture to the oil-stained surface and clean it properly with a cloth. Rinse the surface with another clean cloth after cleaning and allow it to fully dry. Remember to place drop clothes on the floor before beginning work and put on rubber gloves when mixing the trisodium.
- For the latex paint to strongly adhere, the surface has to be extra clean. Like with preparing the wood for latex stain, you need to sand the surface here too. Remove the sanding dust with a clean cloth.
- Tape the areas you do not want the paint to get to.
- The next step is to go in with your stain-blocking primer. Apply the primer with a paintbrush and leave it for the recommended duration. For a perfect finish, sand the surface again and apply a second coat of primer.
- The final step is to apply the latex paint with the paintbrush and allow it to dry. Drying time might take an entire day depending on the temperature in the area. When the surface is dry enough, apply a second coat of paint and allow it to cure.
Conclusion
Feel free to put latex stain or paint over oil stain whether as your next DIY experiment or simply for a change. So long as you clean and prepare the surface properly, you will get a smooth finish. Of course, the stain quality matters too. Choose a good latex stain and follow the label directions on its application procedure.
- Can You Unmix Paint: Techniques, Consequences, Alternatives - February 23, 2024
- Does Primer Need to be Mixed? Effective Primer Application - February 22, 2024
- How to Make Old Paint Usable Again: Retrieving and Preserving Paint - February 21, 2024


