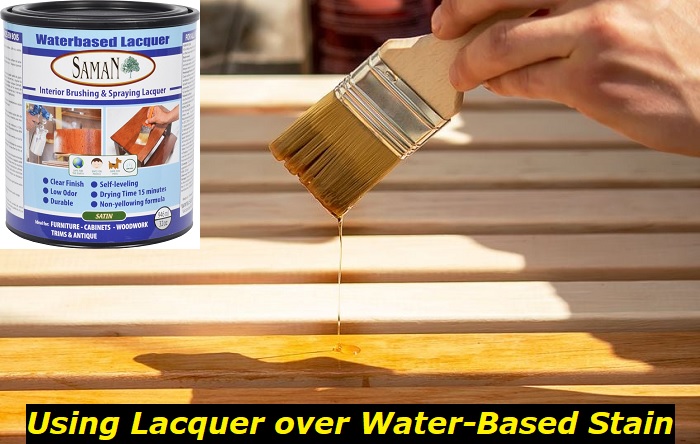
So, you’re done staining your workpiece with a water-based stain–perhaps a piece of furniture. And now it’s time to seal it. But you’re wondering if applying Lacquer over water-based stain is the right option.
This post will give you the answer based on our research and also cover how to apply Lacquer to spruce up your stained wood. Let’s start with why you should seal your water-based stain.

Why Should You Seal Over Water-Based Stain?
Putting a clear coat over a water-based stain seals the wood and prevents the stain from coming through. It also offers protection against scratches and external weather conditions such as rain, wind, sunlight, and mist.
Standard sealants you can use on stained wood include Lacquer, polycrylic, oil, wax, and polyurethane finishes. They work by penetrating the wood pores and forming a layer that prevents water entry and other elements that can cause rotting and rusting. You have the option of not sealing your stained wood if you don’t frequently handle it or expose it to external weather conditions. Next, let’s answer the important question:
Can You Apply Lacquer Over a Water-Based Stain?
Yes, unlike oil-based stains, you can put Lacquer over water-based stains without issues like surface blotchiness and layer separation. You can also use it over lacquer base and lacquer base fillers. However, using the Lacquer directly over the stain is not a good practice.
Use a light sealing coat first to avoid dragging the color of the stain. Some professional painters prefer wax-free shellac, a thin layer of lacquer, or a lacquer base sanding sealer to seal a water-based stain before applying Lacquer. The sealing coat forms a sandwich coat between Lacquer and stain. Lacquers such as nitrocellulose lacquer would dissolve water-based stain if applied directly over it.
Lacquer can penetrate through color layers of glaze and stain to form a multi-color-step finish with film integrity (resist separation at color layers preventing lack of uniformity). Once you apply a water-based stain, wait until the stain dries completely before putting on a lacquer.
Why Shouldn’t You Apply Lacquer Over Oil-Based Stain and Other Finishes?
It would help if you don’t use Lacquer over oil-based stains, many fillers, and other finishes. This is because Lacquer contains a high solvent composition. The chemical solvents in the Lacquer react with the binder in the oil-based stain. As a result, the stain dissolves.
If you have no choice but to use Lacquer over an oil-based stain, ensure the stain dries entirely for at least ten days before applying Lacquer. There’s a chance it may work, but it’s still not recommended.
Why Would You Use a Water-Based Stain?
Water-based stain is a semi-transparent wood stain used on indoor and small projects such as kitchen cabinets. Its lack of odor and non-inflammable traits make it suitable and safe for indoor use. Also, you can use it on a wood surface where you’ve removed the previous finish. It’s available in a wide array of bright and bold colors.
Pros of Water-Based Stain
- It has a fast drying time hence suitable for projects with a quick turnaround time.
- It’s flexible in that you can fix a mistake with soap and water, which you can use to clean easily.
- It has less odor compared to oil-based stains
- It’s eco-friendly since it doesn’t release toxic fumes–volatile organic compounds(VOCs) – to the environment.
- It retains its original color for a long time because it’s UV resistant.
- It doesn’t trap moisture and therefore hampers the growth of fungi, algae, and other microorganisms.
- You don’t have to strip and sand the stained wood if you require a new finish over the wood.
Cons of Water-Based Stain
- Its fast drying time is also a disadvantage because you are in a hurry to apply it, making it less user-friendly.
- It’s prone to blotchy and streaky finishes if the stain is not applied correctly.
- Overapplication of the stain can lead to peeling.
Why Apply Lacquer?
Lacquer is a finish made up of shellac dissolved in alcohol. It dries to form a smooth and hard protective layer on wood and metals. It’s available in clear form, stain colors, satin, High gloss, and Matte finish. Use it in almost all types of woods except rosewood and mahogany. This is because they produce oils that may bleed through the Lacquer.
Lacquer has a “burn-in” property in which a freshly applied coat melts into a previously applied coat. Modern Lacquer contains nitrocellulose resin and chemical solvents such as xylene and ketones. When the chemicals come into contact with the cellulose film of the previously applied film, they reactivate and rewet the film. This leads to blending the freshly and previously applied coats to create a single uniform film.
Several lacquer coats can melt into each other, making the final coat easy to repair and polish to a glossy finish. With Lacquer, another perk is you don’t have to sand between the coats because of the chemical bond that makes the coats fuse. Now that you know why to use it let’s examine its pros and cons.
Pros of Lacquer
- It’s among the fastest drying finishes.
- It’s durable and long-lasting.
- It’s easy to repair in case of damage.
- You can recoat Lacquer without any problems.
- It’s safe from dust.
- It leaves a few brush marks on the surface but they disappear after applying another coat.
Cons of Lacquer
- It’s easy to get dents and scratches and challenging to remove them.
- It’s toxic, potentially damaging the liver, brain, and nervous system.
How to Apply Lacquer Over Water-Based Stained Wood
Lacquer can be applied using a spray can, High Volume Low Pressure (HVLP) sprayer, or a high-quality natural bristle brush. Below are steps to applying Lacquer:
Applying Lacquer using an air sprayer
- Wait until the water-based stain fully cures for 24-48 hours before applying the lacquer finish. If it’s cold and humid, you may have to wait until 72 hours before it fully dries.
- Feather sand the surface with 400 grit sandpaper and wipe off the dust with a tack cloth.
- Spray a thin coat of Lacquer over the entire surface with an air pressure adjusted to 50 psi. Spray with a back-and-forth motion and maintain a uniform distance (10-18 inches). Don’t get too close to the surface and spray quickly to avoid runs and drips.
- Let the Lacquer dry before applying a second coat.
- Apply 3-4 coats of Lacquer. Before applying the final coat, remove any bumps or dust with 320-grit sandpaper or a synthetic sanding pad.
- Apply the final coat, cover it with cardboard to protect the workpiece from dust, and wait for it to dry.
- Buff the surface of the workpiece with No 0000 steel wool.
- Put a dollop of Deluxing compound on a Surbuf pad and use a random orbiter sander for sanding the surface. Creep the sander across the surface to remove any sanding tail marks.
- Wipe the surface with a tack cloth followed by paste wax application.
- Cap it off by buffing the surface with a lint-free cloth to a fine gloss.
Applying Lacquer with a brush
Learning to work quickly when applying Lacquer with a brush should do the trick. Brushing follows three steps: brushing Lacquer on, tipping it off, and leaving it.
- First, apply the coat evenly on the surface, working with the grain.
- Hold the brush at 90 degrees to the surface and lightly tip it with the bristles’ ends. This removes brush marks and blends each brushing pass with the last. Remove any drips on the surface immediately with the brush.
- Lightly sand between coats with 320-grit sandpaper to knock off any dust bumps and small drips on the surface.
- Apply 3-4 coats and leave the workpiece to cure and harden for 24-48 hours.
- Rub out the surface to even the sheen and remain with a high gloss surface.
Lacquer Application Tips
- Don’t brush on a spray-on lacquer because of its quick drying time.
- Use a NIOSH-approved ventilation mask, gloves, and safety goggles while applying Lacquer because it’s highly toxic and volatile.
- Apply in a well-ventilated room.
- You should put it on quickly and maintain wet edges because of its fast drying time.
- Spraying Lacquer too far from the surface can result in orange peel effects.
- As you spray the Lacquer, overlap each spraying pass by 50% to produce an even thickness of the lacquer film.
- Invest in a quality brush since the solvents in the Lacquer may dissolve the dyed bristles of a cheap foam brush leading to the color bleeding on your work.
- Lacquer is mixed with lacquer thinner in equal parts to make a lacquer sealer.
- It’s suitable for small projects because of the fast drying time.
- Avoid applying it on surfaces near fire since it’s highly flammable.
- The application of Lacquer needs good lighting to spot the reflection of the wet coat and easily see where you’ve not sprayed.
Bottomline
There you go. Now you know that you can put Lacquer over a water-based stain based on our research. But the proof is in the pudding. You’ll have to experiment with a scrap of wood or cardboard and practice to get the best result.
For the average do-it-yourselfers or beginners, it’s advisable first to handle a small project to get the hang of it before progressing to a larger one. This prevents you from biting off more than you can chew since Lacquer is a bit hard to apply.
- Can You Unmix Paint: Techniques, Consequences, Alternatives - February 23, 2024
- Does Primer Need to be Mixed? Effective Primer Application - February 22, 2024
- How to Make Old Paint Usable Again: Retrieving and Preserving Paint - February 21, 2024


