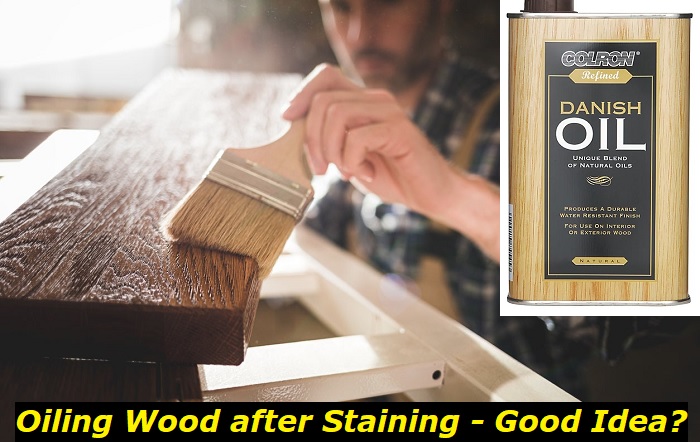
You’ve stained your hardwood floors, so you’re ready to start oiling them. But wait—you’re already a little confused about how to go about this whole oiling thing. Are you supposed to use oil after only one coat of stain? Or do you need to wait until the stain has dried completely? There’s a common misconception that you can’t oil wood after staining it. While there are some conditions under which this may be true, most of the time, it’s not.
In this article, we’ll talk about how to oil wood after staining. We’ll also discuss what kind of oil is best for the task at hand, whether or not it’s necessary, and some other tips for keeping your stain looking its best!

Can you Oil Wood After Staining?
It’s a common question among woodworkers: is it possible to oil wood after staining? The answer is yes, but there are some caveats.
First of all, it depends on the type of stain you use. If your stain contains pigments (like dye or paint), then you can safely oil your wood after staining. Pigmented stains are usually safe to oil. If it’s a clear stain, however, you might have trouble finding oil that will protect your wood from future damage.
To find out if oil will work for you, try applying a small drop of oil to the surface of your stained board and watch as it sinks into the pores in the wood grain. If it looks like it has absorbed into the wood grain and left behind a shiny film instead of leaving behind a white residue, then it’ll probably work well for protecting your stained piece from future wear and tear.
If you’re doing a staining project on your home’s exterior, you’ve probably heard the same advice: “don’t oil the wood.” This is because oiling the wood can make staining fail. But it doesn’t have to be that way!
Oil doesn’t have to stop you from finishing your project—it actually makes staining easier for you. Oil helps shine up your wood and protect it from the elements so that it stays beautiful for years to come. If you’re looking for ways to protect your wood from fading or cracking this is one of them!
Oil also helps keep the color of your stain in place longer on the wood than it would otherwise be. Oiling helps keep the stain from drying out and makes it easier for the finish to adhere. You can oil wood after staining, but it’s not recommended. The oil will soak into the wood, which can cause the stain to come off if you wipe it off too soon or if there’s too much moisture on your hands when you’re applying it. It’s also important to use an appropriate amount of oil; too much can weaken or damage the wood.
If you want to continue with the stain and oil process, use a small amount of mineral spirits (available at hardware stores) as a thinner for your added coats of stain and sealer. This will allow you to apply more coats without having to worry about using too much oil each time.
Wood oils are a versatile and popular way to care for your wood furniture. They can be used on a wide range of surfaces, from floors to furniture, and they can help you keep your wood looking like new.
There are many different types of wood oils available on the market, each with its own set of benefits and drawbacks. The following guide will introduce you to some of the most common types of wood oils, as well as their uses.
- Natural Oil: This type of oil is derived from natural sources such as plants or animals. It can be applied directly to wooden surfaces without causing damage or discoloration. This kind of oil is also best recommended as it protects the wood against humidity and etc. Examples include linseed oil and tung oil.
- Synthetic Oil: This type of oil is produced by chemical synthesis rather than from natural sources (like natural oils). It does not contain any natural ingredients but instead relies on synthetic materials to create its effects. Examples include polyurethane oil and silicone oil.
- Penetrating Oil: This type of oil penetrates into the pores in wood grains; it helps prevent moisture retention within the wood fibers by trapping air bubbles within them. Examples include Olive Oil and Jojoba Oil.
Oil over Stain on Wood Tips and Tricks
The next time you stain your woodwork, it’s important to remember that the oil you use on the wood is going to make a difference in how it looks. There are many different types of oils and stains available, but we’re going to focus on two types: oil, and water-based stains.
Oil-based stains are usually used for darker woods and can be applied with a brush or roller. The biggest downside to oil-based stains is that they tend to be more expensive than other options.
Water-based stains are good for lighter woods because they don’t require as much drying time as oil-based ones do. They also tend to be cheaper than oil-based stains because they don’t require as much product per gallon as oil-based stains do. Water-based stains are applied with a brush or roller, so they can take less time than oil stains.
Have you ever stained a piece of furniture and wondered why it didn’t come out as well as you’d hoped? Maybe your wood is too dry, or maybe the stain wasn’t the right color. Whatever the reason, if you’re looking to improve your staining technique, here are some tips to help you get better results next time.
- Always start with a clean surface.
- Brush off any loose particles that could cause problems later on down the road (like dust, dirt, or pet hair).
- Use mineral spirits or other solvent-based oiling products instead of water-based stains like Minwax Polyshades, Stain Protector, or Brizo Universal Stain Remover—they’ll work much better in this case because they won’t absorb into the pores of your wood and affect its natural look and feel after drying.
Wood is a durable material that can be used to create many different pieces of furniture. However, if you want your wood to last, it’s important to take care of it. One way of doing this is by using oil after staining it. Oil will help prevent the wood from sticking together and damage in the future. Here are some tricks on keeping your oiled wood looking its best:
- Don’t overdo the oiling. Too much will make the wood look oily and dirty, not shiny and new.
- Use a lint-free cloth to wipe off excess oil from the surface of the wood. Don’t use paper towels or anything else that might leave lint behind on your wood.
- Use a clean cloth to buff away any dust or dirt that’s been left behind by wiping down the surface of the wood with a dry cloth before applying coats.
- You can use a silicone spray on the wood to make sure it stays protected.
- If you have a dark stain, then you might want to put some newspaper under your stained area for protection from dripping oil or water onto other surfaces in your home or workspace (like your floor).
- Use a good quality oil based on what type of wood you’re using. For example, if you’re staining oak, use oil made specifically for that purpose.
- If possible, try to apply one coat at a time. This will help with absorption and also help with drying times between coats if necessary. You can even leave this last coat overnight before buffing it off so that you don’t have to wait too long before getting started on your project
- When applying your oil, don’t wipe it off too quickly after application—this can cause some problems and may not allow for proper absorption into the wood fibers themselves! Instead, allow a couple of minutes for the oil to soak into each section of wood before wiping away excess product from around edges where there weren’t applied much at all (like around corners).
How long to wait before Applying Oil after Staining your Wood
Letting a stain dry is a common practice. it’s important to wait until the stain has had time to fully dry before putting the oil on. The reason for waiting is that the oil can cause the wood to shrink and expand at different rates depending on the type of wood, temperature, humidity levels, and other factors.
If you apply the oil before it has had time to fully dry, then when you try to press down on it with your thumb or fingers, you may find that it feels sticky or tacky rather than smooth.
Oiling wood after staining is a great way to bring out the natural look of your wood, but it is also important to note that it takes time. Before you oil your wood, give it a few days to dry properly, and then pay close attention to how much oil you apply. Typically, it takes 12 to 24 hours for the stain to dry and set completely.
Pros and Cons of Oiling Wood After Staining
The Pros of Oiling Wood After Staining:
- Oil will help protect the wood from moisture, which can cause rot and decay.
- Oil can hide blemishes and defects in the wood.
- Oil will help prevent the wood from drying out and cracking.
- Oiling helps add a protective, glossy layer to the surface of the wood that can make it look more polished and beautiful.
- Oiling also helps prevent the surface of the wood from becoming sticky or tacky because it creates a protective barrier between the oil and the surrounding air.
The Cons of Oiling Wood After Staining:
- If you’re not careful, the oil may leave a mess on your walls as well as furniture.
- Oiling may leave some residue on the surface of your project, depending on how much oil you use and how often you apply it. You should always test an inconspicuous area first to see how much residue there is before applying more oil around the entire piece of furniture (or whatever else).
- Oiling also causes some people to experience allergic reactions, especially if they’ve never been oiled before. If you’re sensitive to oils or have any kind of skin condition that could be affected by a lack of ventilation, then you might want to avoid doing this yourself.
- It could cause your wood to warp over time (especially if you don’t use quality products).
- If you don’t use any kind of sealant or protection (like wax), then the oil can cause your freshly stained wood to swell up like a balloon when exposed to moisture in your home or office space.
Final Words
A lot of people don’t realize that oiling your wood after staining is actually a good idea. Most people just think that it’s a waste of time and money. But, if you’re willing to do a little more research, there are some incredible benefits to oiling your wood after staining.
- Can You Unmix Paint: Techniques, Consequences, Alternatives - February 23, 2024
- Does Primer Need to be Mixed? Effective Primer Application - February 22, 2024
- How to Make Old Paint Usable Again: Retrieving and Preserving Paint - February 21, 2024


