Wood surfaces are beautiful items that need delicate care and diligence whilst being prepared for use. Most times, wood craftsmen use polyurethane to coat the wood surface in order to protect and seal it.
It can be applied by rolling, spraying, or brushing and the end results will definitely be pleasurable.
Other than its easy appliance, polyurethane is very strong and its durability against materials that can cause wood damage.
But a lot of people have a bit of a conundrum when applying polyurethane because sometimes they need to apply another coat of enamel paint afterward.
To know more about the mixing of enamel paint and polyurethane and what could happen, read ahead.
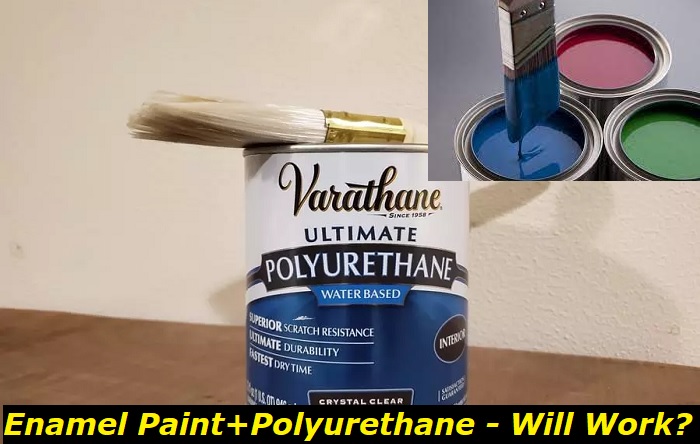
Why you shouldn’t mix enamel paint with polyurethane?
Even though technically, the chemical combination of enamel paint and polyurethane isn’t deadly and won’t poison you, on a craftsman level, it’s not the best idea to mix enamel paint after polyurethane or vice versa.
It’s OK that you want to speed up the process of two finishes in one coat, but the end results won’t be what you hoped for.
Typically, it’s better to apply the enamel paint first, let it dry, and cure for its destined period of time. After you’ve made sure it’s dry you can add the polyurethane coats.
What can happen if you mix enamel paint with polyurethane?
Depending on what type of polyurethane or enamel paint is used, there could be some type of issues shown.
If the polyurethane is water-based, mixed with enamel paint which is oil-based, then the two substances will simply not mix. This is because oil-based substances will only stick together in a puddle of water due to their strong adherence to each other.
The same goes if the enamel paint is water-based and the polyurethane is oil-based. The substance you’ll get in the end will only be clumps of paint stuck together at the top which isn’t at all useful.
Can you use mix-based polyurethane and oil-based enamel paint?
Though they are both oil-based, it’s not a good idea to mix them into one substance because their respective qualities won’t persevere to their full extent.
The best option is to apply them separately. This means to paint the wood surface with the enamel paint, wait for it to dry and cure, and then after it has dried add the coat of polyurethane.
Why use polyurethane as a finishing coat?
Most paints and even enamel paint have a tendency to dry with a dull look which gives the impression of old work. To brighten the surface and add a shine to the surface you can apply a coat or two of polyurethane that’ll give a better look to the wood.
Besides that, polyurethane also smoothens the surface better than leaving only the coat of paint on.
How to apply polyurethane on top of enamel paint?
Usually, polyurethane is easy to apply on normal wood as mentioned at the start. But when dealing with painted surfaces you should be careful with the appliance. For better end results and no regrets, take caution in every step of the way and don’t rush the process.
Here are some steps you should be careful with for the best end results whilst applying polyurethane over enamel paint
Make sure the enamel paint has dried fully
It’s known that when applying the second coat of anything on top of the other, the first coat’s drying time is the most crucial. The same is for polyurethane on top of enamel paint.
If you don’t wait long enough and apply polyurethane over wet paint, you’ll cause a slight mixture of both substances that doesn’t give a good finish look to the surface. It’s important to determine well ahead that the paint is dry so as not to cause any unwelcoming changes to your work. If you’re not sure whether the paint has dried it’s always better to wait a little more than rush to add the polyurethane.
How to know when the paint has dried and cured completely?
It’s not always easy to know if the paint has fully dried if there’s a thick layer on. But one easy method that could slightly determine the dilemma is pressing your finger slightly on the painted area. If your fingerprints are left on the surface then the paint hasn’t fully dried and needs more time to cure.
After some time you could use a toothpick to stab the pain slightly and see if it’ll go through the surface or will only cause a slight divot on the area. Dry paint isn’t tacky so it won’t allow the toothpick to go in.
Make sure this step is done correctly for it is the most problematic. If it’s not rightfully done the other steps will surely mess up the entire paint layer and even the wood that is underneath.
What affects enamel paint’s drying and curing time
It firstly depends on what type of wood it has been applied to. Some wood types have certain chemicals engraved in them that don’t allow the paint to adhere very well to the surface. It needs extra time to cure.
Then the temperature is a big factor. The temperature in the room the paint is drying at shouldn’t be too hot or too cold. The best temperature is around 70-80 degrees Fahrenheit.
Other factors are also ventilation and humidity in the drying space. Not only does proper ventilation help with drying, but it also reduces paint fumes poisoning as it eliminates them in the proper time.
Clean the surface
After the paint has dried, you have to clean the painted surface for better adherence to the polyurethane. Not only that but, because polyurethane gives a clear look to the paint, everything that is left underneath will be visible to the eye. For a better aesthetic look, you should clean the area thoroughly before adding polyurethane.
Sand the surface
To ensure you don’t leave any bumps or divots in the finished surface it’s best to sand the paint layer lightly before adding the polyurethane. Use a light grit or a sanding sponge. Be careful not to over sand the area as you can cause paint loss and ruin your work. After sanding the paint layer, clean the area again to make sure you don’t leave any unwanted materials under the polyurethane.
Some woodworking professionals also recommend adding a few drops of enamel paint to the polyurethane before applying. This will ensure that the finish look will be even better and eliminate the possibility of the polyurethane layer looking grayish. If you decide to do this, make sure that the paint you’re adding is the same base as the polyurethane, oil-based paint to oil-based polyurethane, or water-based paint to water-based polyurethane.
Otherwise, the paint won’t mix into the polyurethane.
Apply the polyurethane
Depending on what sort of look you’re looking for you have a few methods you can try. Usually spraying the polyurethane gives the surface a nice smooth look that many desire. But you could also try brushing it on or wiping it with a cloth.
Most times only one coat of polyurethane isn’t enough for most paints. So you have to add multiple coats for the best results. In between coats always make sure that the previous coat of polyurethane is fully dry as you don’t want to cause wrinkles on the surface.
It’s also a good idea to lightly sand or buff the coats in between adding more and then clean off any residue.
Let it dry
After the layers of polyurethane have been applied, the drying process should begin. For best results, you should let it dry for at least 24 hours before using the pieces you’ve painted. The more time you give the polyurethane to dry the more it’ll harden and protect the wood and paint.
Final Thoughts
Mixing the polyurethane and enamel paint is almost guaranteed to never give you the expected results.
If you want to add polyurethane to the wood you’ve already painted with enamel paint, make sure that the polyurethane is the same base as the enamel paint. Another necessary step is to make sure that the paint layer has fully dried before adding any other finish to the wood.
- Can You Unmix Paint: Techniques, Consequences, Alternatives - February 23, 2024
- Does Primer Need to be Mixed? Effective Primer Application - February 22, 2024
- How to Make Old Paint Usable Again: Retrieving and Preserving Paint - February 21, 2024


